1. Boat Electronics Project
| This is the documentation for our older hardware project. If you are looking for Bareboat OS Documentation you should use this document: https://bareboat-necessities.github.io/my-bareboat/bareboat-os.html |
This document describes a DIY project of building a marine computer, a boat LTE/Wi-Fi gateway, and a cockpit chartplotter display from easily obtainable and affordable components. This boat electronics project includes:
-
Waterproof marine touch screen HDMI display
-
GNSS (GPS, GLONASS, Beidou, Galileo) receiver
-
Sensors for orientation (gyroscope, accelerometer, compass via IMU)
-
AIS radar
-
Environment temperature, barometric pressure, humidity sensors
-
Connections to the boat instruments such as wind, depth, speed, AIS via NMEA 0183 serial ports
-
Boat LTE / 4G Gateway, network storage
-
Boat Wi-Fi hotspot and a router with Wi-Fi extender and a long range waterproof Wi-Fi antenna
-
Optional autopilot integration, rudder angle sensor
-
Other NMEA devices, engine/battery status, bilge pump monitoring, etc
-
Optional air mouse with a wireless keyboard, and a touchpad
-
Lightning EMI sensor and alarm
-
RTL-SDR for weather fax, NavTex, satellite weather, AIS, RTL 433, morse code decoder, etc
-
Boat IoT Integration via MQTT
-
Music Player
-
Can be used with Iridium Satellite Modems
-
Can be used for processing transmissions received from SSB radio via audio interface
-
Variety of options of using wireless handheld devices such as smartphones and tablets to connect to boat systems via Wi-Fi and bluetooth. There are many marine applications available for smartphones and tablets.
-
Marine OS Linux Distribution https://github.com/bareboat-necessities/lysmarine_gen
The boat computer is connected to the waterproof HDMI touchscreen in the cockpit.
Boat Computer
Boat Gateway
| Keep in mind that by following this document you are building devices to be used in marine environment. All connections and wiring need to follow marine standards which are more strict than automotive. All nuts and bolts need to be properly tightened. I’ve run into issues in my sailboat experience on water just because of one missing washer (it was in mechanical system on gear switch wire). Heat shrink tubing, wire grades are different for marine standards. Corrosion in misty salt water air is much higher than on the ground. Conformant coating is recommended for PCBs. Marine dielectric grease extends the lifetime and the quality of connectors. A boat is exposed to the elements more than house or automobile appliances. If you doubt you did something right you better of revisiting it or seeking peer review from other sailors. The same works the other way. If you see something wrong here with the design let us know :) There is issues reporting system in GitHub: https://github.com/bareboat-necessities/my-bareboat/issues |
| Although this document describes mostly instructions on building hardware components, it is designed in the spirit of open source development. We hope this design is going to evolve and have numerous releases and corrections if it gains some community. Some software components might become part of this project too. Cost-cutting is another sport and sub-hobby in recreational sailing and boating. So if same functionality can be built cheaper it probably should be, and here is the reason to change this document. |
| As of March 2021 our preferred software for OS: https://bareboat-necessities.github.io/my-bareboat/bareboat-os.html |
1.1. Boat Computer
The boat computer runs on Raspberry Pi (Raspbian Linux) with OpenPlotter 2.0 installed. The boat computer will reside below deck, so it’s not going to be waterproof. The touchscreen display runs OpenPlotter UI with OpenCPN chartplotter and dashboards as well as general Linux UI.
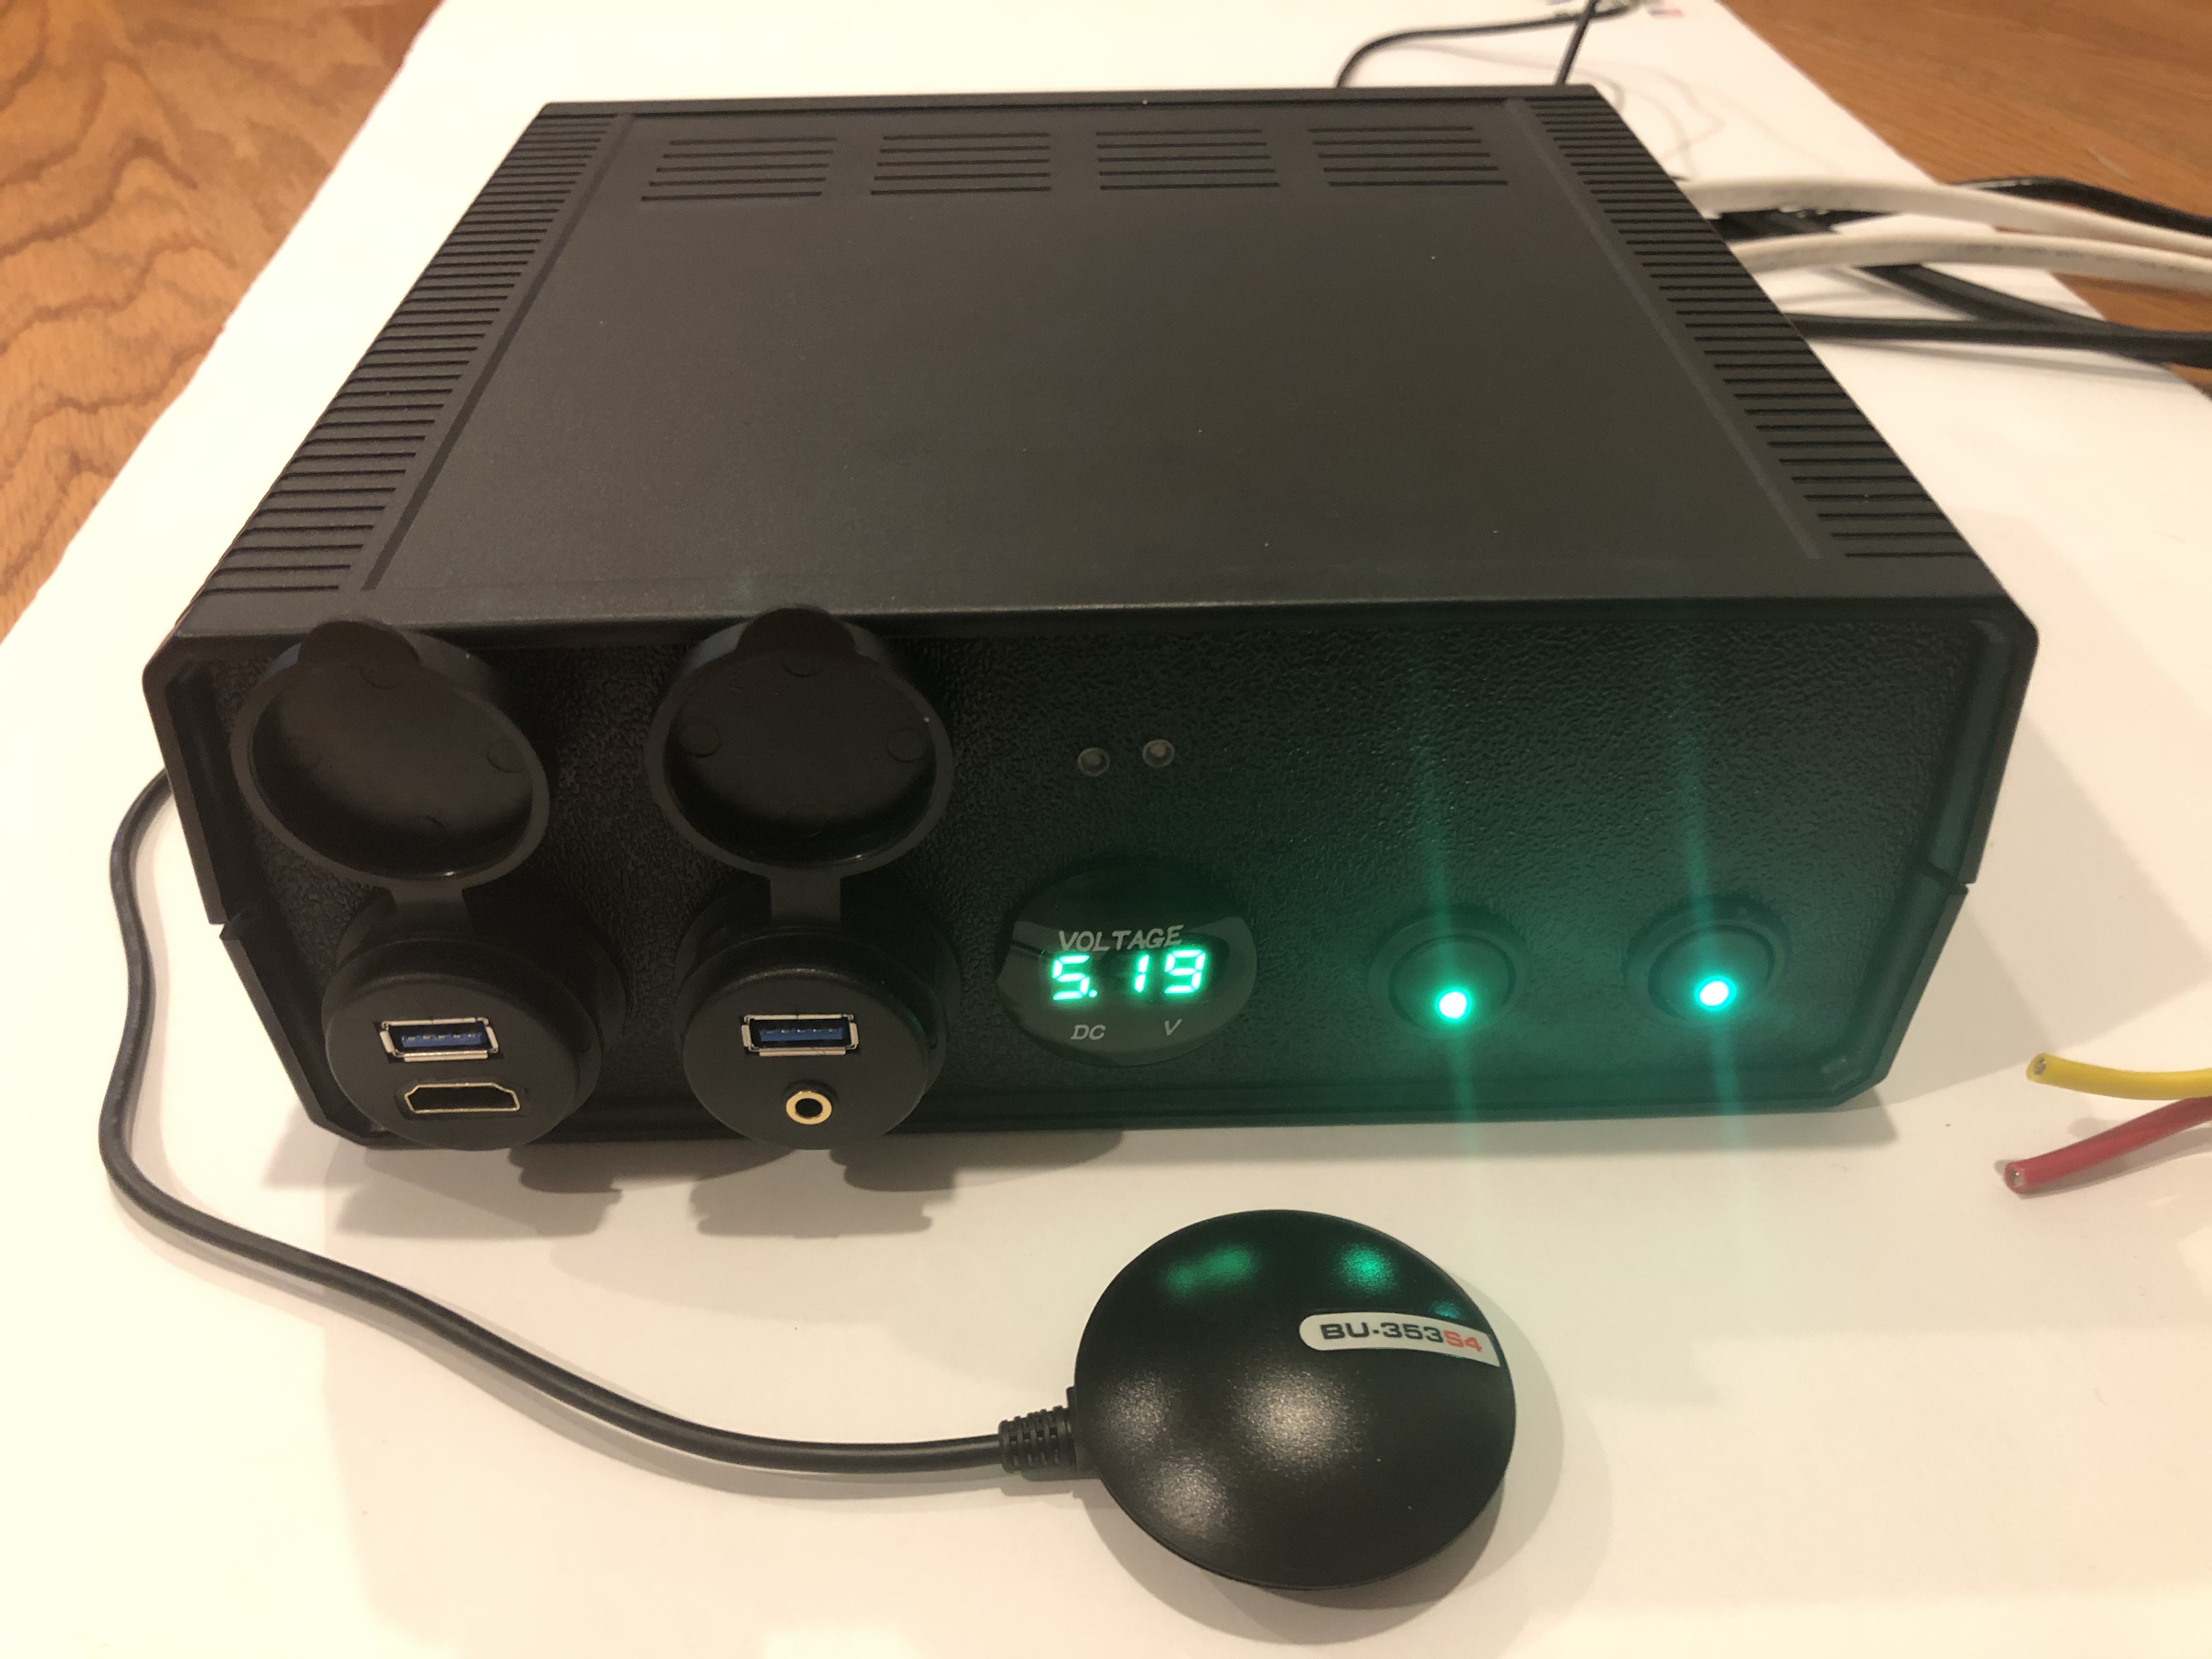
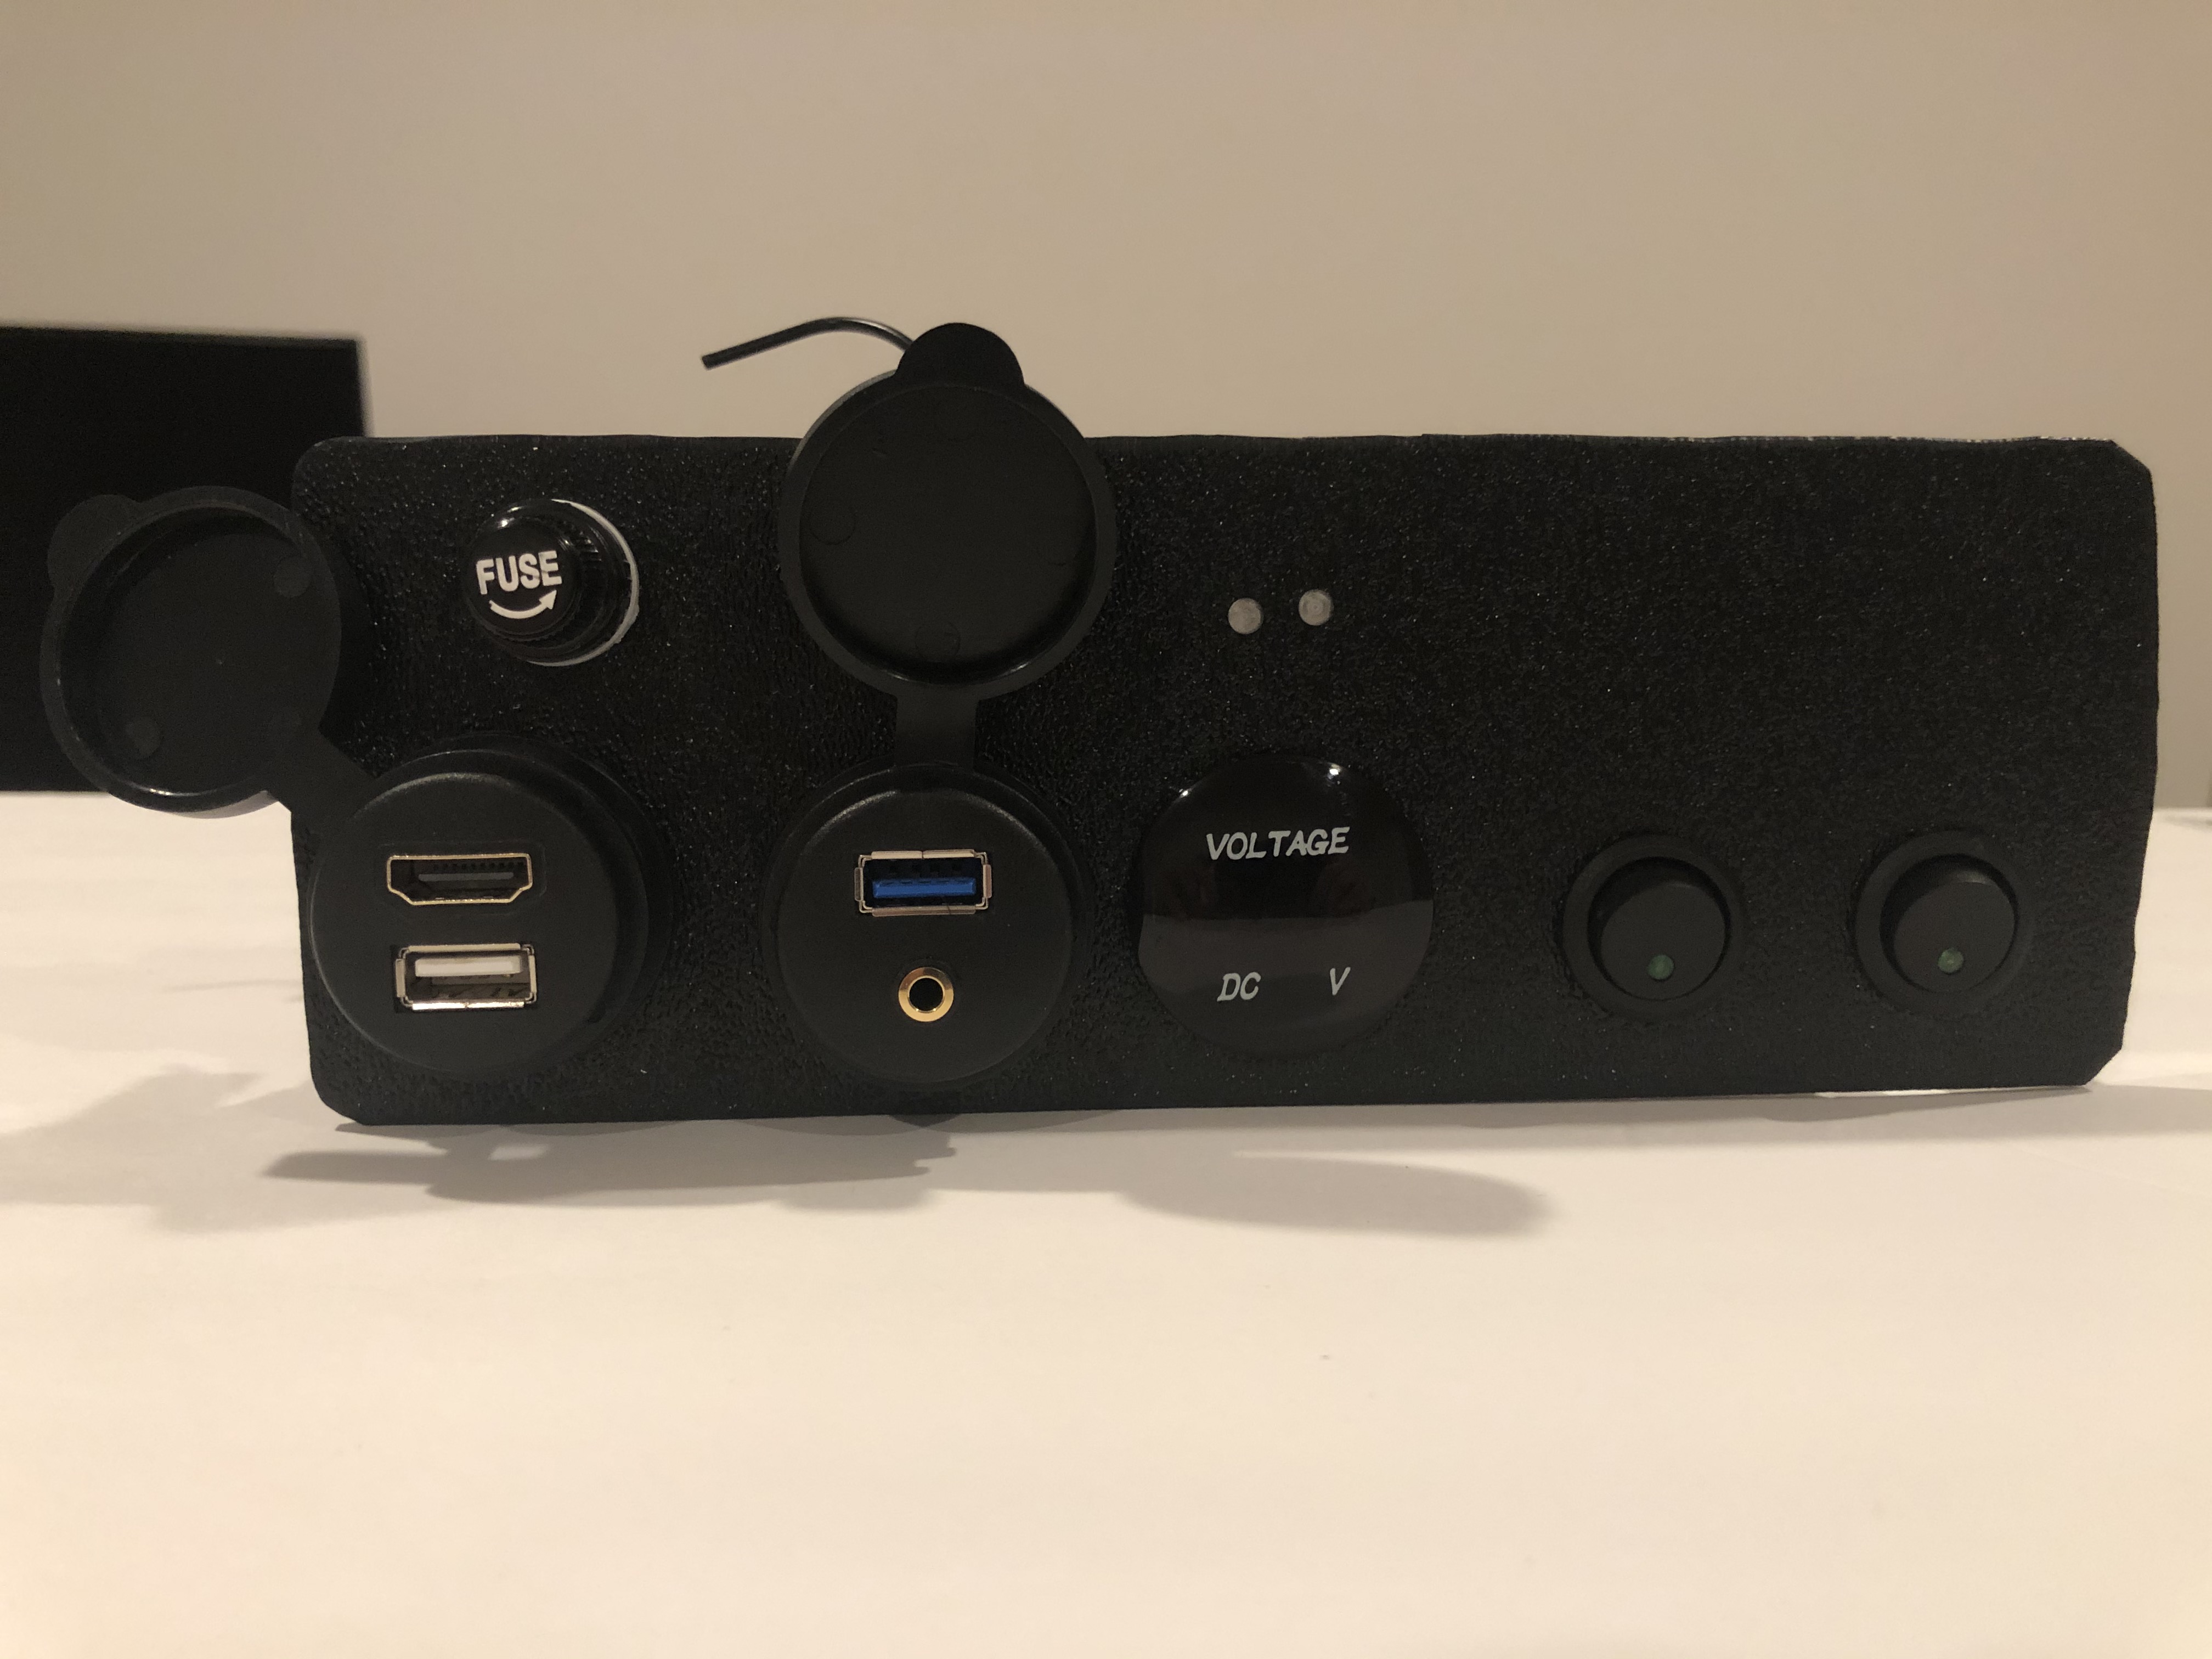
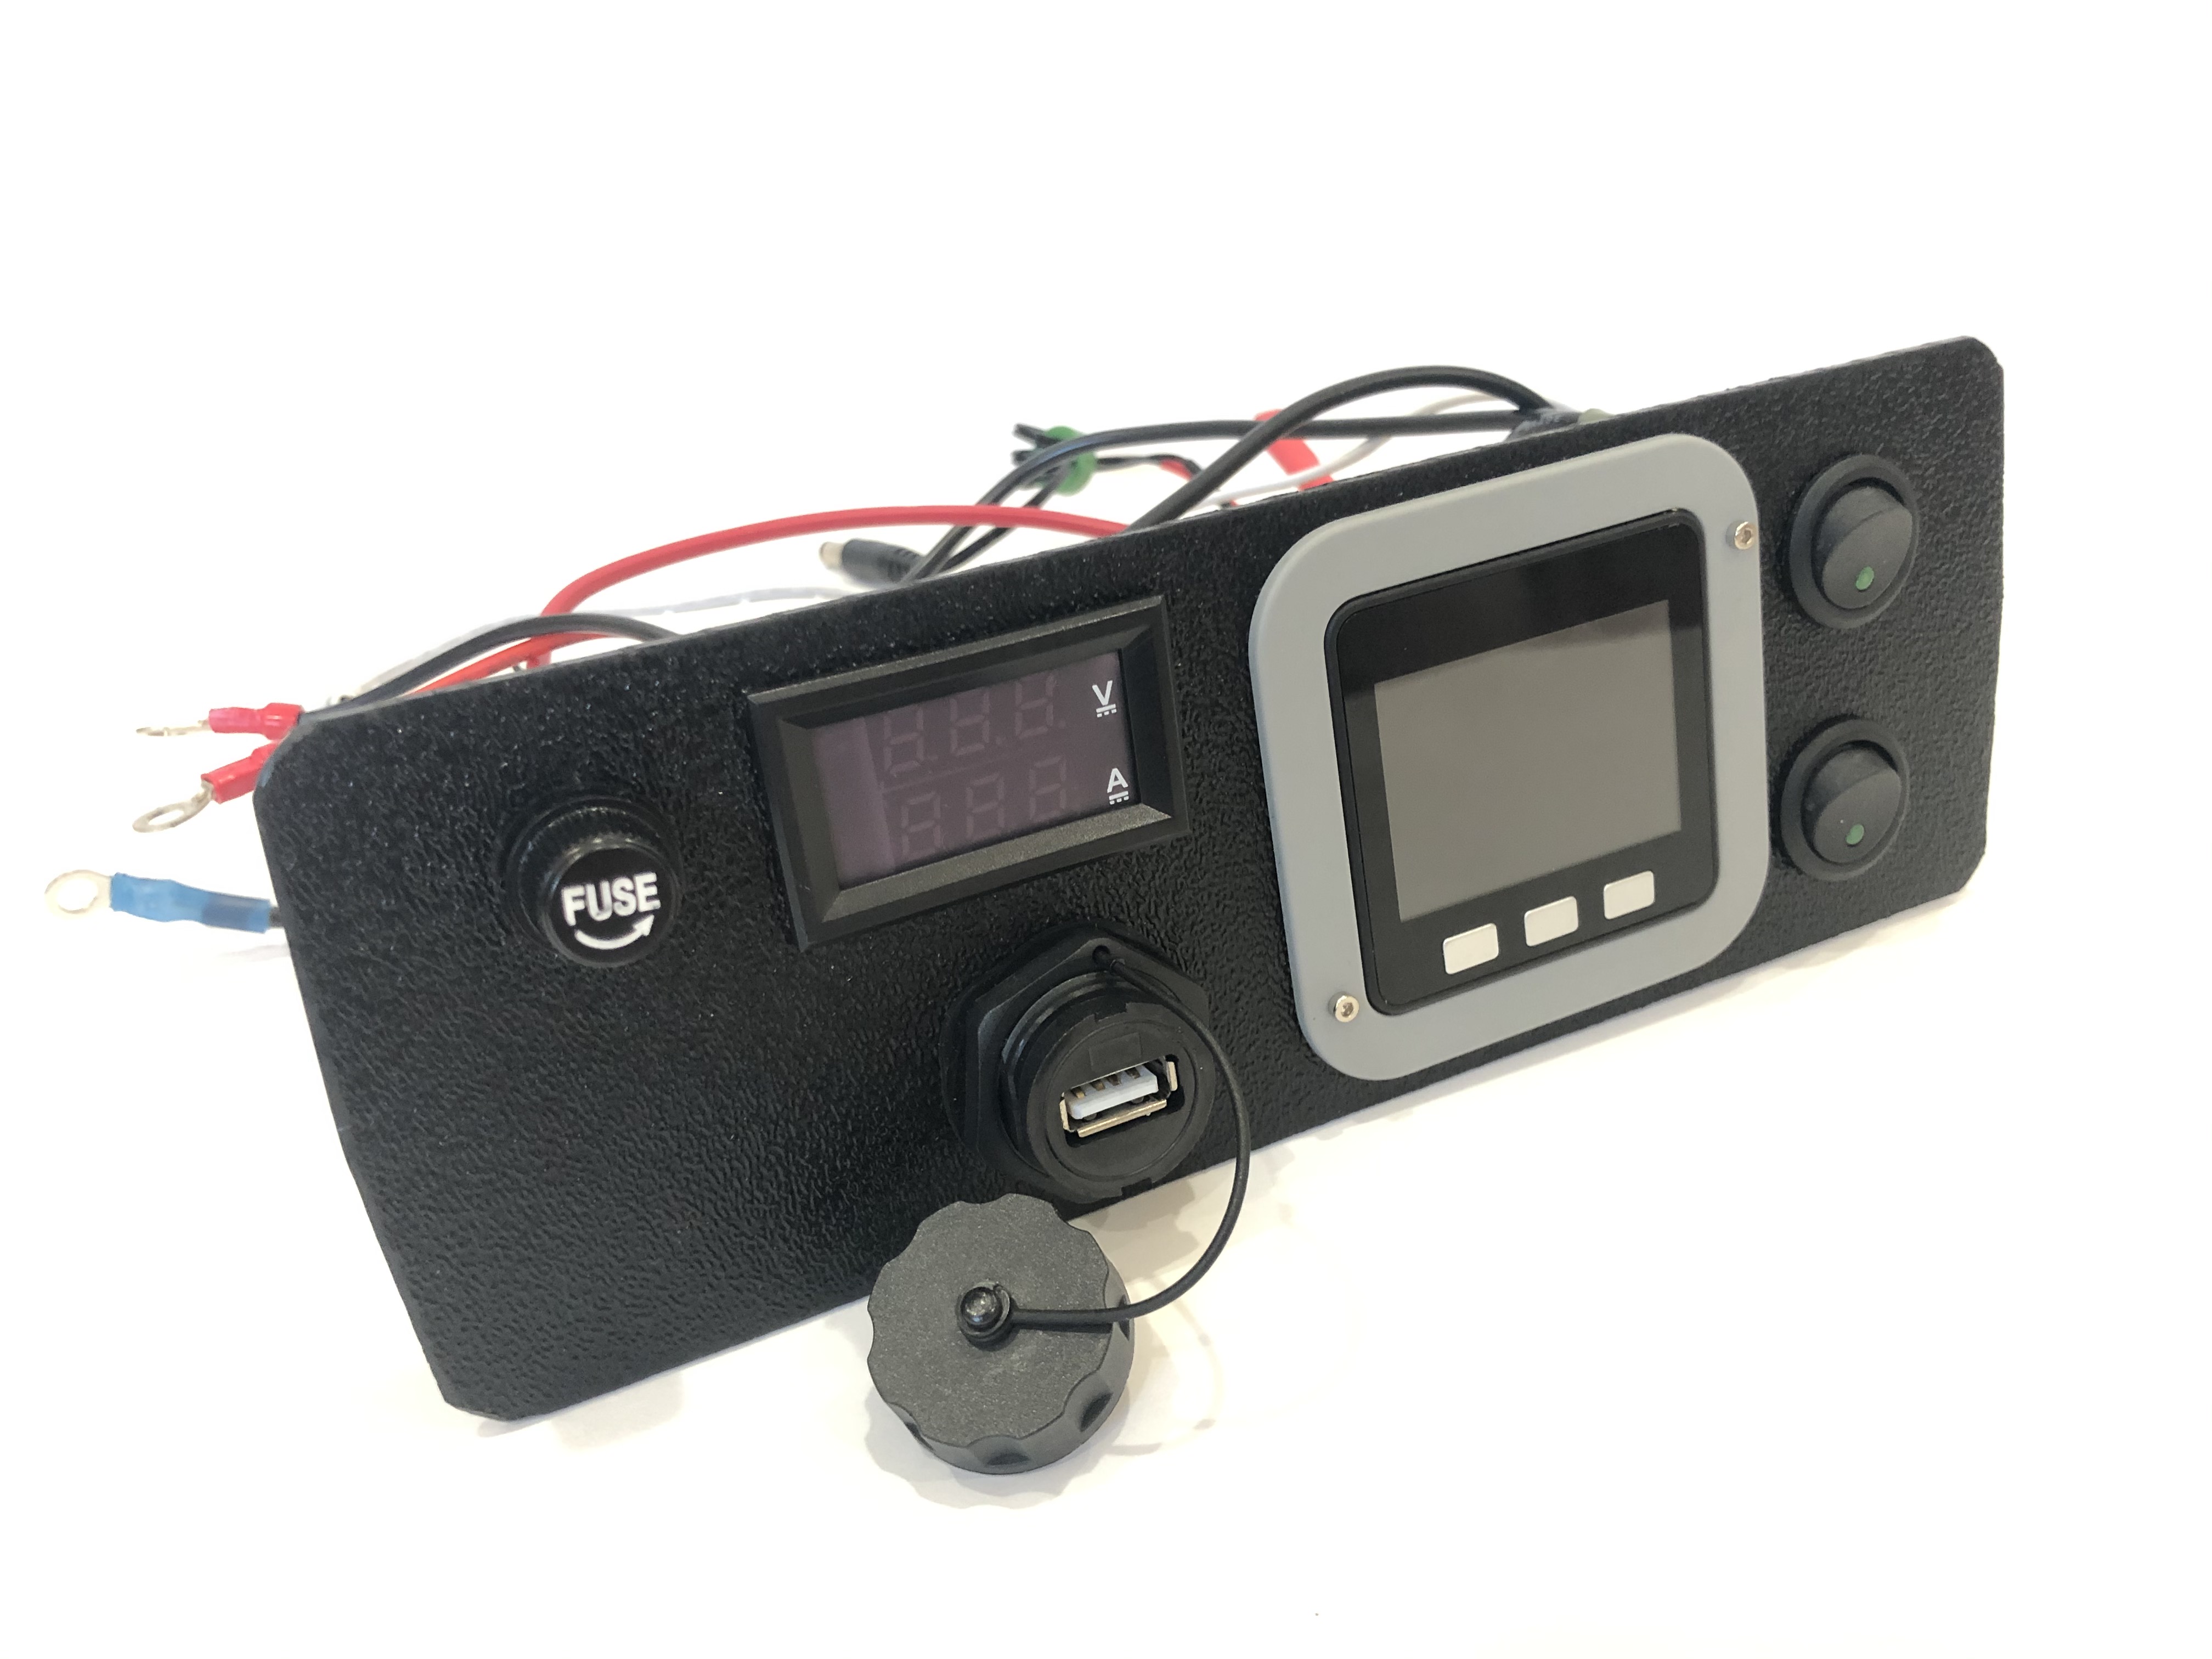
The boat computer front panel interfaces:
-
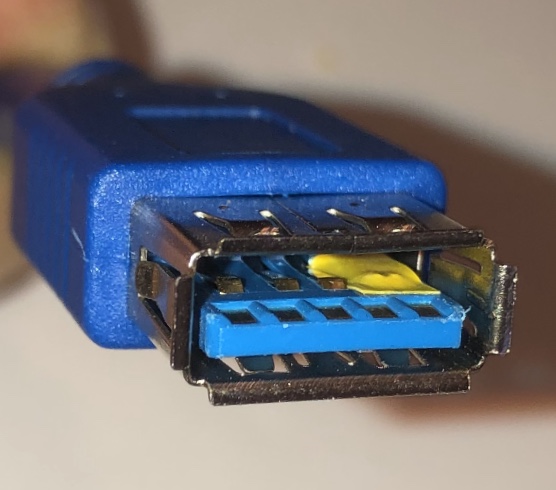
1 USB 3.0 data port
-
1 AUX audio port
-
1 USB 2.0 data port
-
1 HDMI port
-
Computer Voltage Meter
-
Amp and Voltage Meter Combined
-
Status indicators via fiber-optic light pipes
-
Fuse box panel mount
-
On/Off power switch
-
On/Off power switch for cockpit instruments
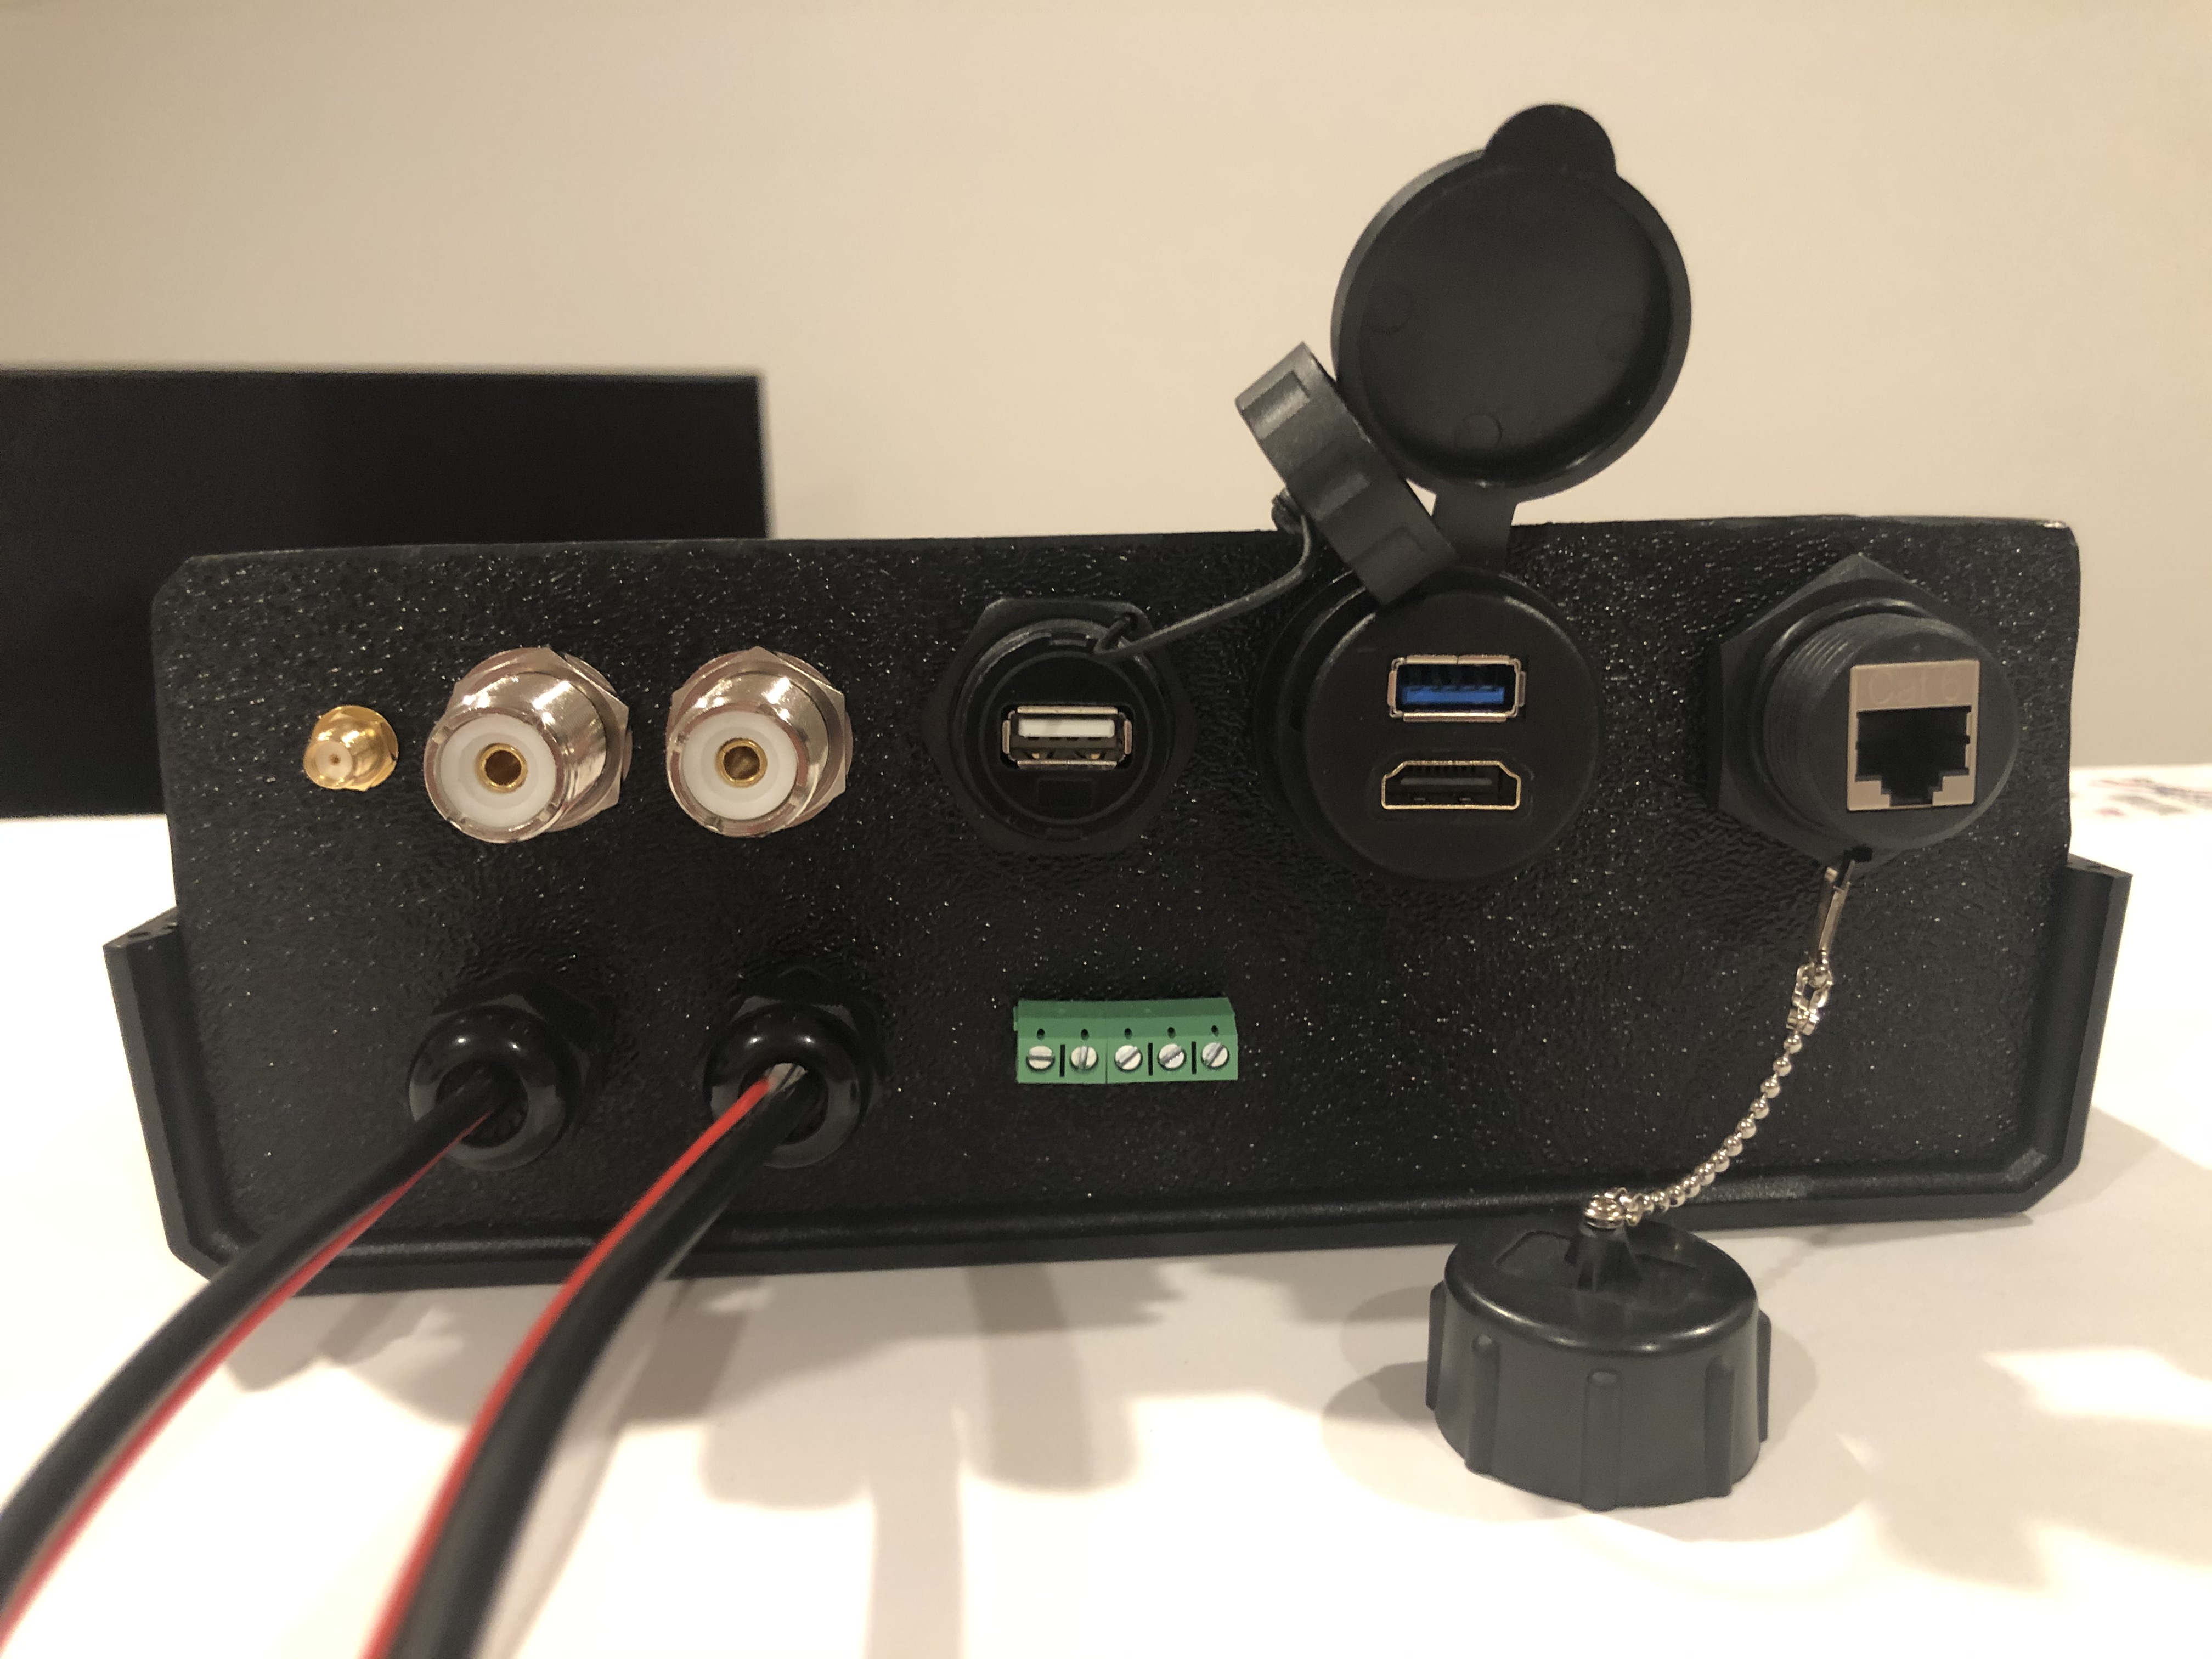
The boat computer back panel interfaces:
-
1 Ethernet port 1Gbit (for the Wi-Fi router)
-
1 USB 2.0 port for GPS (or something else)
-
1 NMEA-0183 port (More can be added in the same DIY fashion)
-
DC power 2-wire input cord mounted inside a waterproof gland for 12v boat connection. SAE-type connector
-
DC power 2-wire output cord mounted inside a waterproof gland for 12v cockpit connection. SAE-type connector (black male)
-
HDMI and USB 3.0 connectors to the cockpit display and touchscreen
-
RF connector for AIS antenna
-
RF connector for RTL-SDR antenna
-
SMA RF connector for a secondary GPS
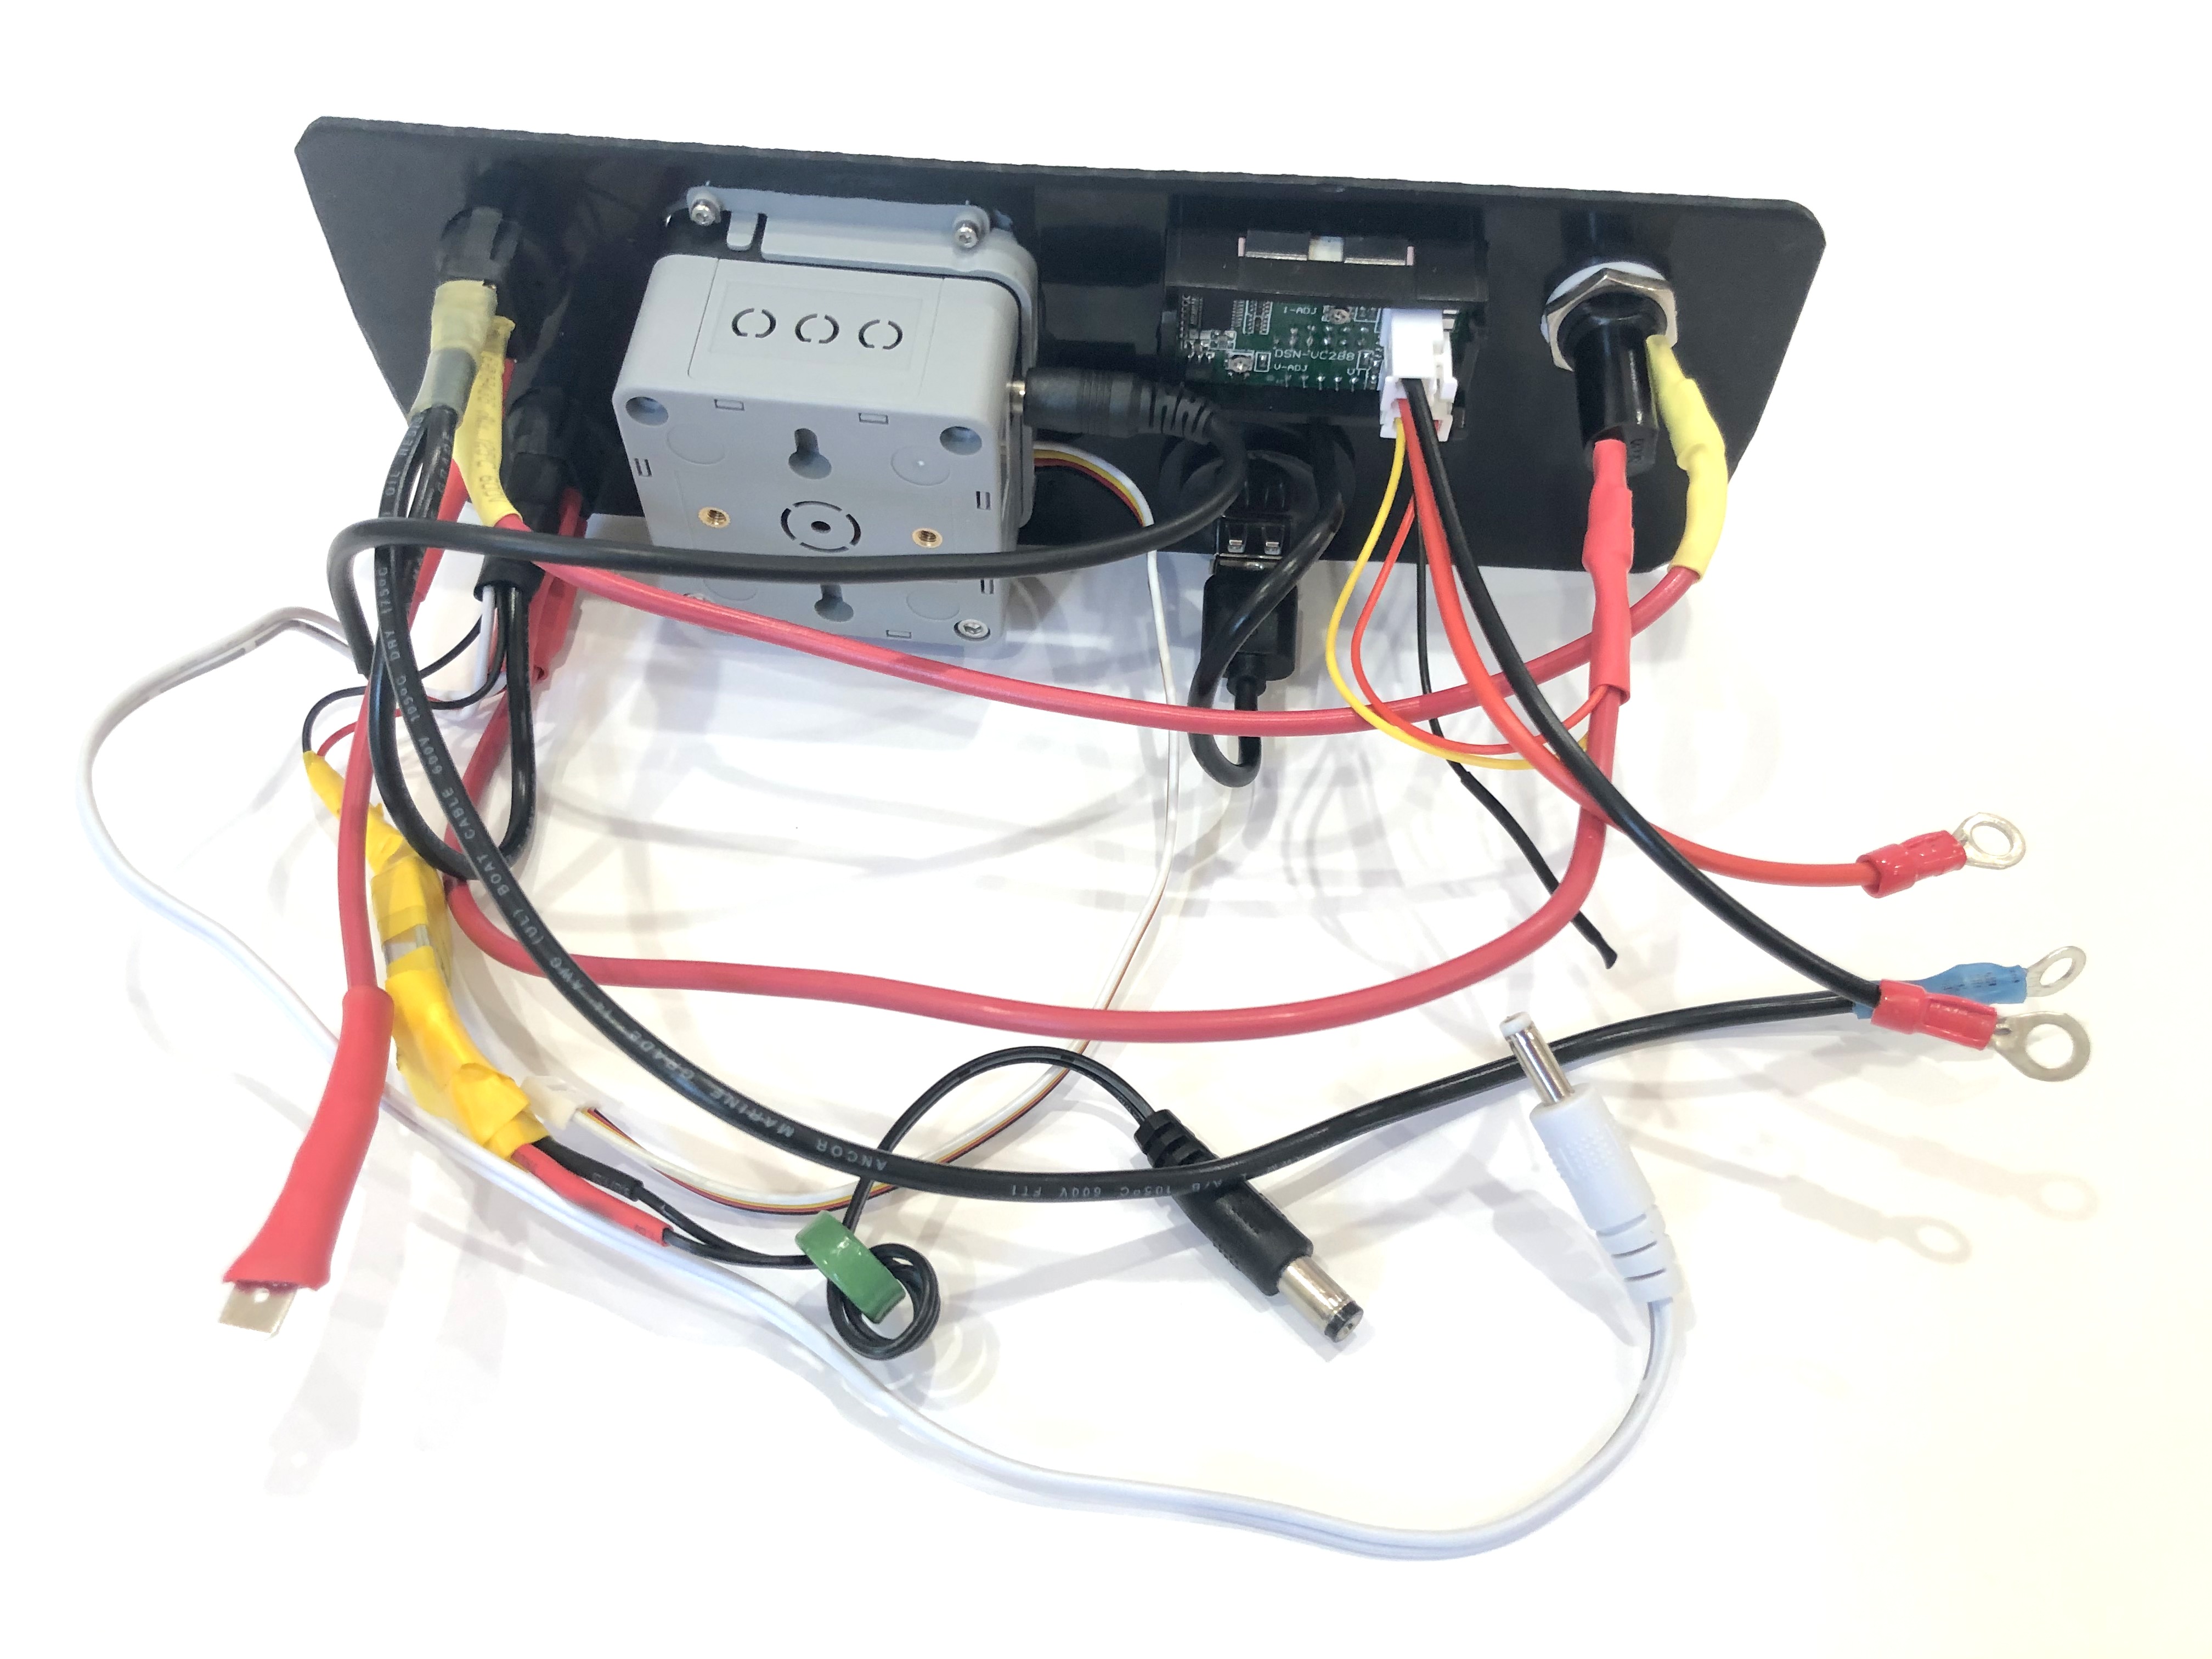
Boat Computer Inside
| Raspberry Pi lies on top of the middle divider made out of plastic sheet. The power supply (12v to 5v step-down converter) is mounted from the other side under the middle divider. The USB hub doesn’t fit by height to simply lay on the divider, so there is a little shelf made out of the same plastic sheet, and it is attached by 4 shortest standoffs. USB hub is mounted under a slight angle to give space to a screw which closes the enclosure. |
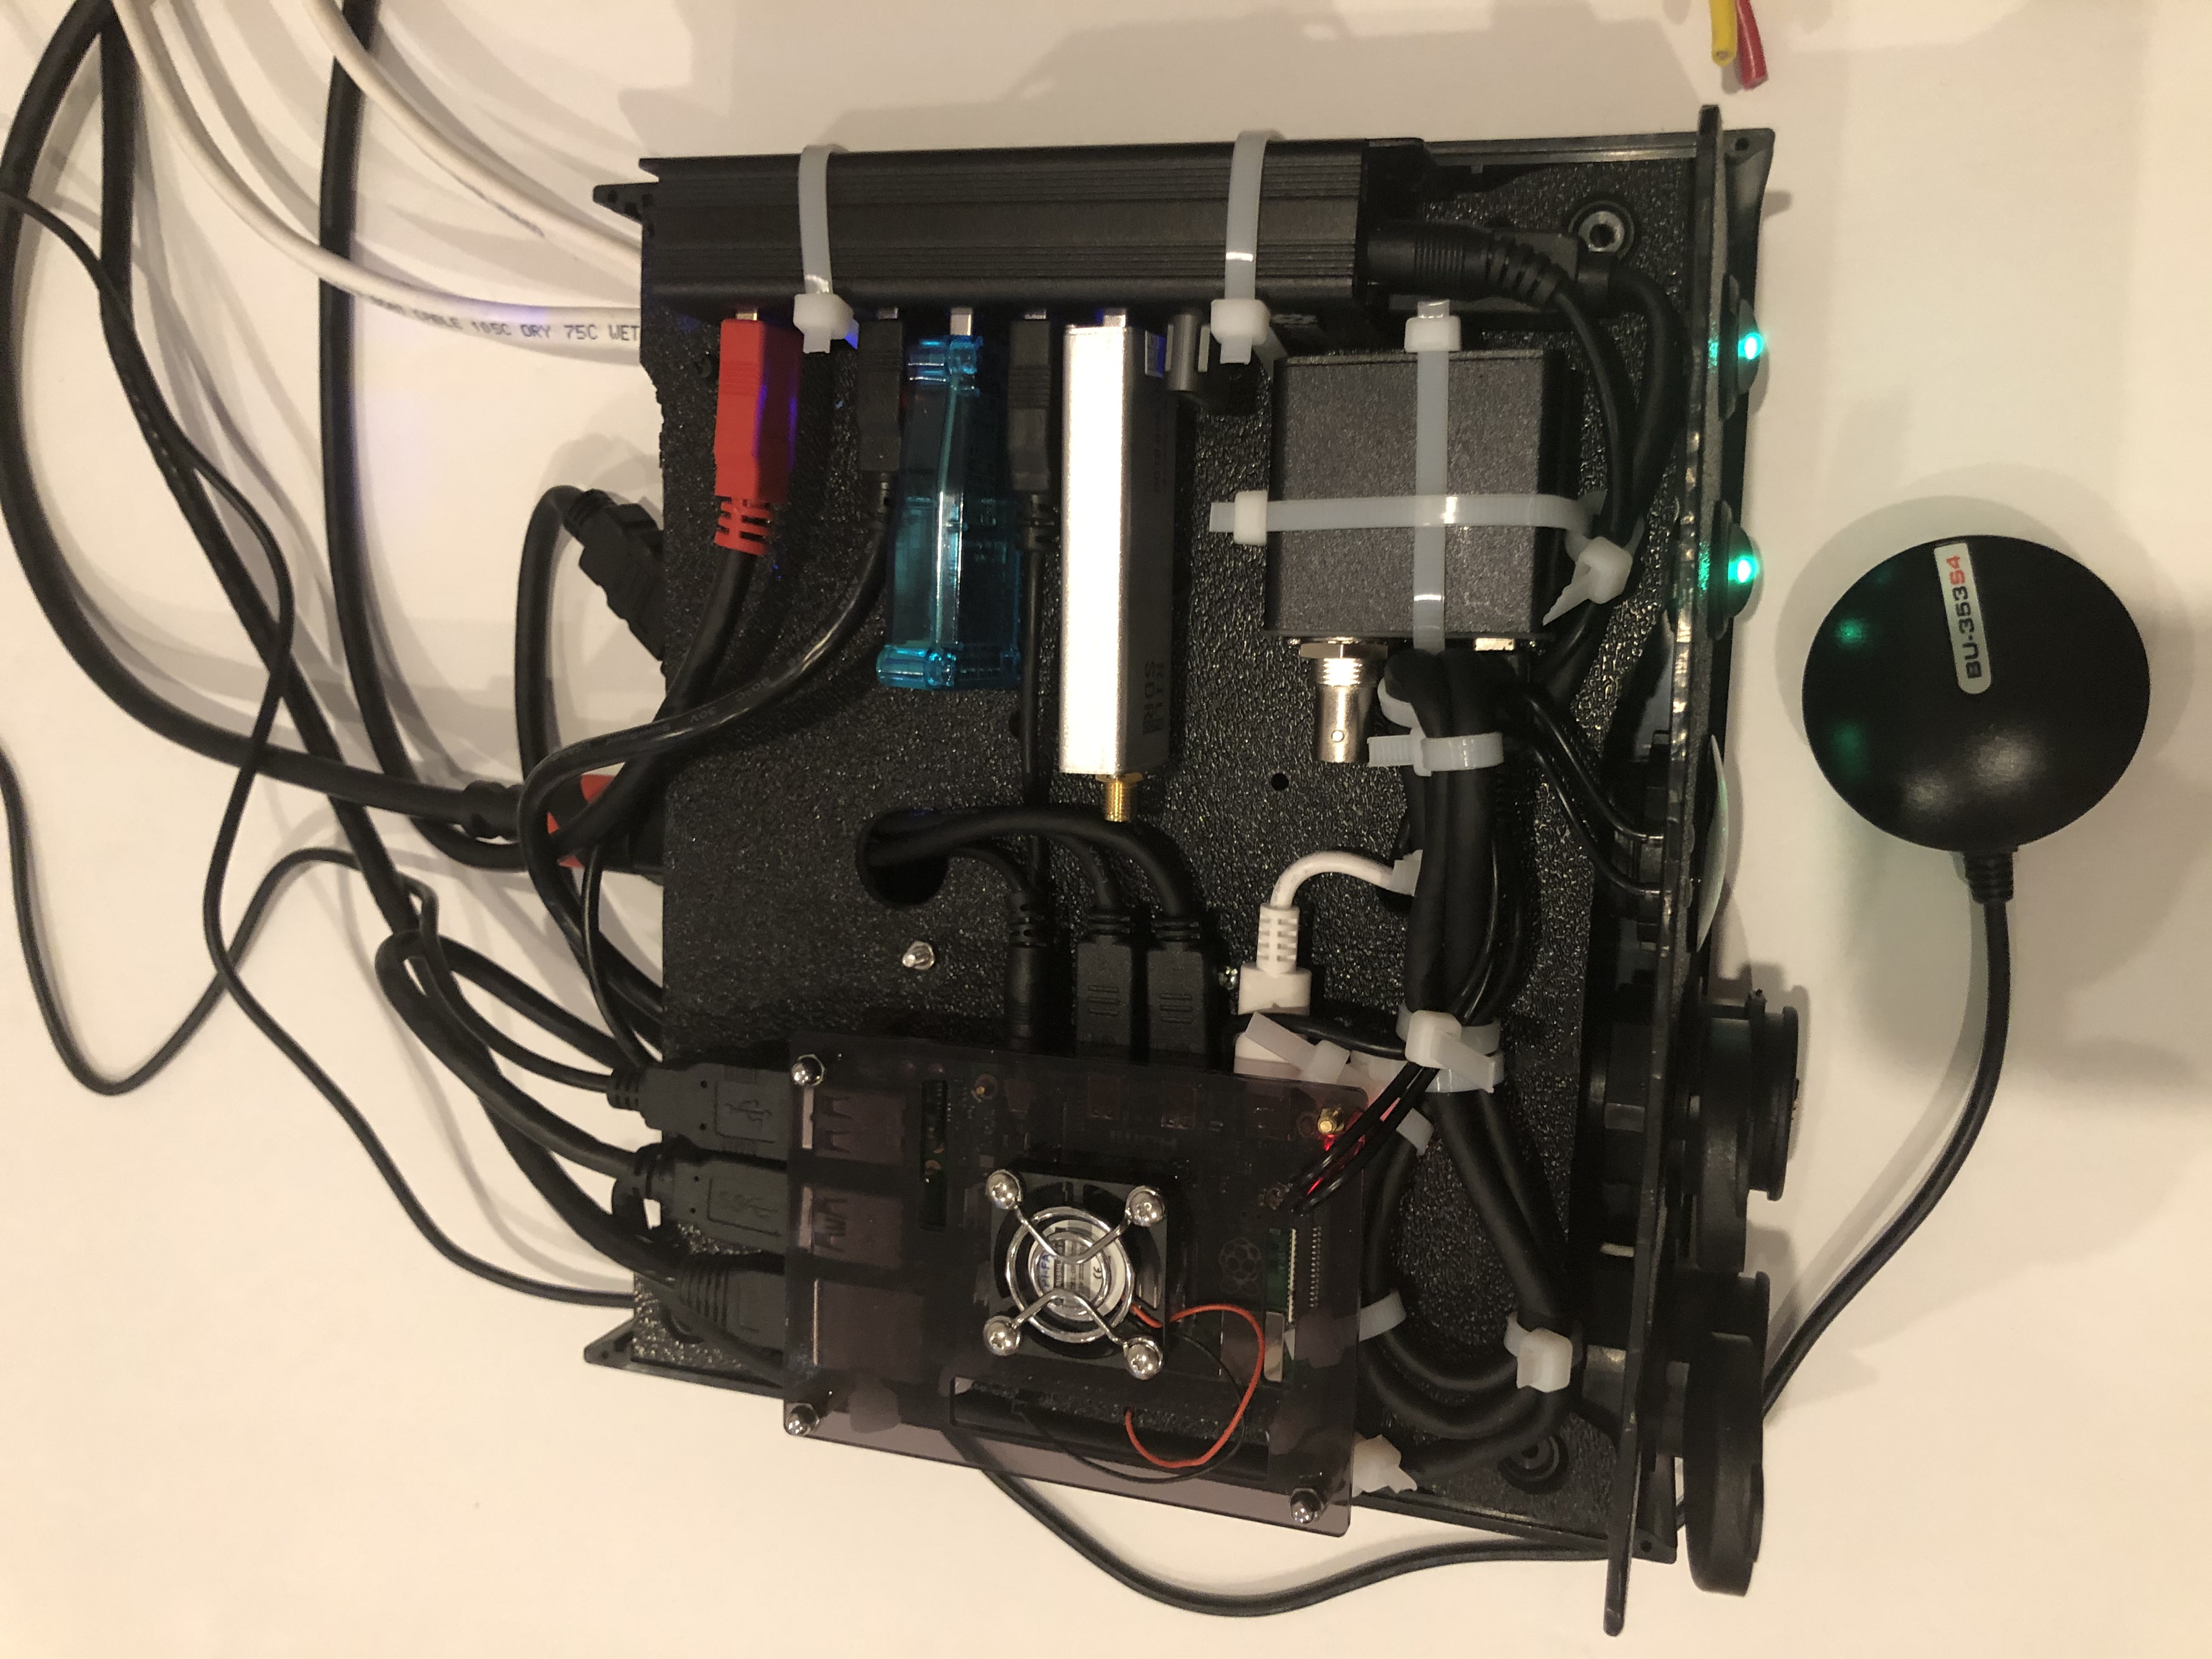
On the picture above 7-Port powered USB 3.0 hub, dAISy AIS, Raspberry Pi 4 with a cooling fan and heat sinks, serial-to-USB stick (with the chipset from FTDI), SSD, RTL-SDR RF stick. 12v to 5v step-down converter is located below this layer inside the housing box and is connected to the front panel via a fuse and a switch on the front panel.
You can customize the front and back panels for your needs.
1.1.1. Basic Schematics

Raspberry Pi 4 has also Wi-Fi and BlueTooth interfaces:
-
802.11ac/n
-
Bluetooth 5.0
Wi-Fi can be used to set up access to the boat computer from smartphones and tablets with additional software.
1.1.2. Tools and Supplies
| Item | Description | Cost | Source |
|---|---|---|---|
Standoffs |
Hilitchi 120Pcs M3 Nylon Hex Spacers Screw Nut Standoff Plastic Accessories Assortment (Black)
|
$6 |
Amazon |
Screws, Nuts |
Screws, nuts, etc. for electronics |
$4.5 |
Microcenter |
Cable ties |
Cable ties |
$5 |
Homedepot |
Soldering |
Soldering Iron Kit - Soldering Iron 60 W Adjustable Temperature, Digital Multimeter, Wire Cutter, Stand, Soldering Iron Tip Set, Desoldering Pump, Solder Wick, Tweezers, Rosin, Wire - [110 V, US Plug]
|
$35 |
Amazon |
Jumper Wires |
120pcs Breadboard Jumper Wires 10cm 15cm 20cm 30cm 40cm 50cm 100cm Optional Arduino Wire Dupont Cable Assorted Kit Male to Female Male to Male Female to Female Multicolored Ribbon Cables |
$5.80 |
Amazon |
Waterproofing Spray for PCB, Conformal Coating (Optional) |
422B-340G Silicone Conformal Coating, Clear, 12 oz Aerosol |
$22.45 |
Amazon |
Heat Shrink Connections (Optional, You might have enough) |
450pcs Heat Shrink Wire Connectors DIY Kit Heat Shrink Butt Connectors Crimping Tool Heat Shrink Tubing Heat Gun Waterproof Marine Automotive Terminals Set |
$42 |
Amazon |
Heat Shrink Tubing (Optional, You might have enough) |
Heat Shrink Tubing |
$6 |
Local auto store |
Fuses |
Fuses 6x30mm |
$6 |
Local hardware store |
1.1.3. Boat Computer Enclosure
Enclosure Parts
| Item | Description | Cost | Source |
|---|---|---|---|
Case |
Brand: SZOMK, Model: AK-D-09, IP54 protection, plastic box for PCB design instrument. Black. Dimensions exterior: W 230mm, D 210mm, H 86mm
|
2 * $19.80, Delivery: $7 |
AliExpress |
Plastic sheets |
ABS Black Plastic Sheets Size 12" x 12", 0.118"-1/8" thick, 2-Pack, 1 Side Textured, Black |
$10 |
Amazon |
12v to 5v step-down converter |
TOBSUN EA50-5V DC 12V 24V to DC 5V 10A 50W Converter Regulator 5V 50W Power Supply Step Down Module Transformer
|
$9.60 |
Amazon |
For those who like 3D printing and designing your own enclosures there is a nice project with OpenScad on ThingsVerse. See:
It’s called 'The Ultimate Box Maker'.
| Another nice case. DeskPi Pro (with SSD support and safe shutdown) https://deskpi.com/products/deskpi-pro-for-raspberry-pi-4 |
Front Panel

| Item | Description | Cost | Source | ||
|---|---|---|---|---|---|
2-Wire DC connectors SAE (Red, Black) Pack of 2 |
DIY 1 to 2 SAE Power Extension Cable Adapter Connector 2 Pin Quick Connect Disconnect Plug SAE Power Extension Cable 18AWG 300mm (Pack of 2) |
$10 |
AliExpress |
||
2-Wire DC connector (Red, White) |
SAE Connector DC Power Cable, 16 AWG Quick Disconnect (Pack of 2)
|
$2 |
AliExpress |
||
USB 2.0 / HDMI |
USB 2.0 HDMI Mount Cable – USB Extension Flush, Dash, Panel Mount Boat Cable (3.3FT/1m) |
$10 |
Amazon |
||
USB 3.0 / AUX |
USB 3.0 & Flush Mount Cable + USB3.0 AUX Extension Dash Panel Waterproof Mount Cable for Boat, Car and Motorcycle - 3ft |
$10 |
Amazon |
||
Panel, etc |
5 Gang 3 Pin Rocker Switch Panel Waterproof On-Off Toggle Switches with Pre-wired for Car Vehicle Trailer Truck SUV Marine Boat RV Ship
|
$12 |
Amazon |
||
Voltmeter |
DC 12V-24V Digital Panel Voltmeter Voltage Meter Tester Led Display For Car Auto Motorcycle Boat ATV Truck Refit Accessories |
$4 |
AliExpress |
||
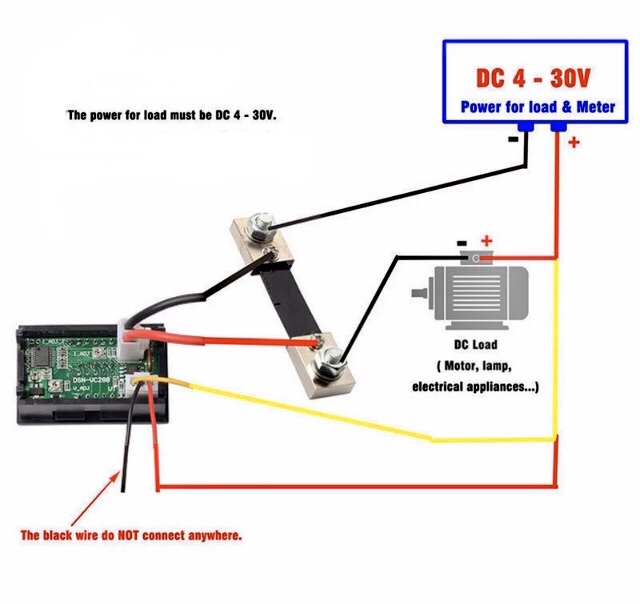
Current (Ampere meter) and Voltmeter (2-pack) |
Digital Ammeter Voltmeter DC 100V 10A 50A 100A Amp Meter Volt panel Voltage Current Meter Tester Gauge Dual LED Auto Car https://a.aliexpress.com/_sr9X34 |
$6 |
AliExpress |
||
Light Pipes (long) |
Fiber optic light pipes with lenses for panel mount for transfer of inside LED indicators light to the front panel
|
$15, Delivery: $7 |
DigiKey |
||
Light Pipes (short) |
Fiber optic light pipes with lenses for panel mount for transfer of inside LED indicators light to the front panel
|
$9 |
DigiKey |
||
Fuse Box for Panel Mount |
Pack of 10 AC 15A 125V Black Electrical Panel Mounted Screw Cap Fuse Holder
|
$6 |
Amazon |
Back Panel
| Item | Description | Cost | Source |
|---|---|---|---|
SAE DC 2-pin connector |
14AWG 100CM SAE TO SAE Quick Disconnect Extension Cable Sae Power Connector Heavy Duty With Dust Cap |
$5 |
AliExpress |
RF connector for RTL-SDR to panel |
SMA Male to UHF PL-259 Male RG316 RF Coax Cable 1 ft
|
$11.30 |
Amazon |
RF Connector to panel for GPS antenna |
SMA Socket Connector Panel Chassis Mount SMA Female to Female Bulkhead Extendable Antenna Jack Adapter for Antennas Wireless LAN Devices Coaxial Cable, Pack of 2
|
$6 |
Amazon |
AIS and RTL-SDR Antenna panel connectors |
2pcs SO239 Adapter UHF Female to Female Jack Bulkhead RF Connector, Impedance:50 Ohm |
$9.60 |
Amazon |
RF chord for dAISy AIS |
BNC Male to PL259 RG58 Cable (8 Inches); UHF PL259 Jack to BNC Male Plug Adapter Jumper Pigtail Cable RG58
|
$5.60 |
Amazon |
RJ45 |
CAT6 RJ45 Shielded Industrial Panel Mount Bulkhead Female/Female Feed Thru Coupler - Network Connectors - IP67 Waterproof/Dust Cap (Single Pack, Black) |
$11.50 |
Amazon |
Terminal Block for NMEA 0183 |
Brand Name: QSU Screw Terminal Block Kit Long Pins 5 mm Pitch 2, 3, 4 Pole (40 pcs) |
$9.50 |
Amazon |
USB 2.0 Panel Mount |
USB2.0 IP67 Waterproof Connector Industrial Standard Double Head Coupler Adapter Female to Female Socket Plug Panel Mount with Waterproof/Dust Cap, 2pcs |
$13 for 2 |
Amazon |
Waterproof Cable Glands |
35pcs Cable Gland Waterproof Cable Fixing Head Suitable for 3mm-14mm M12 M16 M18 M20 M22 Cable Gland Joints Assortment Set (M-Black) |
$11 |
Amazon |
HDMI and USB 3.0 Panel Mount cord |
USB 3.0 & HDMI to HDMI + USB3.0 AUX Extension Dash Panel Waterproof Car Flush Mount Cable For Car Boat and Motorcycle - 3ft |
$8.50 |
AliExpress |
GPS G-mouse (Optional) |
GlobalSat BU-353-S4 USB GPS Receiver (Black)
|
$26.10 |
Amazon |
GPS Antenna (Optional) |
Waterproof Active GPS Antenna with Magnetic Base - 28dB - 3-5V - SMA Connector and Adapter Included
|
$11.50 |
Amazon |
GPS Antenna |
GPS Boat Antenna Compatible with Beidou 30dB SMA Male External Navigation Receiver 0.2 Meter Wire
|
$16.25 |
Amazon |
GPS Antenna Cable |
SMA Male to SMA Female Wi-Fi Antenna Connector Extension RG174 Cable
|
$8.40 |
AliExpress |
AIS Antenna |
Tram VHF Marine Antenna |
$24.15 |
Amazon |
AIS Antenna Cable |
RG-58A/U Coaxial Cable w/Molded PL-259 Connectors (18 feet) |
$9 |
Amazon |
NMEA Pinout and Color Coding
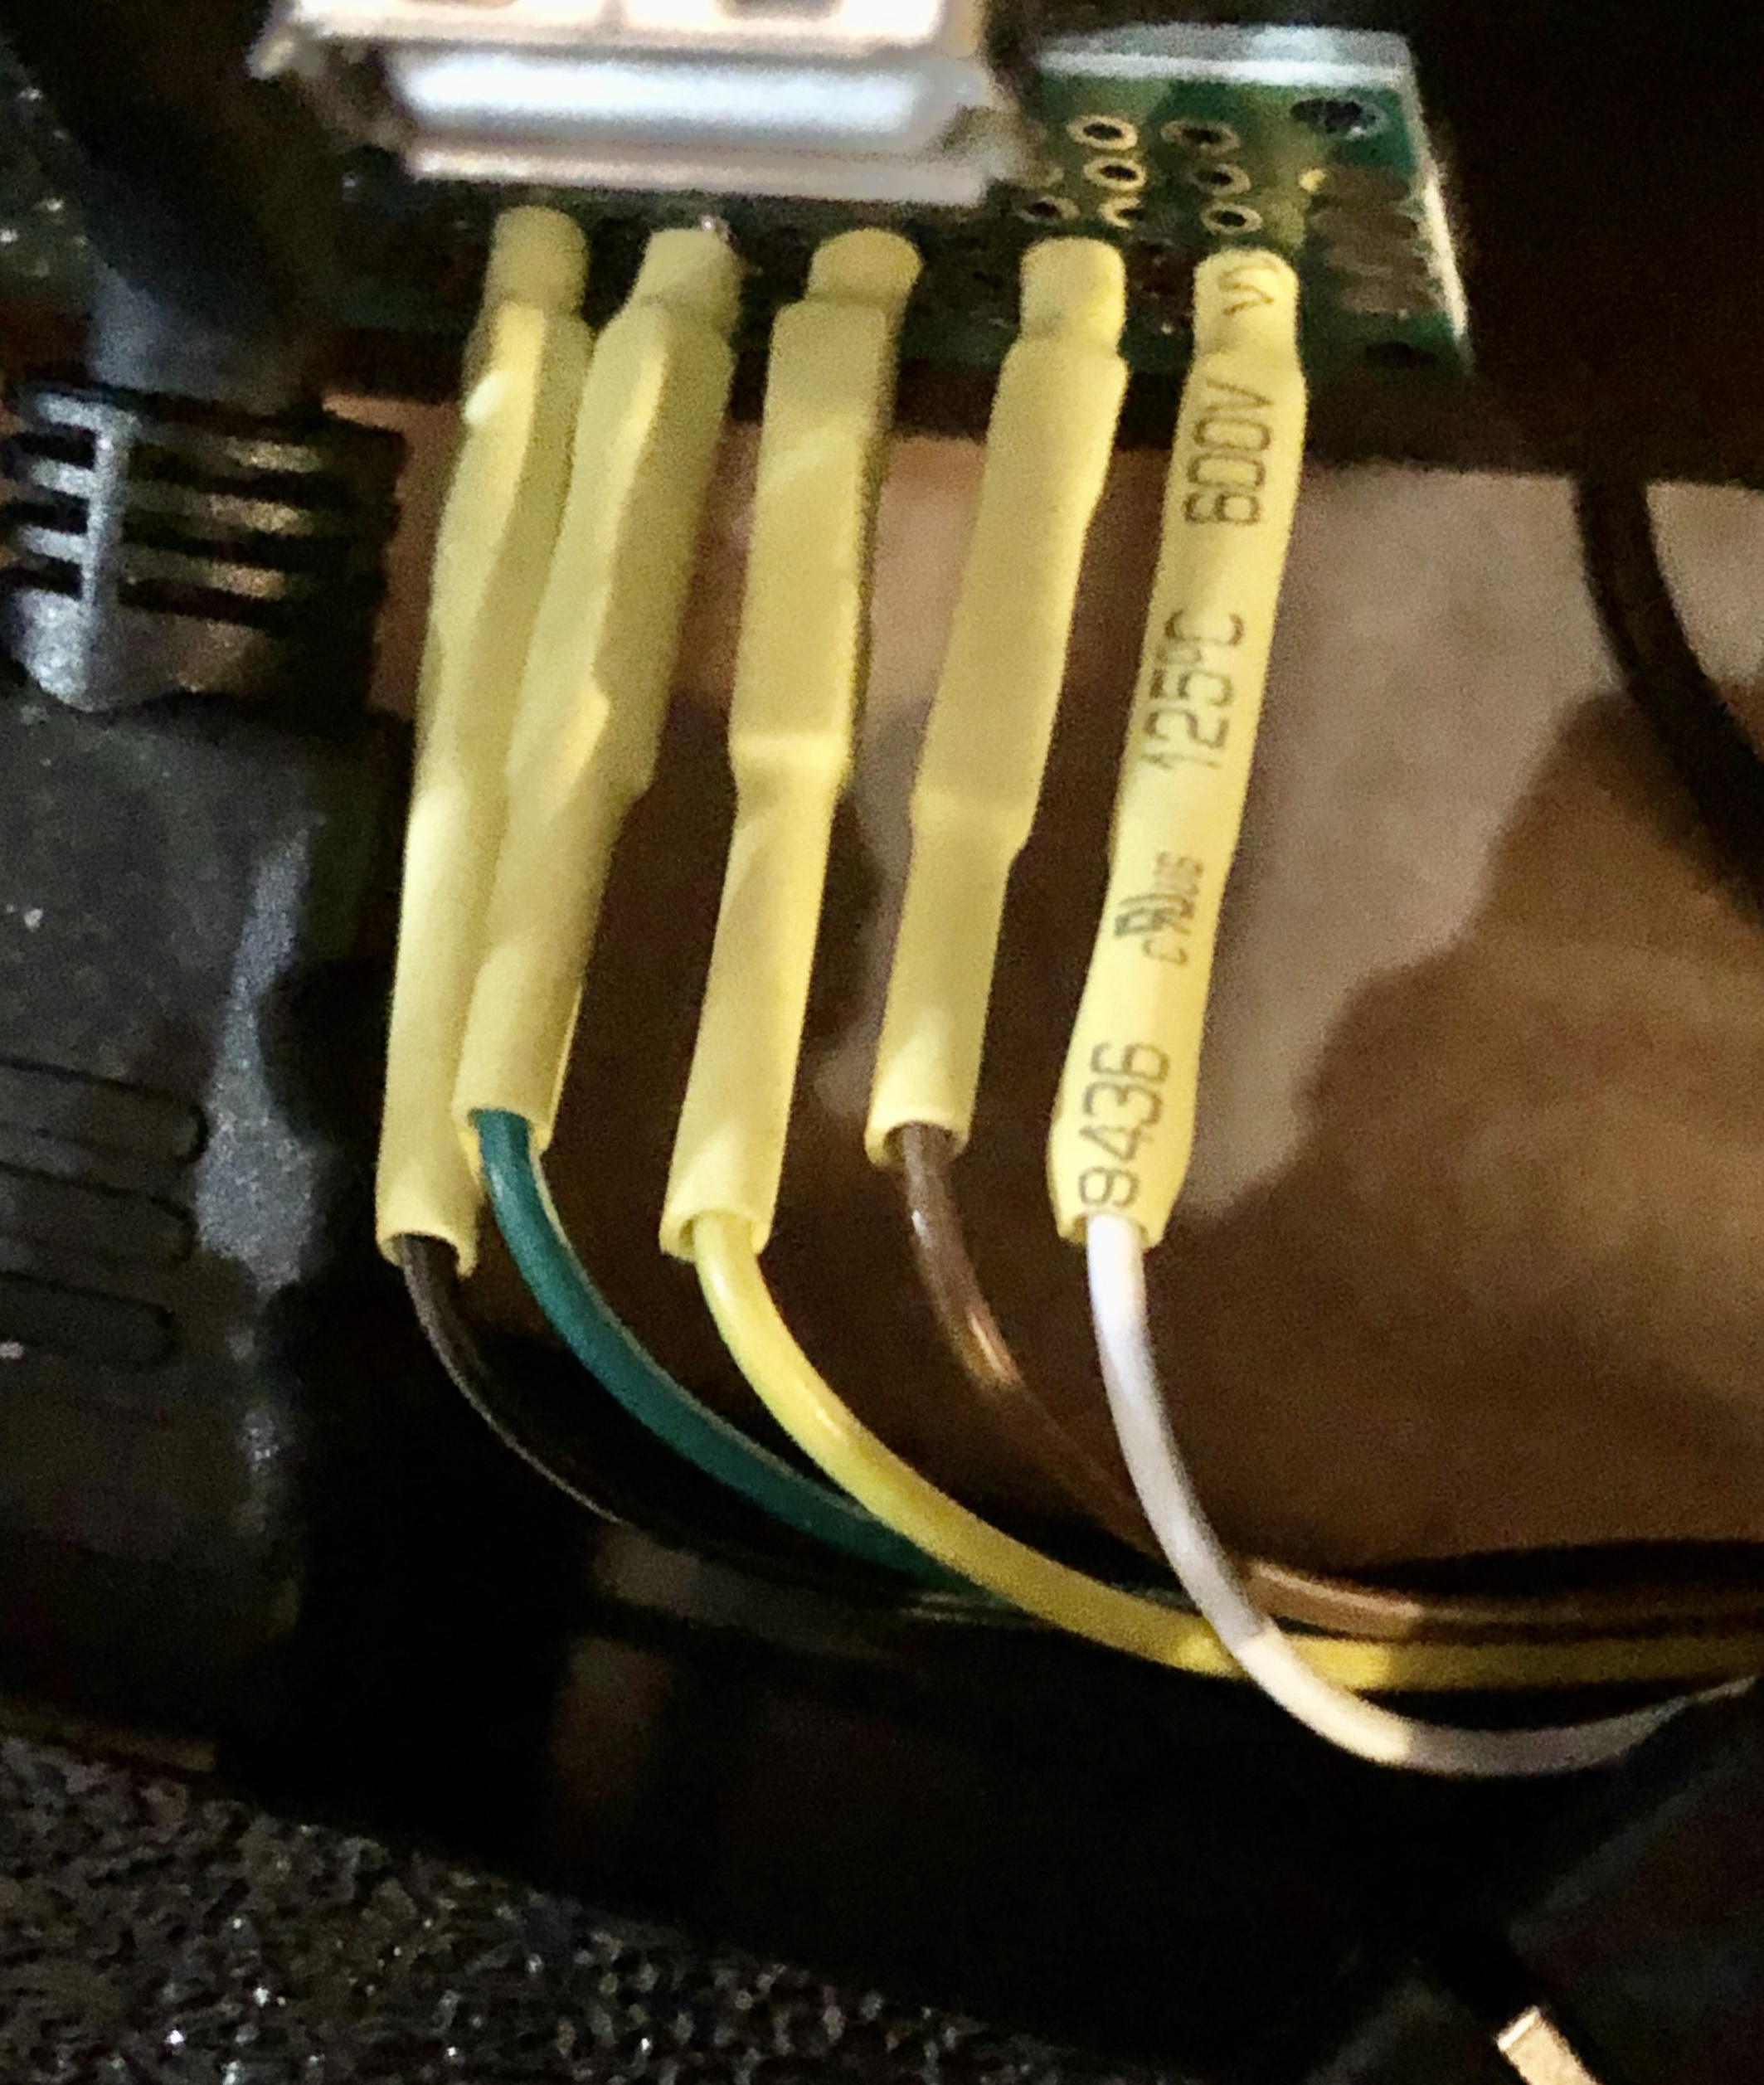
NMEA Pins:
1 |
White |
Tx+ |
2 |
Brown |
Tx- |
3 |
Yellow |
Rx+ |
4 |
Green |
Rx- |
5 |
Black |
Gnd |
When wiring NMEA 0183 devices:
Transmit (Tx) (+) should connect to a receive (Rx) (+)
Tx (-) should connect to a Rx (-)
Rx (+) should connect to a Tx (+)
Rx (-) should connect to a Tx (-)
-
In the event the sending device has a Tx (-), but there is not a corresponding Rx (-) on the receiving device, leave the sending device’s Tx (-) disconnected. Failure to follow this guideline can damage the sending device.
-
In the event that the receiving device has a Rx (-), but there is no corresponding Tx (-) on the sending device, bring the Rx (-) to ground.
Assembly Activities
Make sure you use correct tools for:
-
Measuring
-
Cutting
-
Clamping
-
Drilling
-
Heat Shrinking
-
Tying
-
Crimping
-
Screwing
Tools
Drill, Screwdriver, Drill bits, Large hole drill bit, Cutting knife, Caliper,
Soldering Kit, Rotary Tool (Like Dremel), Heat Gun, Crimper Tool
1.1.4. Computer and Sensors
Raspberry Pi 4

This file is licensed under the Creative Commons Attribution-Share Alike 4.0 International license
Sensors and Parts
| Item | Description | Cost | Source | ||||
|---|---|---|---|---|---|---|---|
Pi 4 |
Raspberry Pi 4, 4Gb + Power Supply |
$65 |
Amazon |
||||
Heat sinks and Cooling fan, Case |
Acrylic Case for Raspberry Pi 4 Model B & Raspberry Pi 3 Model B+, Raspberry Pi Case with Cooling Fan and 7PCS Heatsinks for Raspberry Pi 3/2 Model B/B+ (Brown) |
$9 |
Amazon |
||||
USB Hub |
USBGear 7-Port USB 3.0 Charging and SuperSpeed Mountable Data Hub
|
$35 |
Amazon |
||||
FTDI Serial to USB (2pcs) |
DSD TECH SH-U11 USB to RS485 RS422 Converter with FTDI FT232 Chip Compatible with Windows 10, 8, 7, XP and Mac OS X |
$34 (for 2) |
Amazon |
||||
USB Isolator (Optional) |
USB To USB Isolator Industrial Grade Digital Isolators With Shell 12Mbps Speed ADUM4160/ADUM316 USB Isolator Drop Ship |
11.20 |
AliExpress |
||||
USB Type-B short cable |
USB 3.0 A Male AM to USB 3.0 B Type Male BM USB3.0 Cable 0.6m |
$6 |
AliExpress |
||||
SSD Flash Drive |
Samsung Fit Plus USB 3.1 Flash Drive 128GB |
$30 |
Amazon |
||||
SD Card |
SanDisk Extreme Plus 32GB, 90MB/s |
$16 |
Office Depot |
||||
HDMI adapters |
Cable Matters 2-Pack Micro HDMI to HDMI Adapter (HDMI to Micro HDMI Adapter) 6 Inches with 4K and HDR Support |
$9 |
Amazon |
||||
dAISy AIS + BNC Adapter |
$67.70 |
wegmatt.com |
|||||
RTL-SDR |
RTL-SDR Blog V3 R820T2 RTL2832U 1PPM TCXO HF Bias Tee SMA Software Defined Radio with Dipole Antenna Kit
|
$30 |
Amazon |
||||
IMU + environmental sensors |
BerryGPS-IMUv3 - GPS and 10DOF for The Raspberry Pi - Accelerometer, Gyroscope, Magnetometer and Barometric/Altitude Sensor
|
$53.50 |
Amazon |
||||
SD card Extender Panel Mount (Optional) |
Micro SD card Extender Panel Mount |
Thingiverse |
|||||
RTC Clock (Optional) |
2pcs DS3231 AT24C32 IIC RTC Clock Module Real Time Clock Module for Arduino Raspberry Pi |
$7 |
Amazon |
Other Things to Consider (Add-ons)
| What could I have done better? I think I could use one of the power boards like 'DockerPi power board' with momentary switch for safe shutdown. Or even couple Geekworm X828 SATA board (made by SupTronics Technologies) with their X710 power board. With those I wouldn’t need internal USB hub and 12vDC to 5vDC internal step down converter. |
See:
| (Update: Jan 2020) There is even better board came out. SupTronics X180. 7-Port USB 3.0 self powered hub shield for raspberry pi 4. So I’d use x710 and x180 combo. |
| (Update: Apr 2020) Strato Pi SPBC12X board (https://www.sferalabs.cc/product/strato-pi-can-board/) |
Strato Pi SPBC12X board:
-
9-65Vdc power supply, with surge and reverse polarity protection
-
Controller Area Network (CAN) V2.0B interface, supports speeds up to 1Mb/s, with opto-isolator and electrostatic discharge protection
-
standard RS-485 interfaces to the Raspberry Pi serial line, with opto-isolator and electrostatic discharge protection
-
real time clock with replaceable CR1025 back-up battery
or same without CAN-bus, model SPBB30X ($100.00):
Google for "industrial raspberry pi" to get more ideas.
Raspberry Pi IP65 Weatherproof IoT Project Enclosure: https://sixfab.com/product/raspberry-pi-ip65-weatherproof-iot-project-enclosure/
| Another couple of interesting boards are discussed here http://forum.openmarine.net/showthread.php?tid=1666&page=3 NMEA multiplexer, current, voltage and RPM sensors for engine/battery monitoring and fridge and thermostat control board. |
GeDad MCS (Marine Control Server) Board
GeDad MCS (Marine Control Server) Board (75.00€):
English description: https://drive.google.com/file/d/16oaAfupOjiYvEVGX7z8a4Jnv1sMtD2Nc/view?usp=drivesdk
Installation guide: https://drive.google.com/file/d/1SnUONIgC0pl7oaximXKQQjzZBpLBw1ER/view?usp=drivesdk
App description for openplotter: https://drive.google.com/file/d/10Kz2WCoy9cHQC1AGTumh03V0267kdZyj/view?usp=drivesdk
| Sept 2020. Few more interesting boards: |
Boat IO board from CatamaranElectronics.com https://www.catamaranelectronics.com/boat-io
-
RTC Clock
-
Opto couplers for NMEA interfaces
-
Safe power down method
-
Boot from USB SATA SSD
-
Coaxial Lightning Arresters for RF cables
-
Mount SD card reader to front panel to swap easier
BluesWireless Notecard: https://shop.blues.io/products/raspberry-pi-starter-kit
-
Integrated Quectel cellular modem.
-
Secure element with a factory-installed ECC P-384 certificate provisioned at chip manufacture.
-
Integrated GPS and Accelerometer.
-
Designed operate on battery power, be "always-on" to maintain time & location, while typically drawing less than 8µA, when idle.
-
Bundled with 10-years and 500MB of cellular data. No cellular subscriptions, SIM fees or monthly minimums apply.
-
PTCRB Certified Module.
Do consider commercial NMEA multiplexers, they can offer good value for their price Example: Quark-elec https://www.quark-elec.com
My wishlist for the perfect board https://bareboat-necessities.github.io/my-bareboat/boat-computer-wishlist.html
Real blue water (offshore) boat features (just brainstorming)
-
GPS and chartplotter
-
AutoPilot (PyPilot)
-
AIS
-
True Radar
-
Automated WeatherFax via RTL-SDR, Satellite Weather, GRIBs via https://sailmail.com/
-
Integration with Satellite Modems as Iridium
-
Low power usage
-
Weather Routing
-
Better Integration with SSB radio via SDR stick, Morse decoding/encoding (?)
-
Better Celestial Navigation
-
Bilge Alarm, Better Alarms Overall (Deadman, Anchor Watch, Collision Avoidance, Jibe Warning, Landfall)
-
Better monitoring of power usage of the boat
-
Integration with Solar/Wind power generators
-
Lightning strike front detection
-
Wind/Speed/Drift (There are through hull transducers already which measure drift) NMEA sensors with True Wind calculation
-
Comfort features: E-mail, Instagram, Spotify, Log Book, Blog Keeping better integration
-
Integration with windlass and bow thrusters
-
Active Captain, Squidd.io type of services integrated
-
Security features, VPN, AdBlocking, Fire Alarms, Motion Sensors
-
Better integration with engine sensors (temp, power, oil pressure, RPM, fuel usage, etc)
-
FishFinder integration
-
NightVision
-
Sail Trim sensors and integration with powered winches
-
More Maps and Charts
-
Search and Rescue Patterns
-
M5Stack deserves more attention
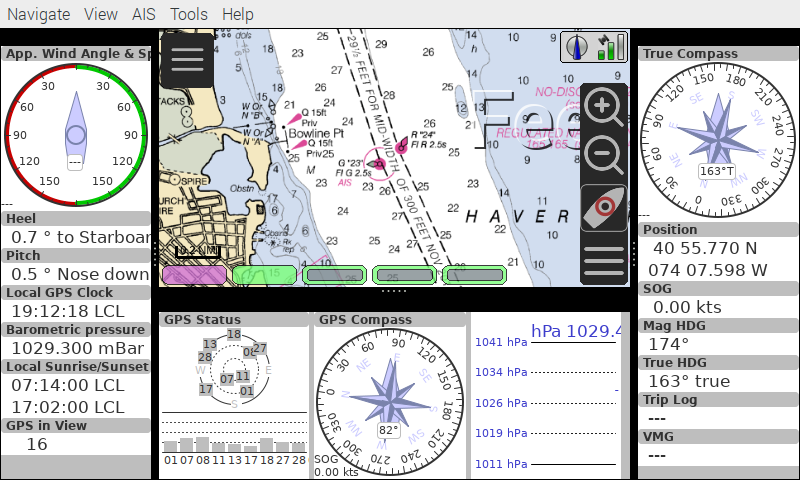
1.1.5. Testing Boat Computer and Cockpit Display
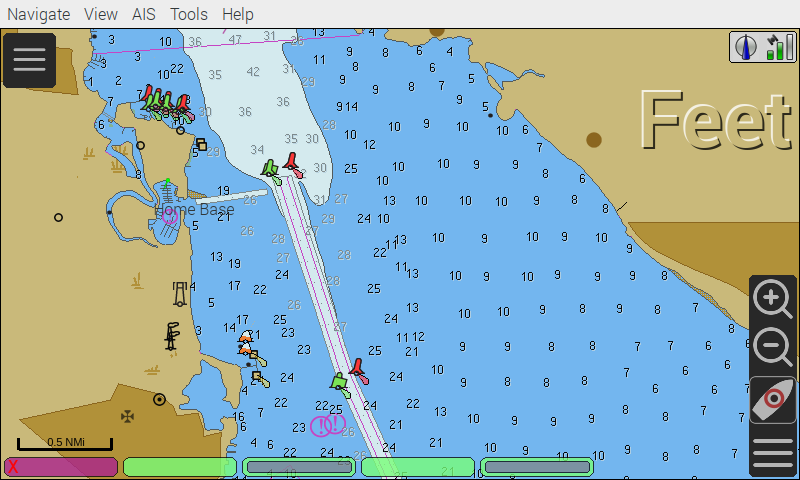
OpenCPN
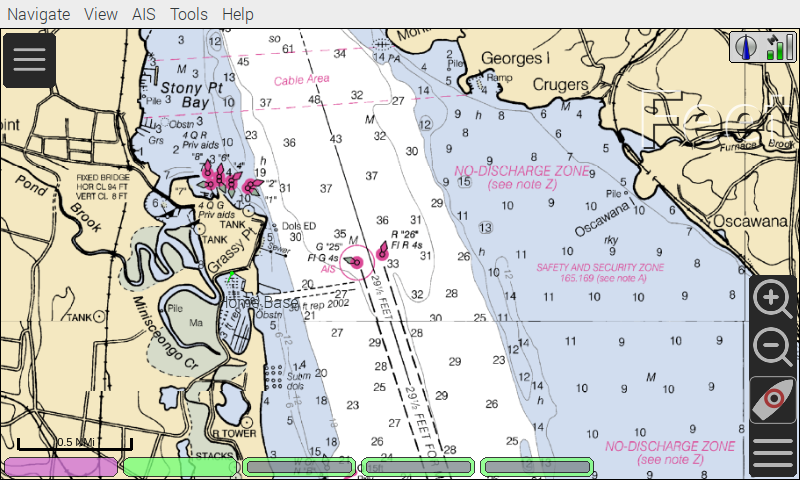
Saving it as a template in OpenCPN was a bit tricky on 7" screen as OpenCPN window is too big to see 'OK' button. I had to press Ctrl-Tab twice followed by Enter, doing it basically blindly.
Power Usage
-
Preliminary tests show that combined power consumption of Raspberry Pi 4 based boat computer and Argonaut M7 gen2 7-inch touch display stays under 10 watts. If I turn off the display then wattage drops to 4-4.5 watts. If I reduce the brightness on the display backlight it drops dramatically as well. So both display and Pi contribute about the same share in power consumption. On average, I see their combined draw of 0.75 amps at 12v (about 9 watts). This is with 2 chained USB hubs and long wires (HDMI/USB/power) between a computer and cockpit display and hub, AIS (dAISy), RTL-SDR (plugged in but idling), Flashdrive SSD, FTDI (connected only into USB).
-
10 watts on 80 amp-hours 12v battery (in my understanding they are rated for that before drop below 10v, so it is all usable amps) will give you approximately 80*12/10=96 hours of chartplotting at max brightness. C’est la vie. That’s why you need solar panels on your sailboat.
-
While experimenting with power usage and connecting/disconnecting various USB devices and Argonaut M7 to different USB ports and hubs (USB2, USB3) Argonaut M7 became unresponsive. Even its own power on/off button didn’t work. I had to perform a factory reset of it.
-
The reset procedure as per manufacturer requires to hold power button on Argonaut M7 display immediately after full power off/on cycle. On my boat it’s really a two-man job then. There is no power switch in cockpit because the M7 display has its own and the other switch to power it on is below deck. It seems they didn’t think about single-handed sailors when they came up with this reset procedure design.
-
Turns out if I turn off 12v supply into cockpit it does turn-off the display, but it’s LED status light still stays on. So it still gets some power via USB (not much per amp meter). Apparently this is the default behavior of most self powered USB hubs to draw from the host when they lose own power supply. There are some hubs which have this behavior configured by a jumper on their PCB, but the default is to power itself from the host.
-
I did test fiber-optic USB data cable leading to the cockpit as well. It does have regular wires for power as well, so it behaves exactly the same. The cable is much thinner, so you can have a smaller hole is your boat in a cockpit deck.
-
Reboot doesn’t work. It just shuts down Pi. There are many reports that pi4 doesn’t reboot with USB self powered hubs if they are not powered off before the reboot and backfeed power into Pi. So currently the reboot procedures are shutdown and then power cycle the boat computer.
-
I’ve tried installing rpi-backlight, but it seems Argonaut M7 monitor doesn’t support software backlight control (at least it doesn’t work under Linux) So the only way to control backlight is via Argonaut’s own control on the side of the monitor.
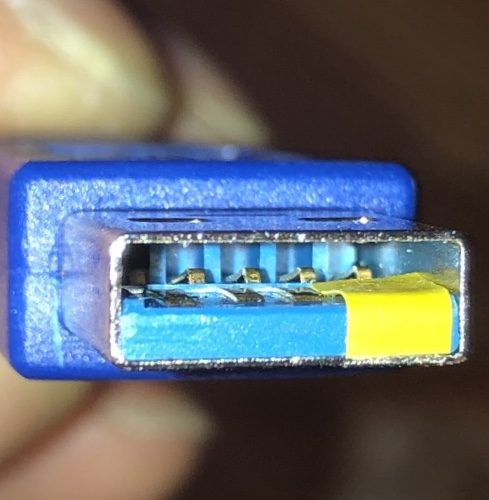
| After long testing and research I’ve found a solution for UBS hub power issues. There are two. The first one is that the hub in cockpit powers the cockpit via USB hub even if I turn the cockpit 12v switch off. The second one is that Pi doesn’t reboot as it stays powered from the hubs. The simplest way to solve it was to tape USB +5v pin inside female part of USB type A plugs with the electrical tape (see pic). There are two places because there are 2 self powered hubs need to be isolated. The procedure is actually makes the whole set up even safer. You do not want extra circuits running from below deck into the cockpit when cockpit switch is 'off'. Power savings when you turn cockpit off are impressive. Pi takes less than 0.2 amps @ 12v with no HDMI video connected (only USB connected sensors and flash drive stick). For the cockpit USB 3.0 hub I got the shortest USB 3.0 type A male to female cable and put tape in it. And for the computer’s hub I’ve just taped it inside USB 3.0 type-A male part connecting the hub. This is how it was done: |
Temperature readings stay under 56 C.
pi@raspberrypi:~ $ vcgencmd measure_temp
temp=48.0'C
Check your USB set up
pi@openplotter:~ $ sudo apt-get -y install uhubctl
pi@openplotter:~ $ sudo uhubctl
Current status for hub 2-1.4 [05e3:0612 GenesysLogic USB3.0 Hub, USB 3.00, 4 ports]
  Port 1: 02a0 power 5gbps Rx.Detect
  Port 2: 02a0 power 5gbps Rx.Detect
  Port 3: 02f0 power 5gbps Polling reset
  Port 4: 02a0 power 5gbps Rx.Detect
Current status for hub 2-1 [05e3:0612 GenesysLogic USB3.0 Hub, USB 3.00, 4 ports]
  Port 1: 0203 power 5gbps U0 enable connect [090c:1000 Samsung Flash Drive FIT 0353019060002728]
  Port 2: 02a0 power 5gbps Rx.Detect
  Port 3: 02a0 power 5gbps Rx.Detect
  Port 4: 0263 power 5gbps U3 enable connect [05e3:0612 GenesysLogic USB3.0 Hub, USB 3.00, 4 ports]
Current status for hub 2 [1d6b:0003 Linux 4.19.97-v8+ xhci-hcd xHCI Host Controller 0000:01:00.0, USB 3.00, 4 ports]
  Port 1: 0203 power 5gbps U0 enable connect [05e3:0612 GenesysLogic USB3.0 Hub, USB 3.00, 4 ports]
  Port 2: 02a0 power 5gbps Rx.Detect
  Port 3: 02a0 power 5gbps Rx.Detect
  Port 4: 02a0 power 5gbps Rx.Detect
Current status for hub 1-1.1.4 [05e3:0610 GenesysLogic USB2.0 Hub, USB 2.10, 4 ports]
  Port 1: 0103 power enable connect [0403:6001 FTDI FT232R USB UART AK08UZHY]
  Port 2: 0100 power
  Port 3: 0503 power highspeed enable connect [05e3:0610 GenesysLogic USB2.0 Hub, USB 2.10, 4 ports]
  Port 4: 0103 power enable connect [067b:2303 Prolific Technology Inc. USB-Serial Controller D]
Current status for hub 1-1.1 [05e3:0610 GenesysLogic USB2.0 Hub, USB 2.10, 4 ports]
  Port 1: 0100 power
  Port 2: 0503 power highspeed enable connect [0bda:2838 Realtek RTL2838UHIDIR 00000001]
  Port 3: 0103 power enable connect [16d0:0b03 Adrian Studer dAISy AIS Receiver 76443A5131002900]
  Port 4: 0503 power highspeed enable connect [05e3:0610 GenesysLogic USB2.0 Hub, USB 2.10, 4 ports]
Current status for hub 1 [1d6b:0002 Linux 4.19.97-v8+ xhci-hcd xHCI Host Controller 0000:01:00.0, USB 2.00, 1 ports]
  Port 1: 0503 power highspeed enable connect [2109:3431 USB2.0 Hub, USB 2.10, 4 ports]
Check SSD Drive transfer speed
pi@openplotter:~ $ sudo apt-get -y install hdparm
pi@openplotter:~ $ sudo hdparm -Tt /dev/sda

/dev/sda:
 Timing cached reads:   1948 MB in  2.00 seconds = 974.71 MB/sec
 Timing buffered disk reads: 628 MB in  3.00 seconds = 209.28 MB/sec
Assembly Activities
Make sure you use correct tools for:
-
Soldering
-
Screwing
1.2. Cockpit Display and Chartplotter

| Item | Description | Cost | Source | ||||
|---|---|---|---|---|---|---|---|
NavPod |
NavPod GP2300 |
$225, Shipping: $9 |
anchorexpress.com |
||||
5V/6V 3A Switch-mode UBEC, Max 5A Lowest RF |
$3 |
Amazon |
|||||
Waterproof touch screen |
Argonaut M7-gen2 + Water Sealed back
|
$518 |
argonautcomputer.com |
||||
DC Wire to cockpit |
Marine Wire |
$25.50 |
Amazon |
||||
Female to Female HDMI adapter |
|
$4.75 |
Amazon |
||||
Standard Horizon MMB-97 Flush Mount Kit for Explorer GX1600/GX1700 |
$16.50 |
Amazon |
|||||
USBGear 4-Port USB 3.0 Mountable Charging and 5Gbps Data Hub |
|
$29 |
Amazon |
||||
USB 3.0 Extension Cable 20ft, Hftywy USB Type A Male to Female Extension Cord 5Gbps Data Transfer, Red |
|
$13 |
Amazon |
||||
Long HDMI Cable |
Postta HDMI Cable(25 Feet) Ultra HDMI 2.0V Cable with 2 Piece Cable Ties+2 Piece HDMI Adapters Support 4K 2160P,1080P,3D,Audio Return and Ethernet, Blue
|
$14 |
Amazon |
||||
Air Mouse and wireless keyboard and touchpad |
H18+ 2.4Ghz Mini Wireless Keyboard Touchpad Combo with 3 Level Backlit Rechargeable Full Screen Mouse Remote Control for Android TV Box, Projector, IPTV, HTPC, PC, Laptop |
$20 |
Amazon |
||||
Waterproof keyboard with backlight and pointer (optional) |
WetKeys Professional-grade Mid-Size Rigid Silicone Waterproof Keyboard with Pointing-Device, Backlight and ON-OFF Switch (USB) (Black), KBWKRC89PB-BK |
$99 |
wetkeys.com |
||||
AcuRite 02020 Portable Lightning Detector (Optional) |
|
$30 |
Amazon |
||||
12v to 1.5v DC Converter (Optional - For AcuRite Lightning Detector) |
AMS1117 1.5V (4.75-12V) output 1.5V Step Down Power Supply Module AMS1117-1.5V |
$1 |
AliExpress |
||||
In-Line Marine Fuse Holder |
In-Line Marine Fuse Holder 6x30 mm |
$7 |
Amazon |
||||
SSD Flash Drive |
Samsung Fit Plus USB 3.1 Flash Drive 128GB |
$30 |
Amazon |
||||
Wireless Phone Charger and Holder (Optional: I think I can DIY much cheaper) |
ScanStrut ROKK Wireless - Active (SC-CW-04E) 12v / 24v Waterproof Wireless Phone Charging Mount |
$97.60 |
hodgesmarine.com |
1.2.1. Other display options for a cockpit
-
Shenzhen United Touch Technology Co. http://www.unitedtouch.cn/
Model: WT070B24, Brand: WinTouch, Capacitive Touch Screen 7 inch, (600 nits or custom higher), IP65, 1024x600, Cost under $100
-
Shenzhen Shinho Electronic Technology Co. https://www.sihovision.com/
Model: SL07W, Brand Sihovision, Capacitive Touch Screen 7 inch, (1000 nits), IP65, 1024x600, Cost under $300
1.3. Boat Gateway Box
The second box is a boat LTE/Wi-Fi/IoT gateway device, and it is an extension to the boat computer. In case if you do not need HDMI display you might need only the boat gateway because the boat gateway runs its own KPlex server under OpenWrt Linux. The boat gateway has M5Stack ESP32 microcontroller and is capable to connect to NMEA (if you customize if a bit further). The boat gateway is connected to the boat computer via Ethernet. The boat gateway uses the same type of enclosure as the boat computer.
Features of the boat gateway box:
-
Wi-Fi Gateway (connecting to marina’s Wi-Fi and on-shore Wi-Fi hot-spots via a long range Wi-Fi antenna)
-
LTE / 4G Gateway (providing a boat with Internet and voice access within the zone of reception of a cellular network)
-
VPN gateway
-
Ethernet Hub
-
Network Access Storage, Network back-up
-
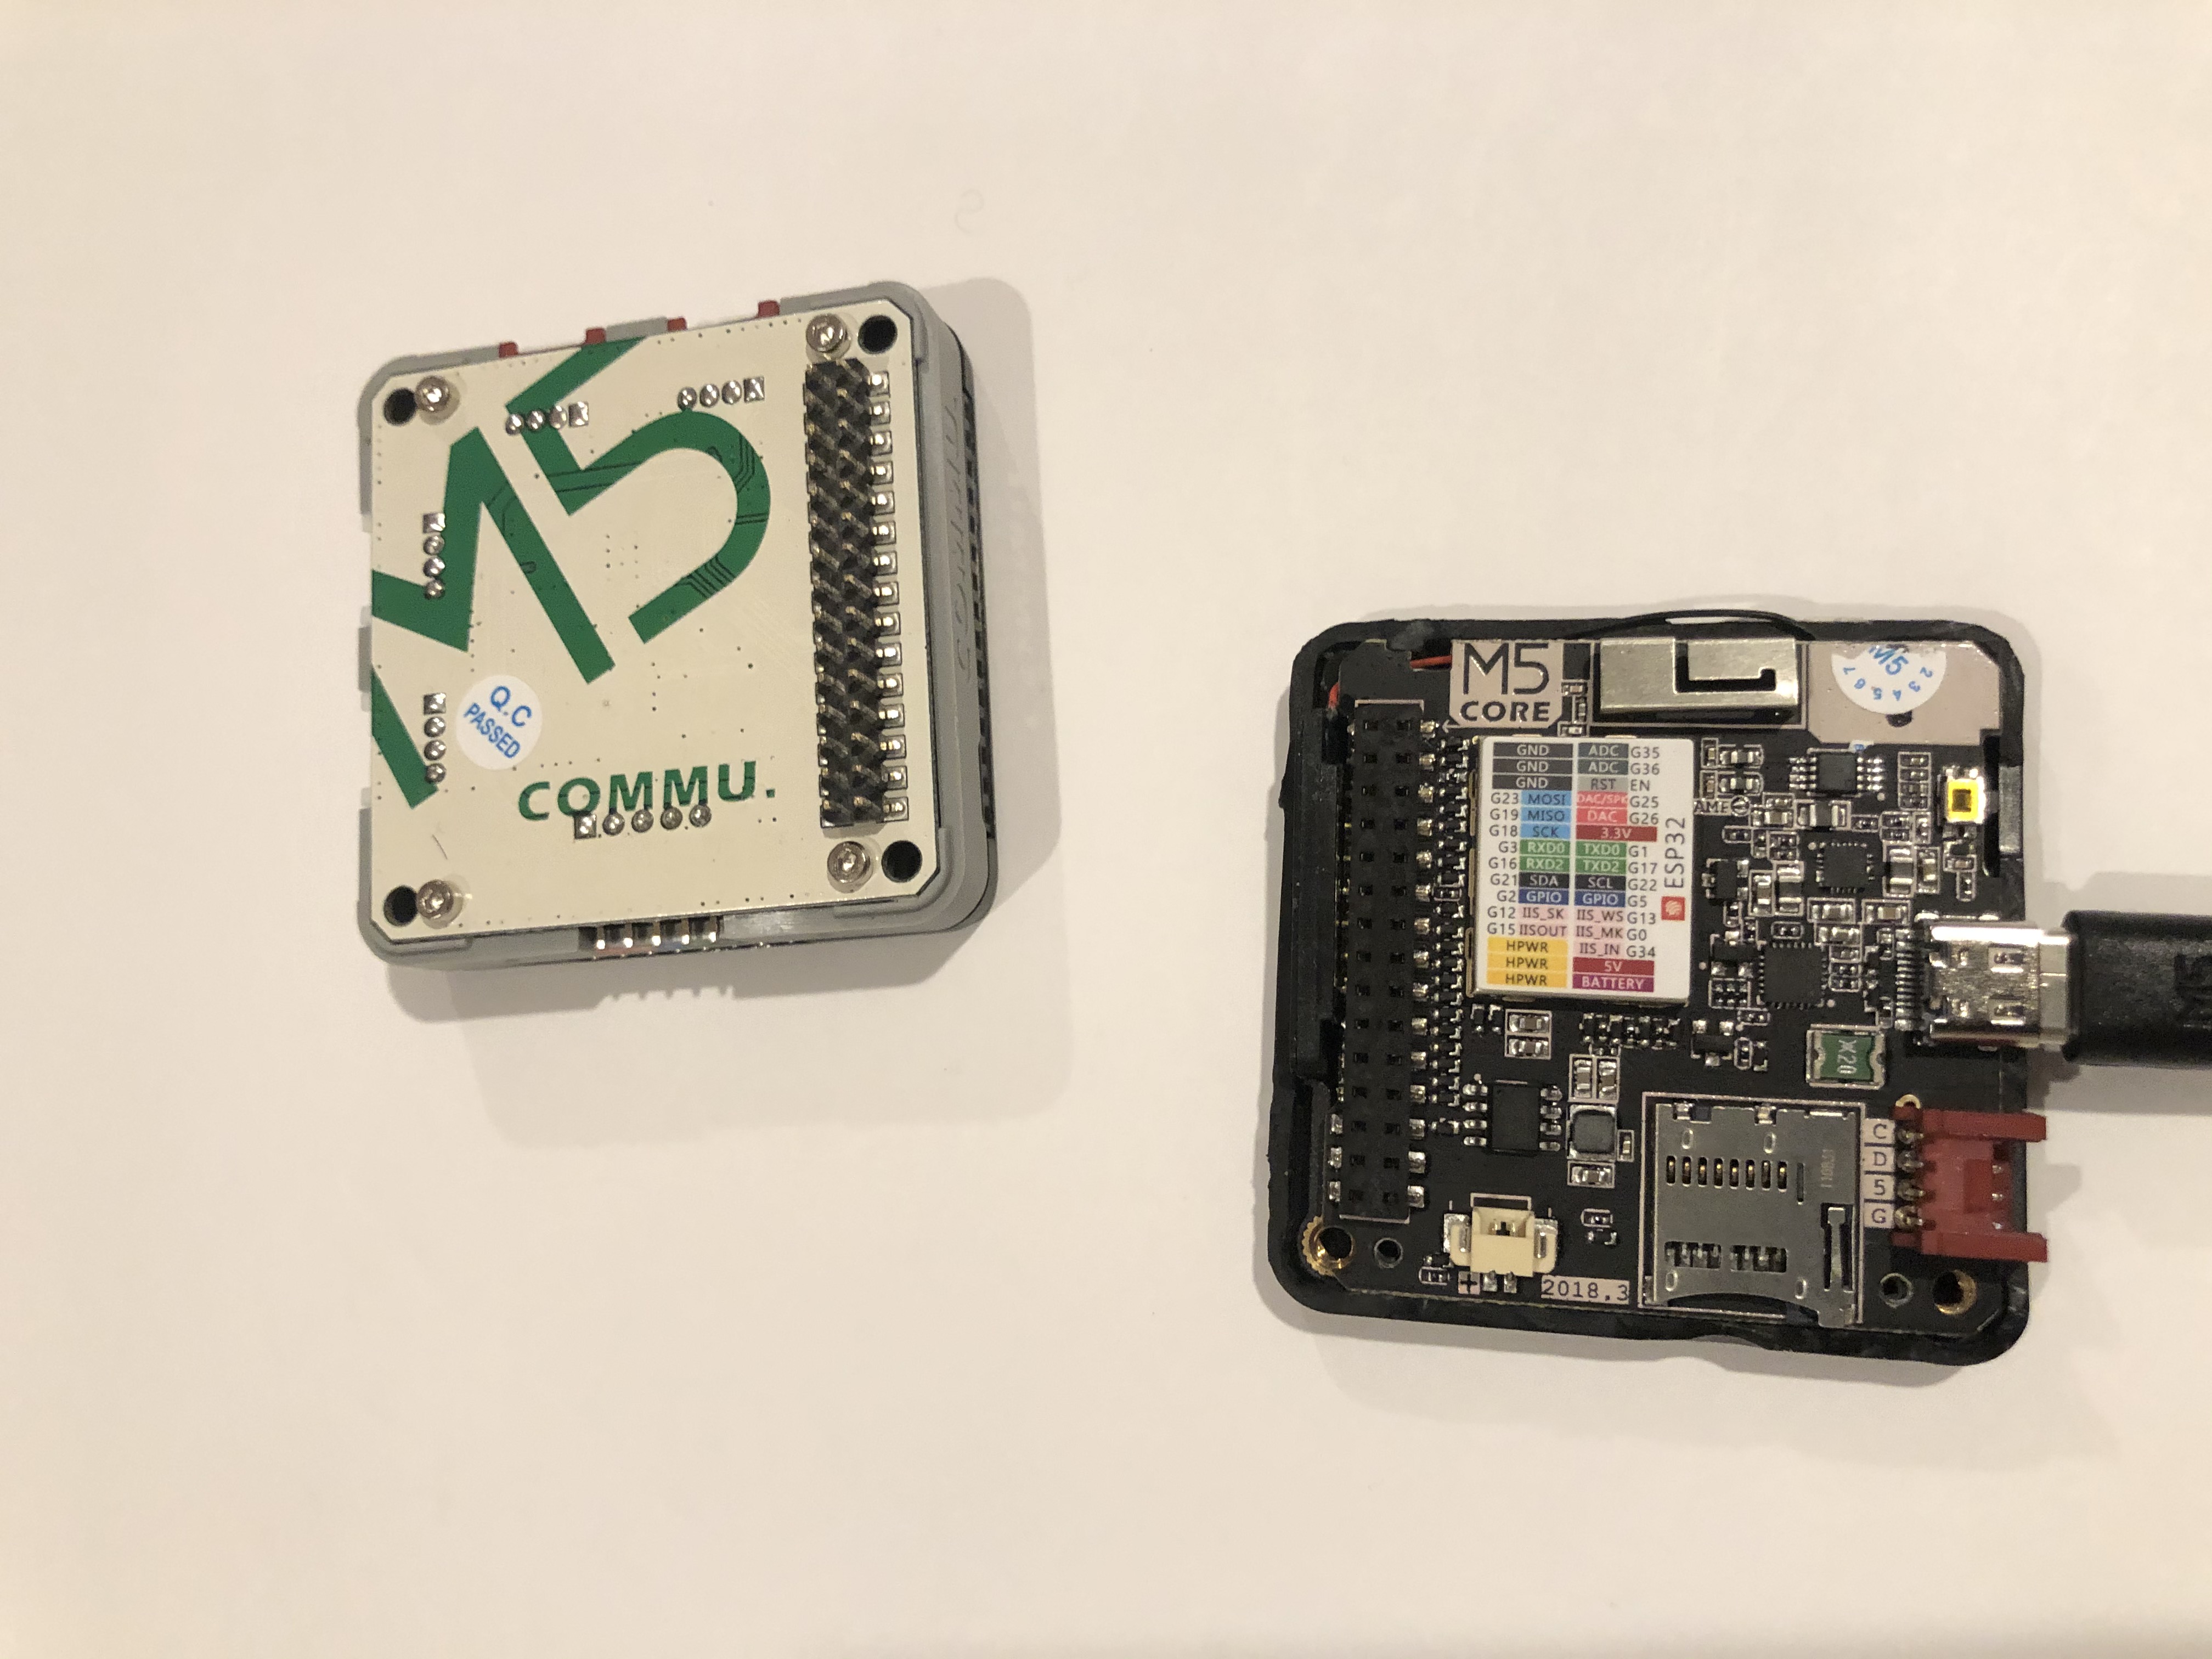
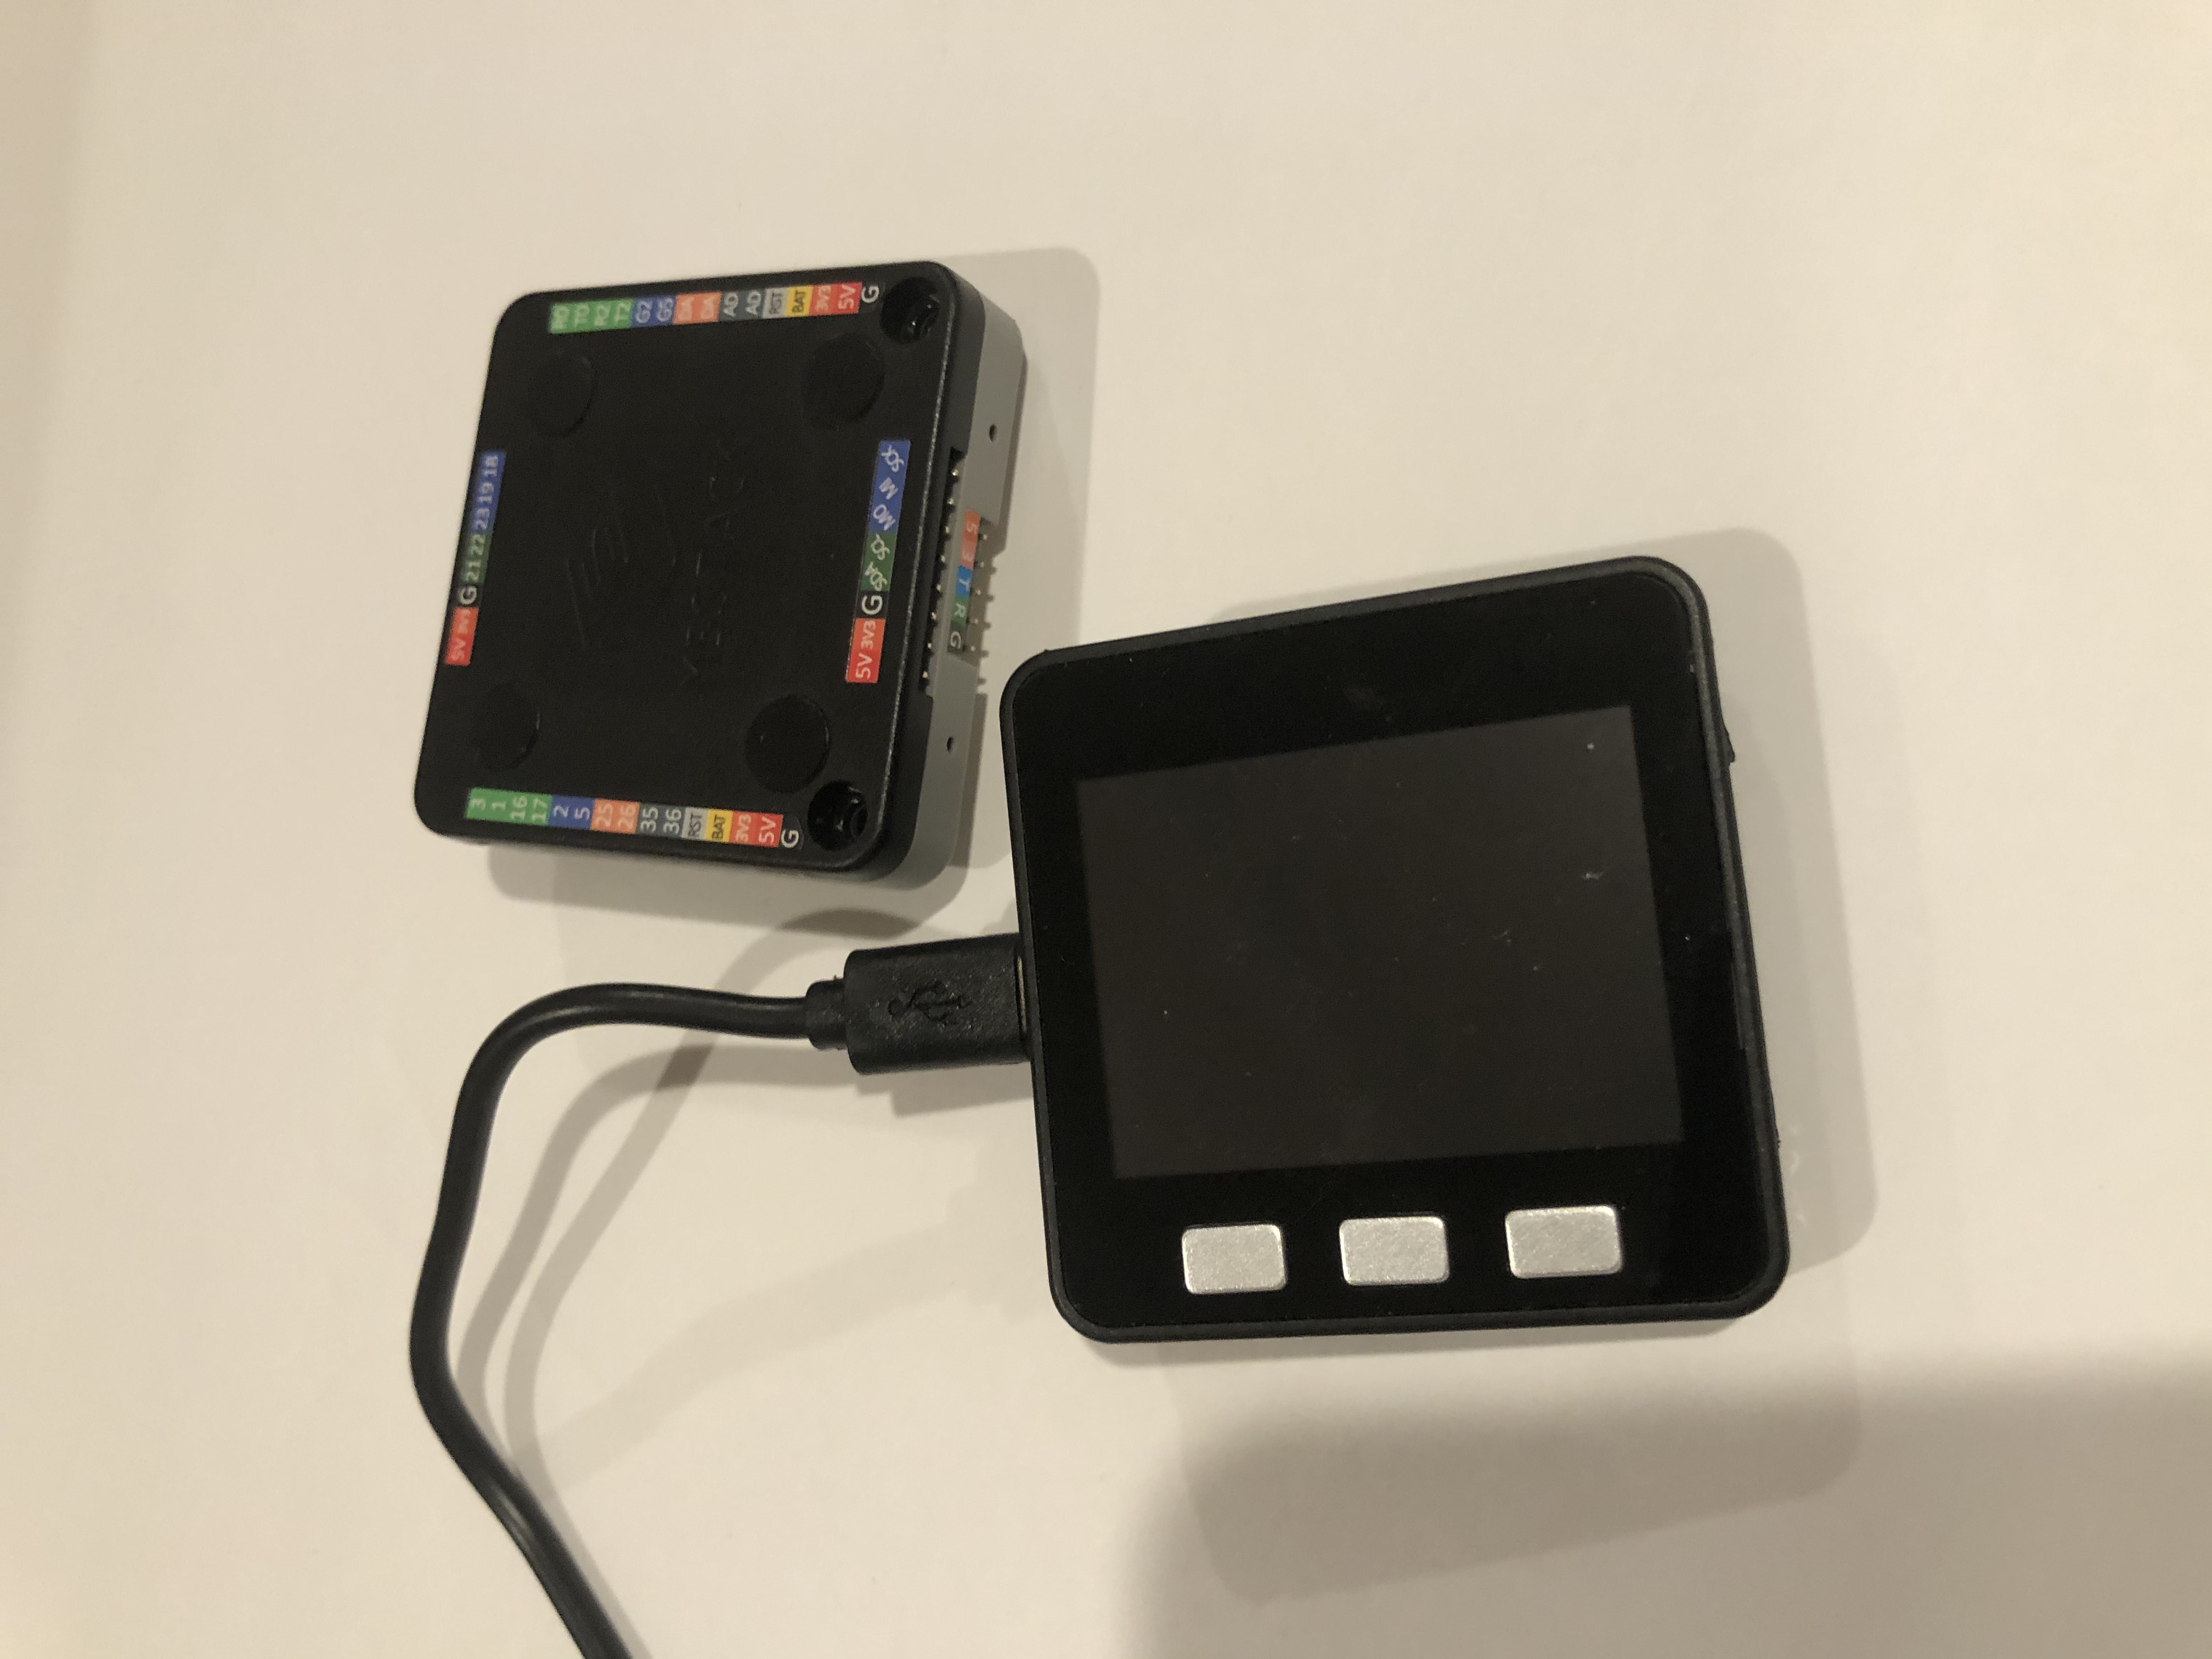
M5Stack ESP32 Controller and 3-Buttons LCD (panel mounted, numerous optional M2Stack add-ons)
-
KPlex server running on router’s OpenWrt Linux
-
GPS NMEA 0183 talker via KPlex
-
IoT gateway with MQTT
-
Voltage and Amperage Display to monitor power consumption
-
Any other additional sensors and devices can be added via M5Stack. M5Stack is programmable microcontroller without an operating system but very capable of running complex programs
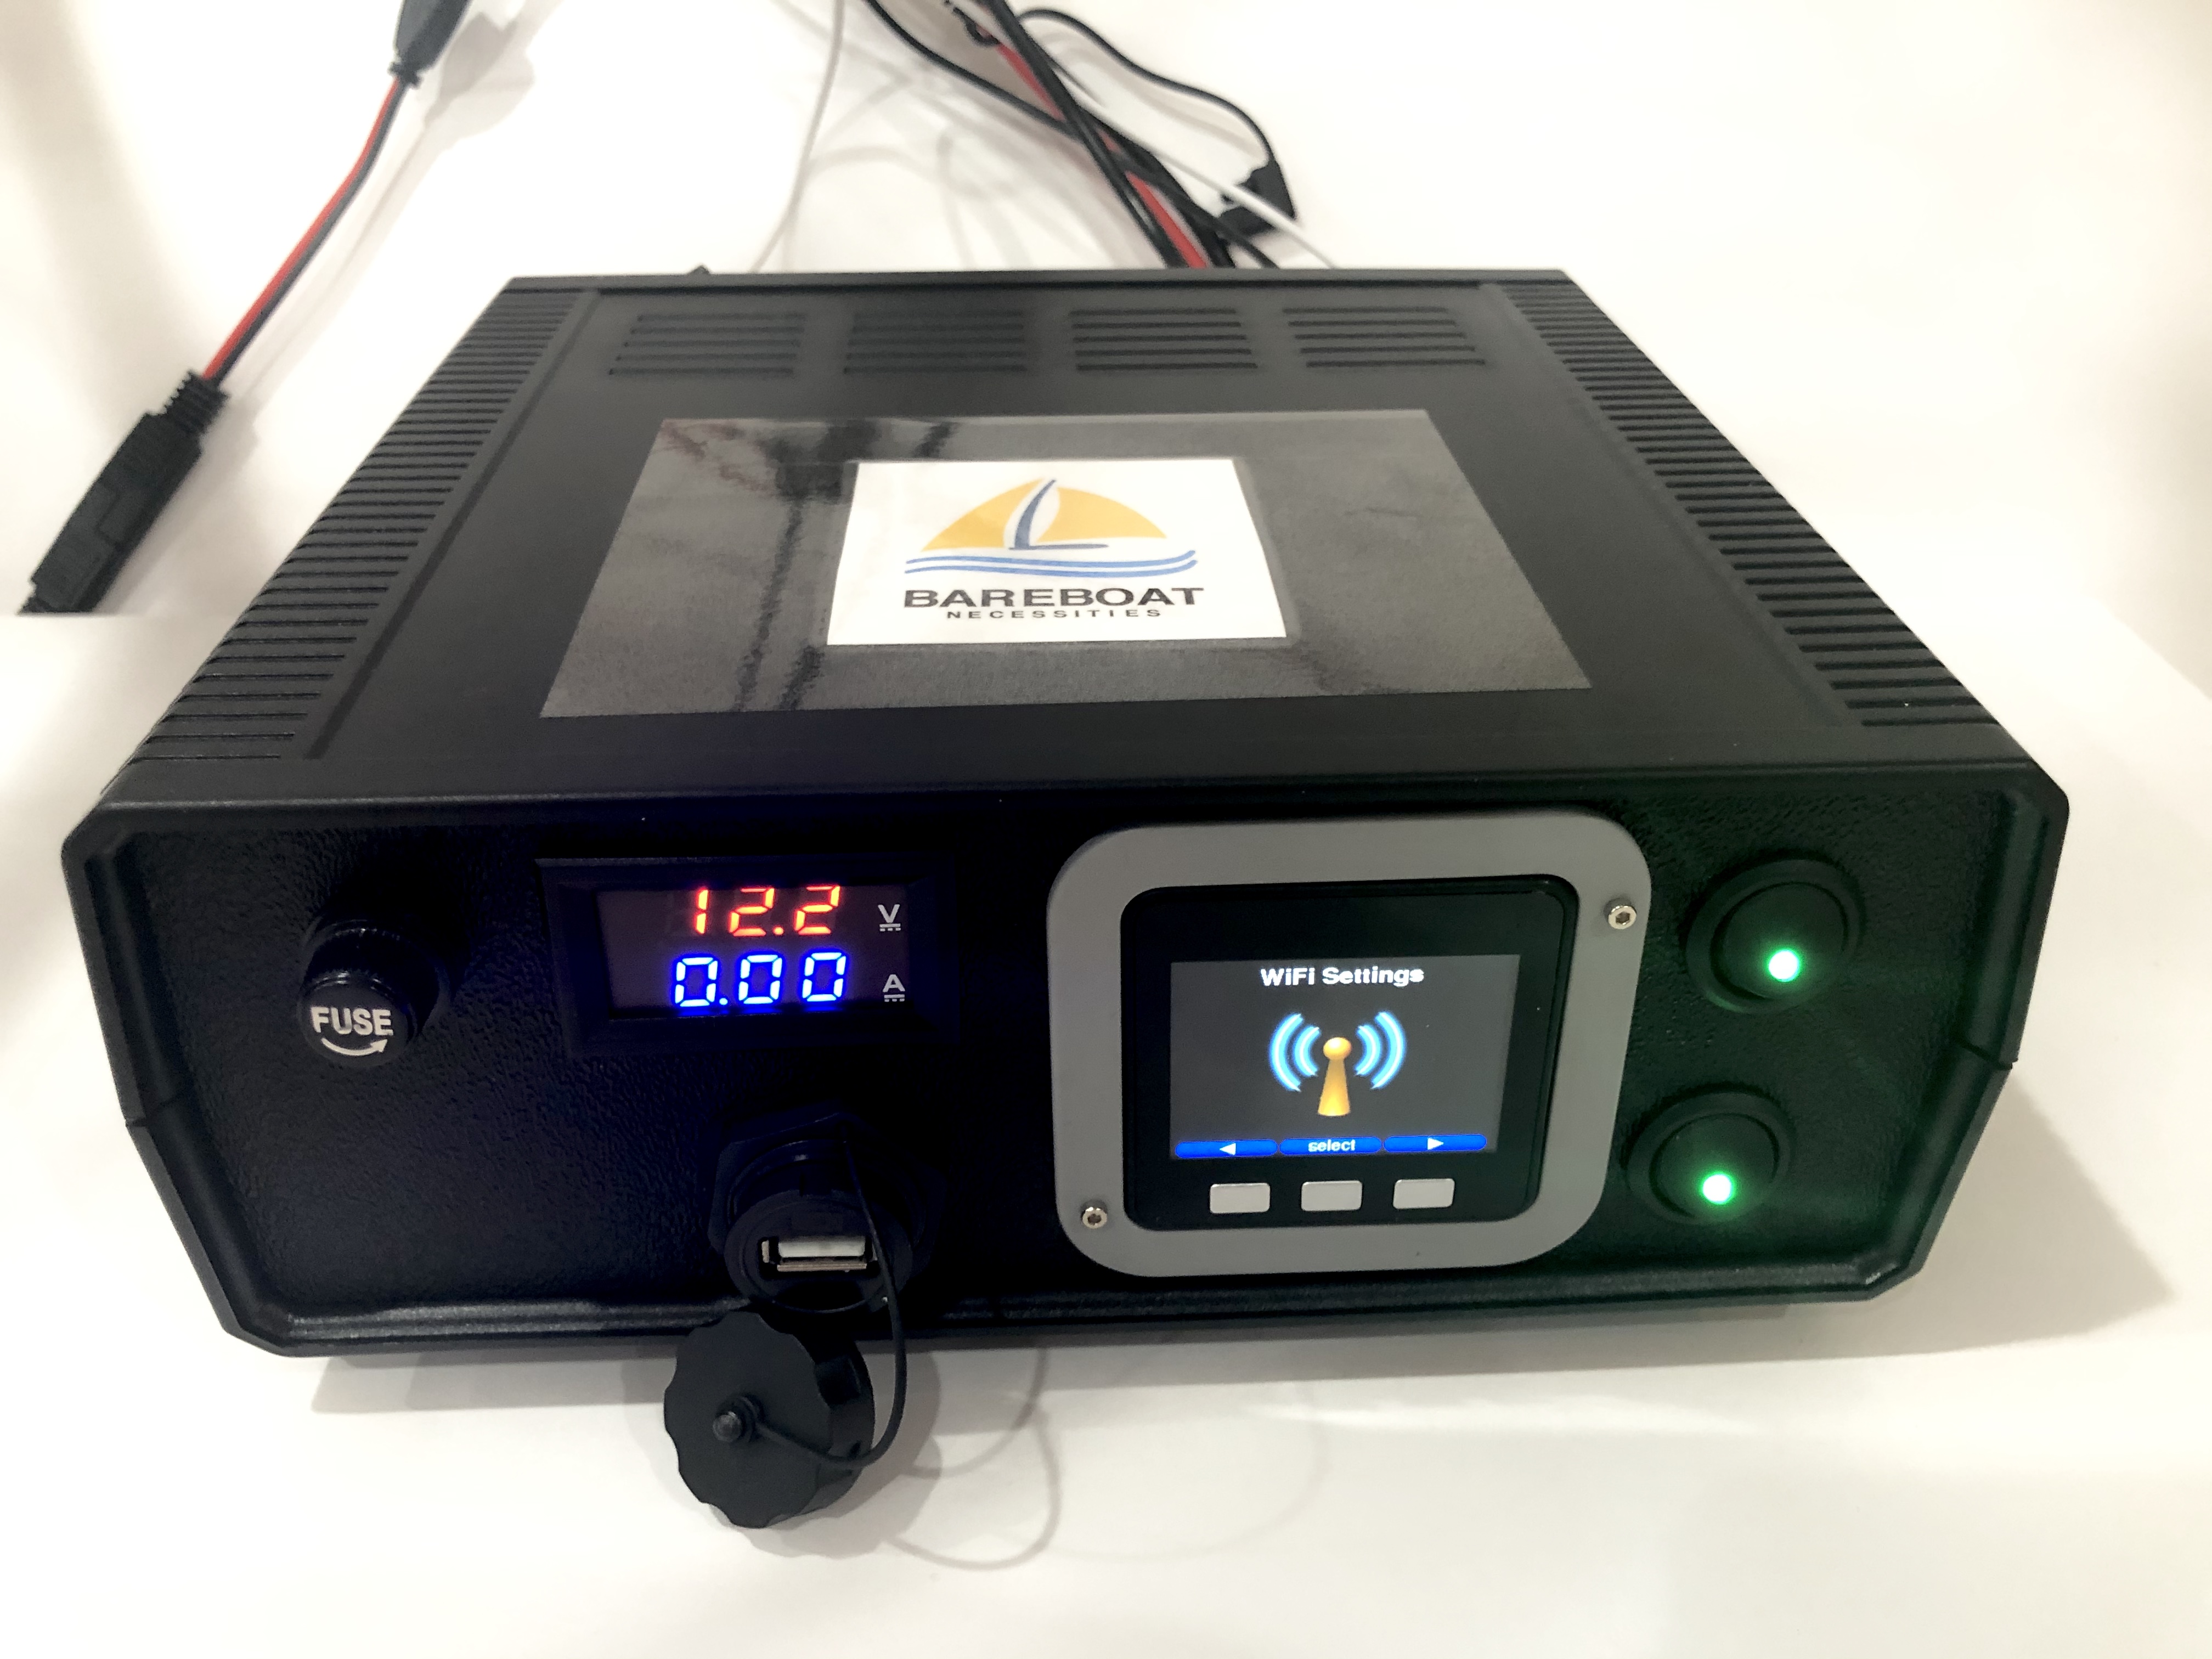
1.3.1. Boat Gateway Front Panel
-
Power On/Off Switch
-
Router Power On/Off Switch
-
Panel Mounted Fuse Box
-
Panel Mounted M5Stack LCD with 3 Buttons
-
USB 2.0 Port connected to M5Stack
-
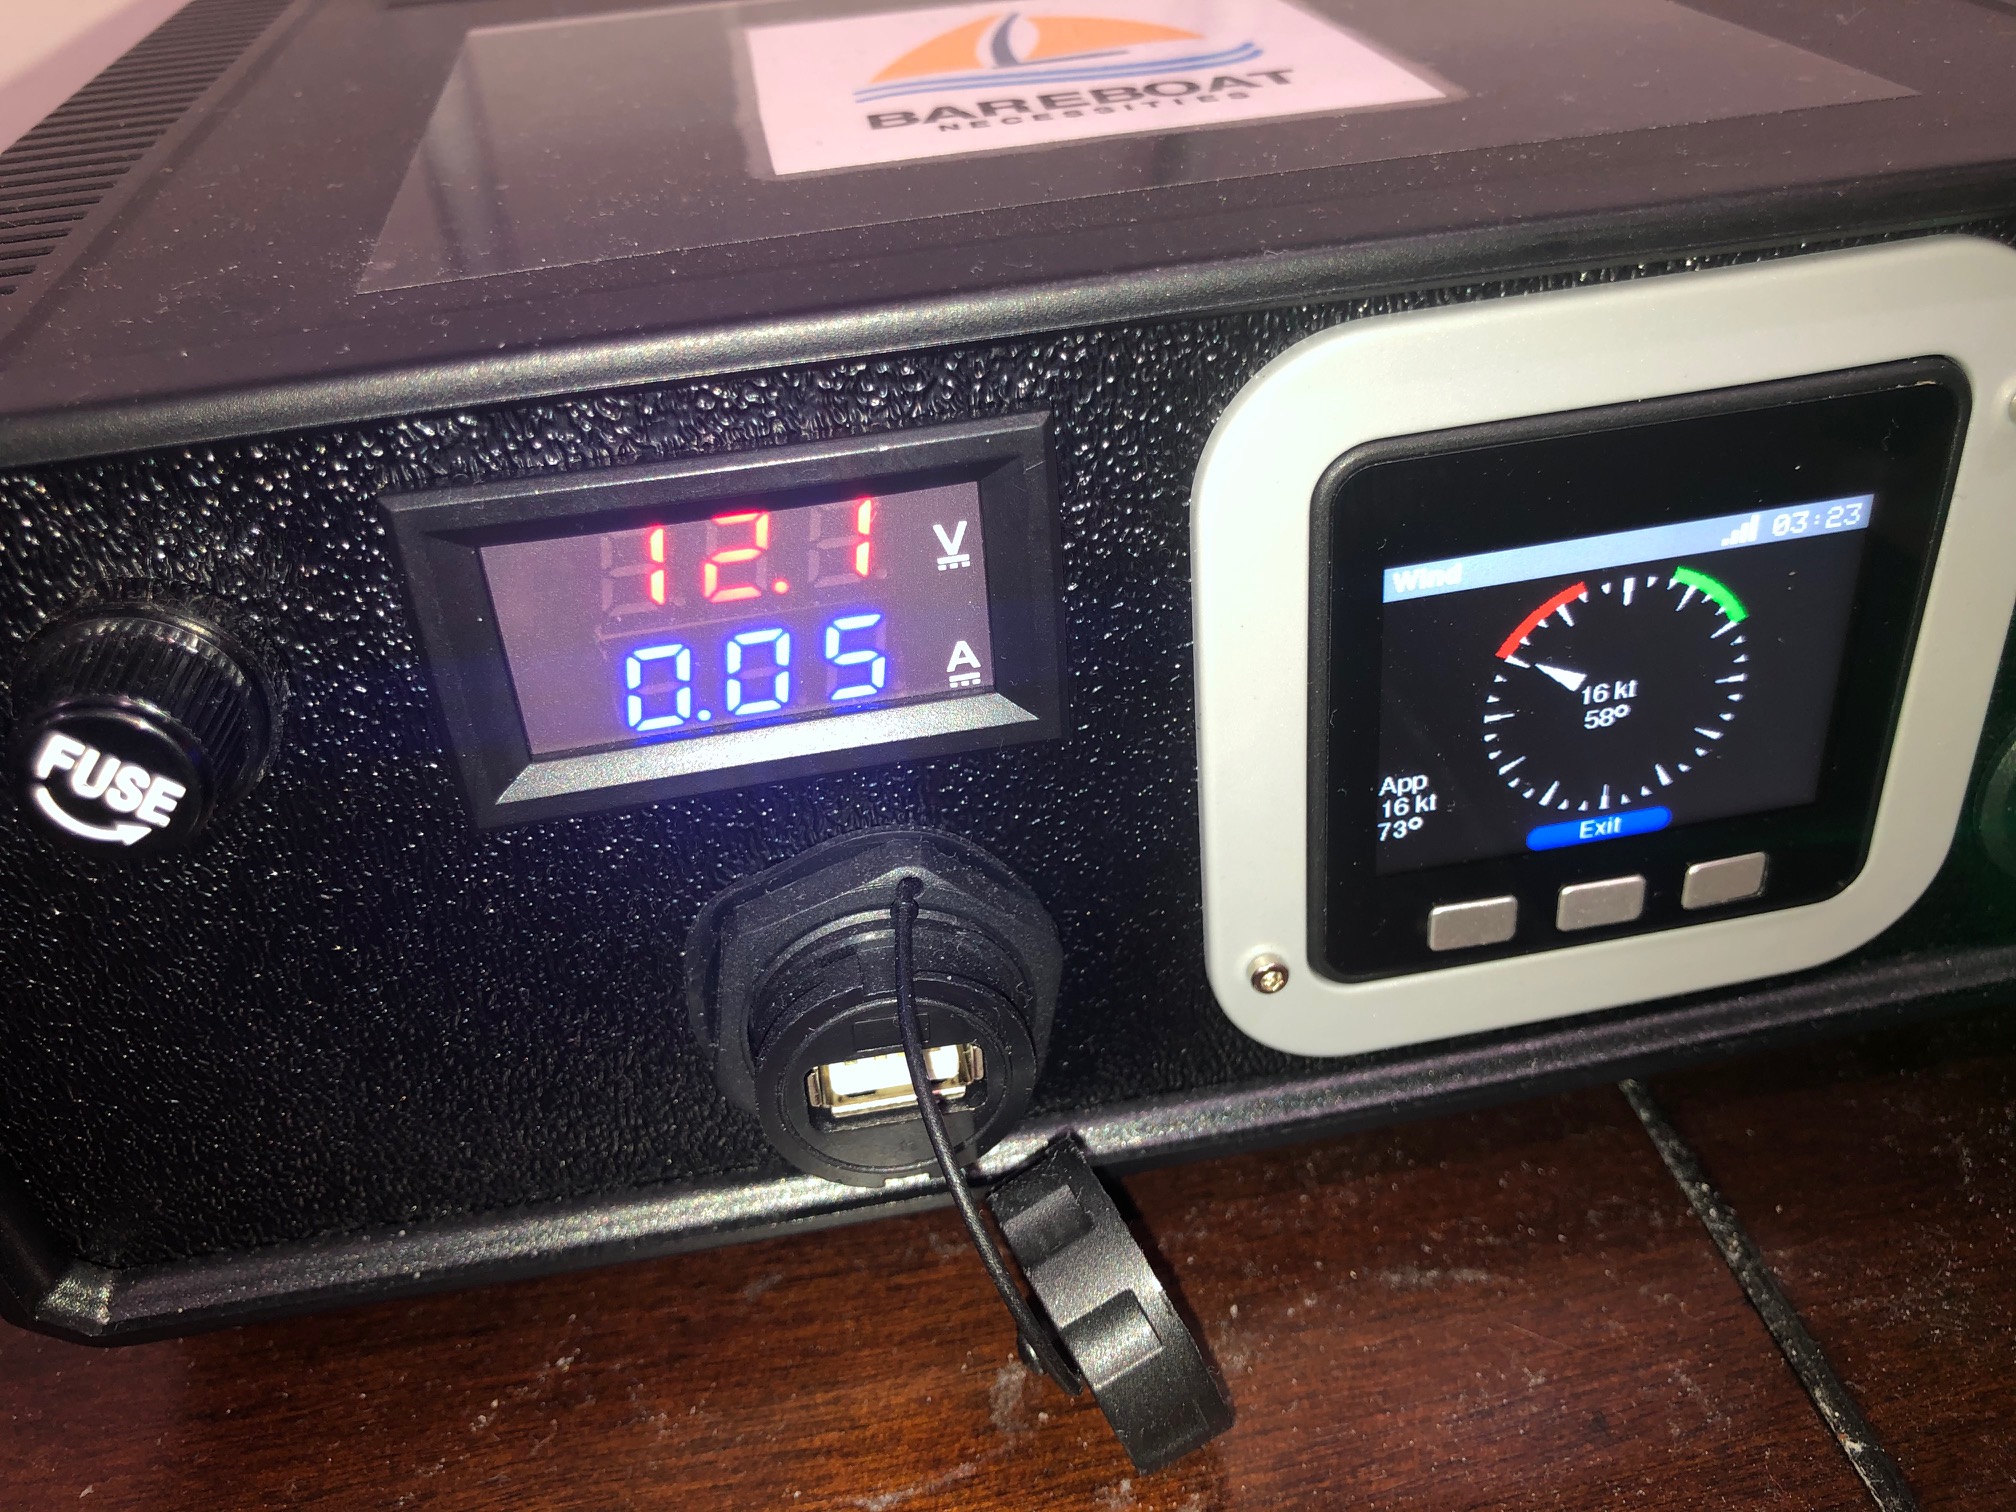
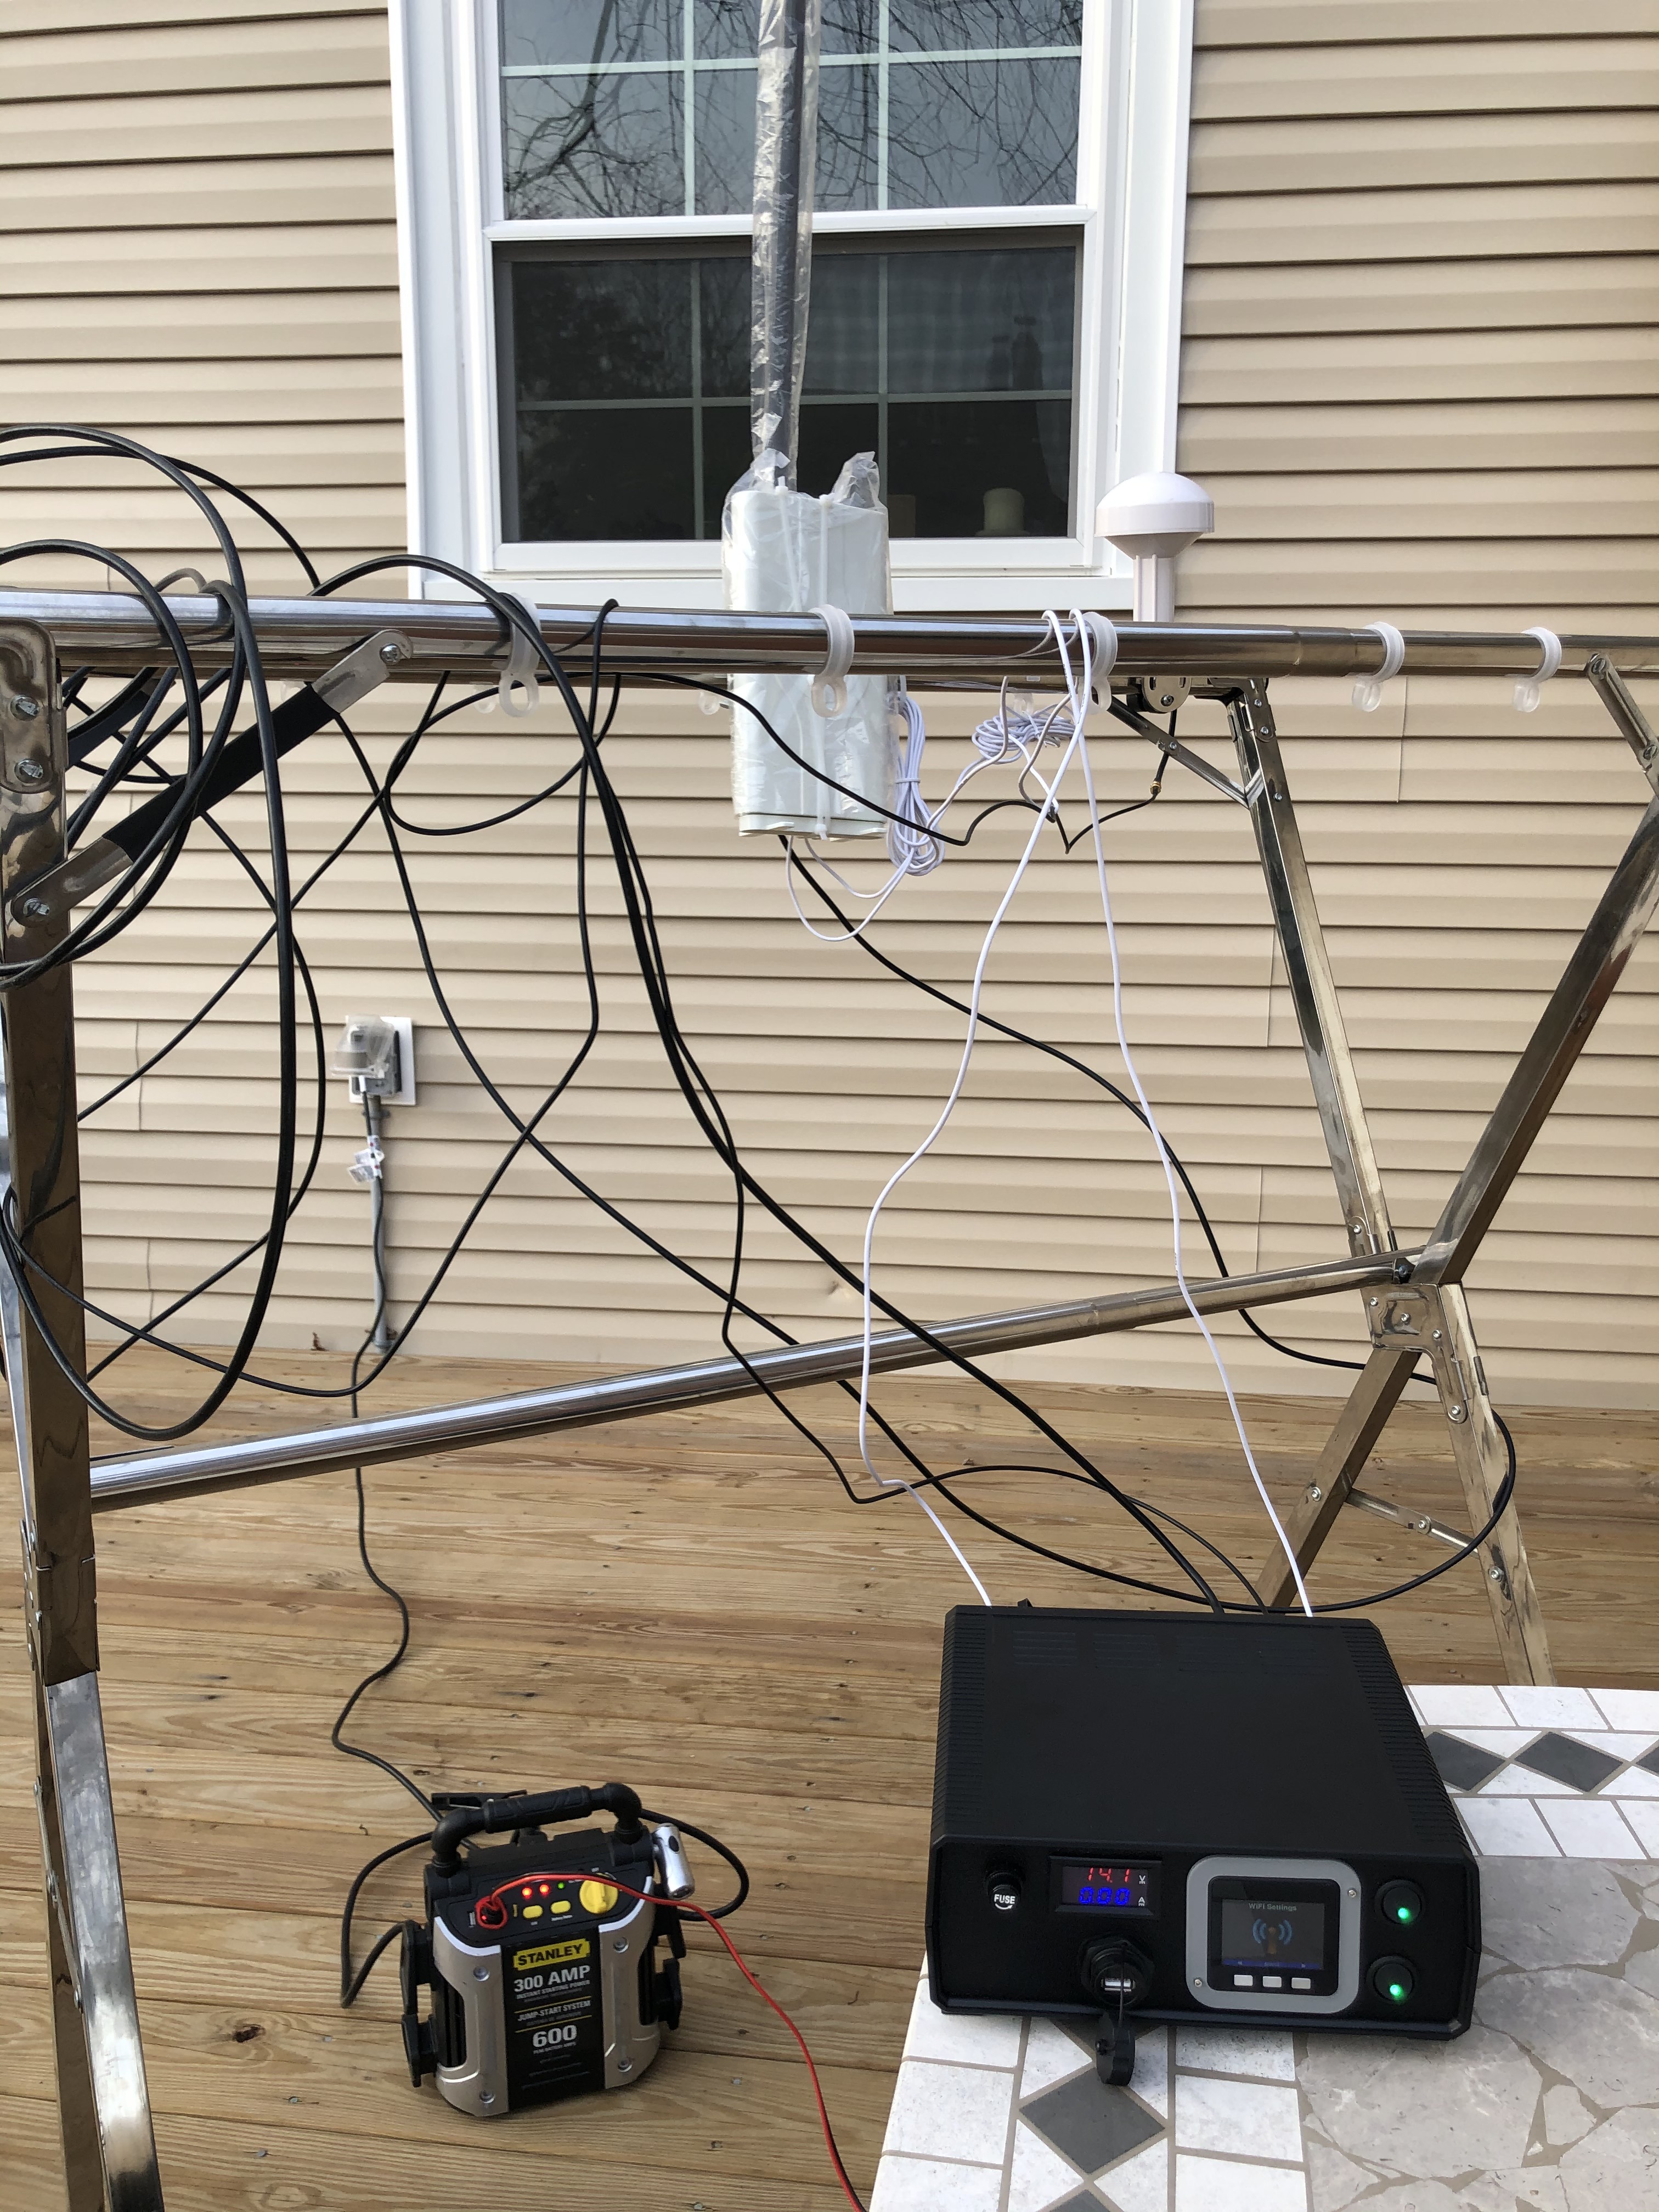
Amp and Volt Meter
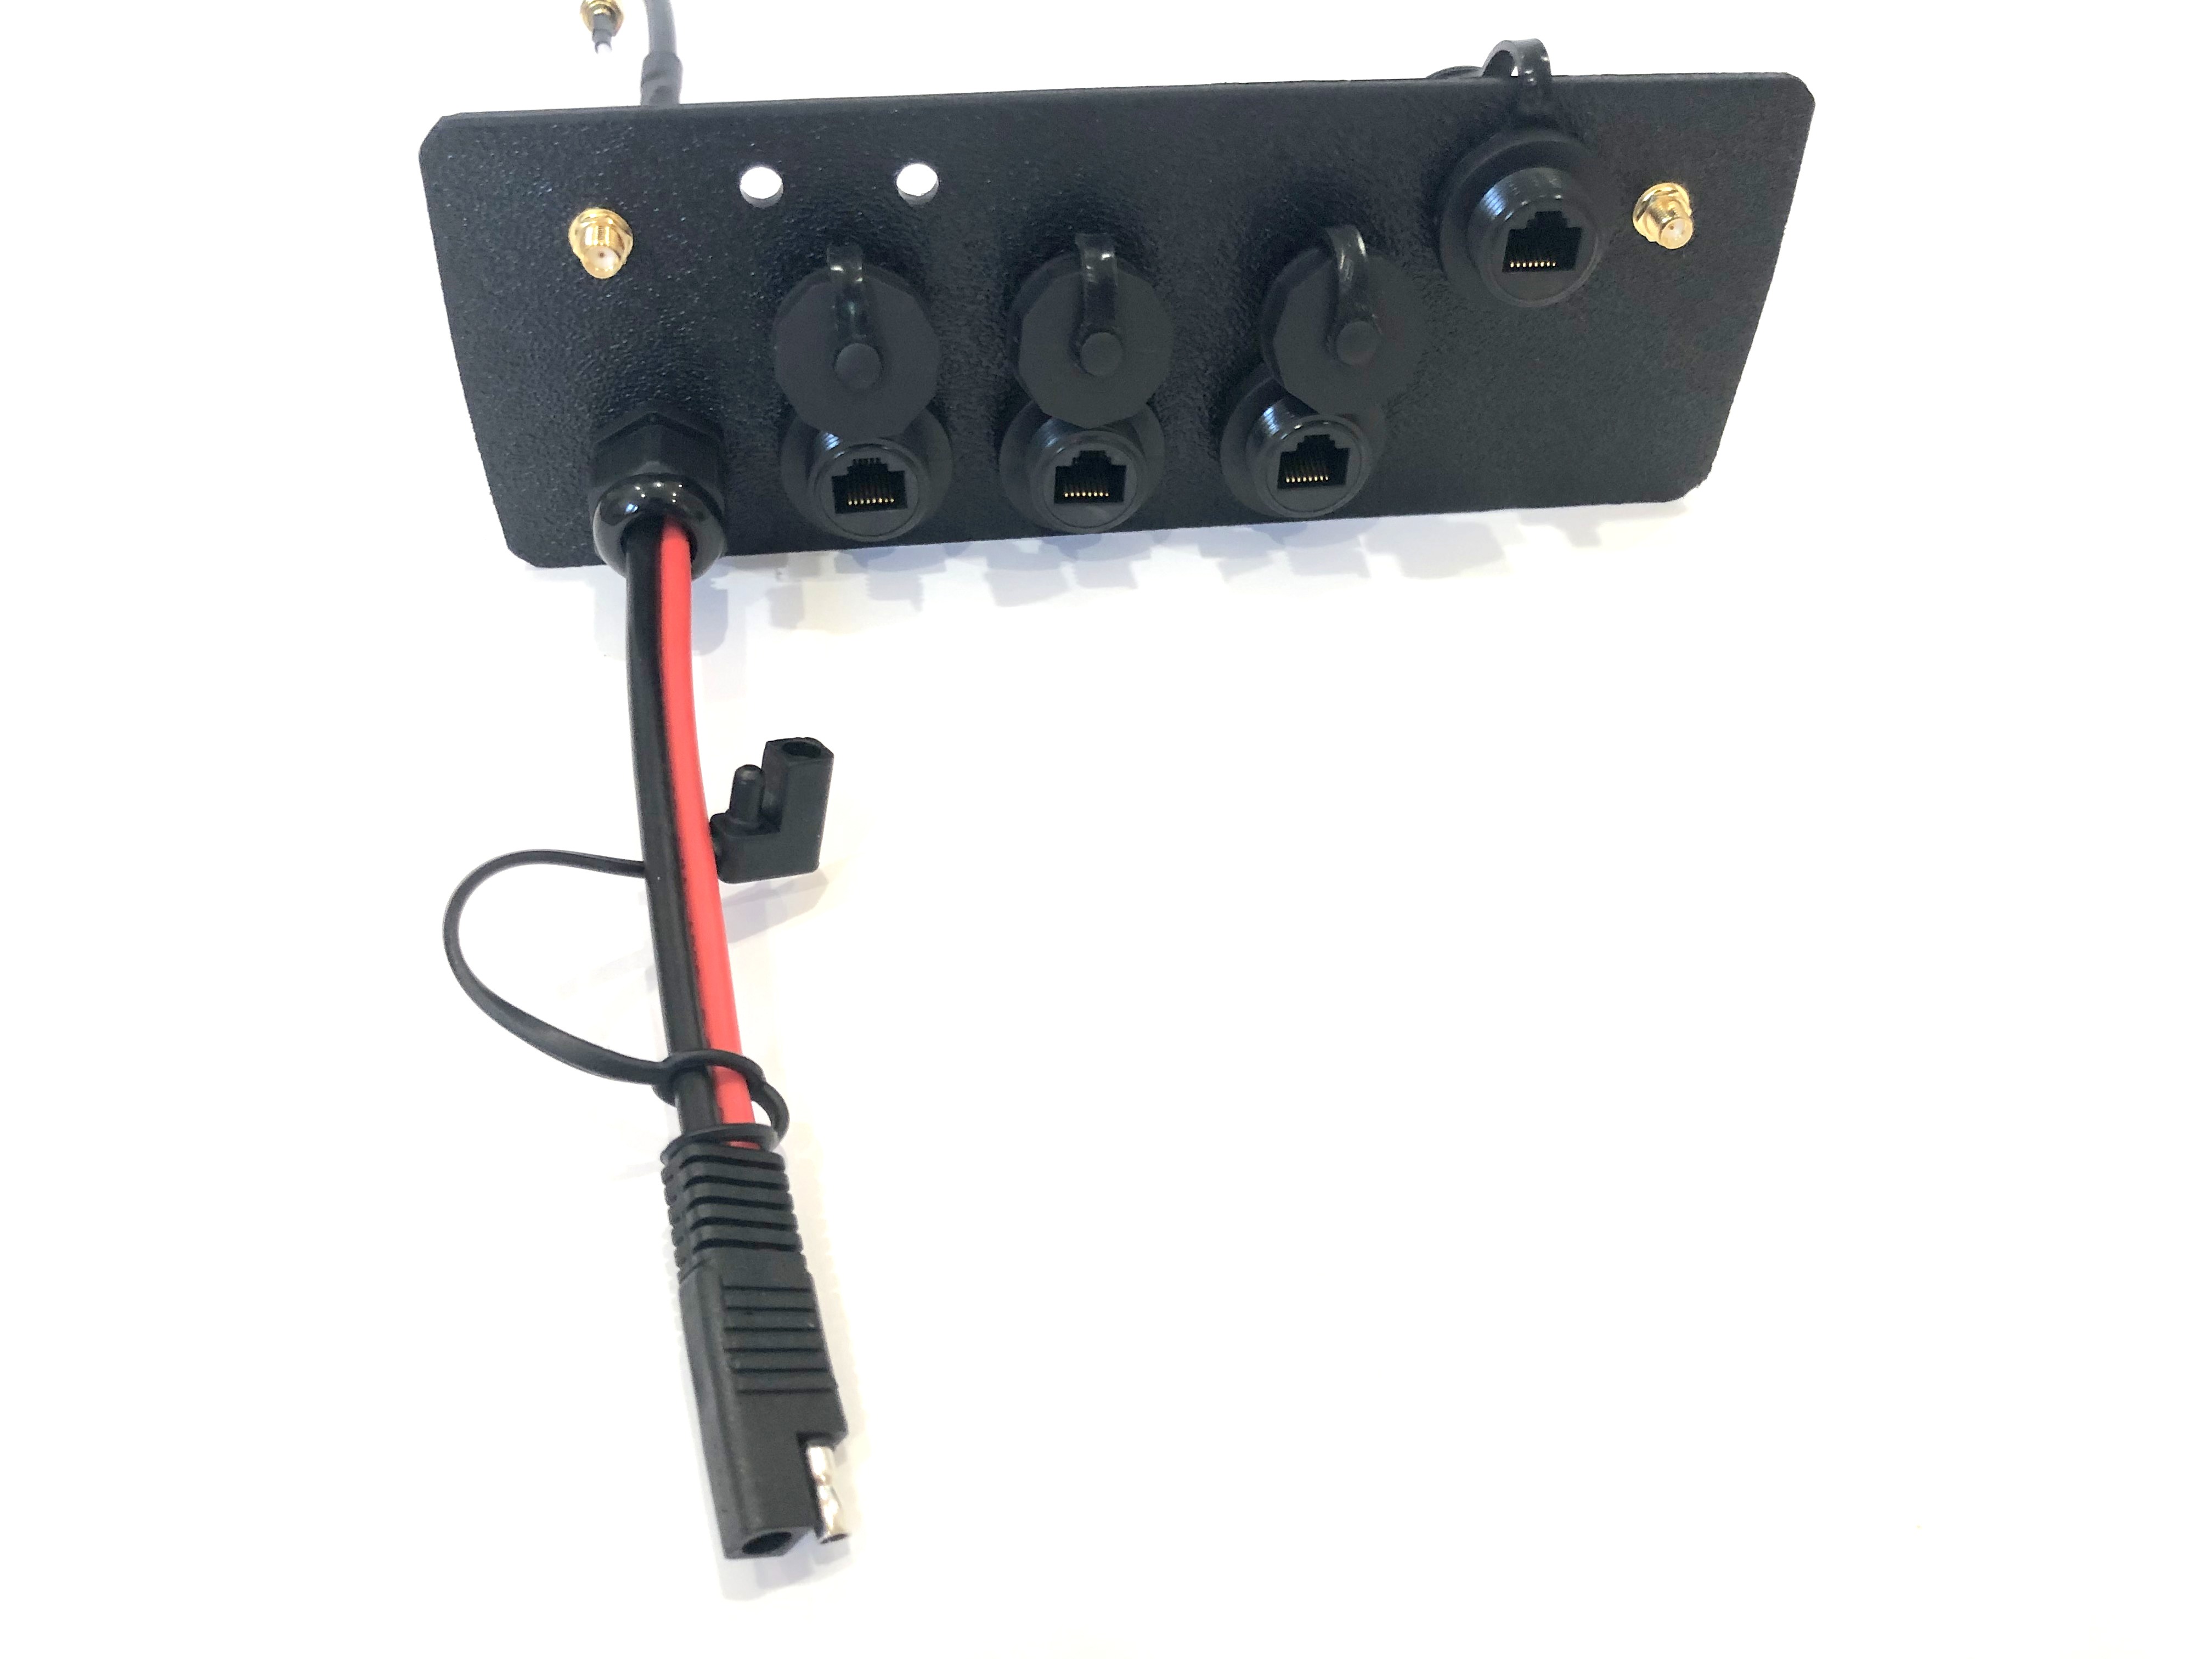
1.3.2. Boat Gateway Back Panel
-
SAE power (red/black, red male) 12V connector with waterproof gland to boat 12v
-
Two SMA coax connectors to external cellular LTE antennas
-
SMA RP coax connector for external long range Wi-Fi antenna
-
SMA coax connector to external active GPS antenna
-
Three Ethernet Ports with water tight caps for LAN
-
Ethernet port with water tight cap for WAN
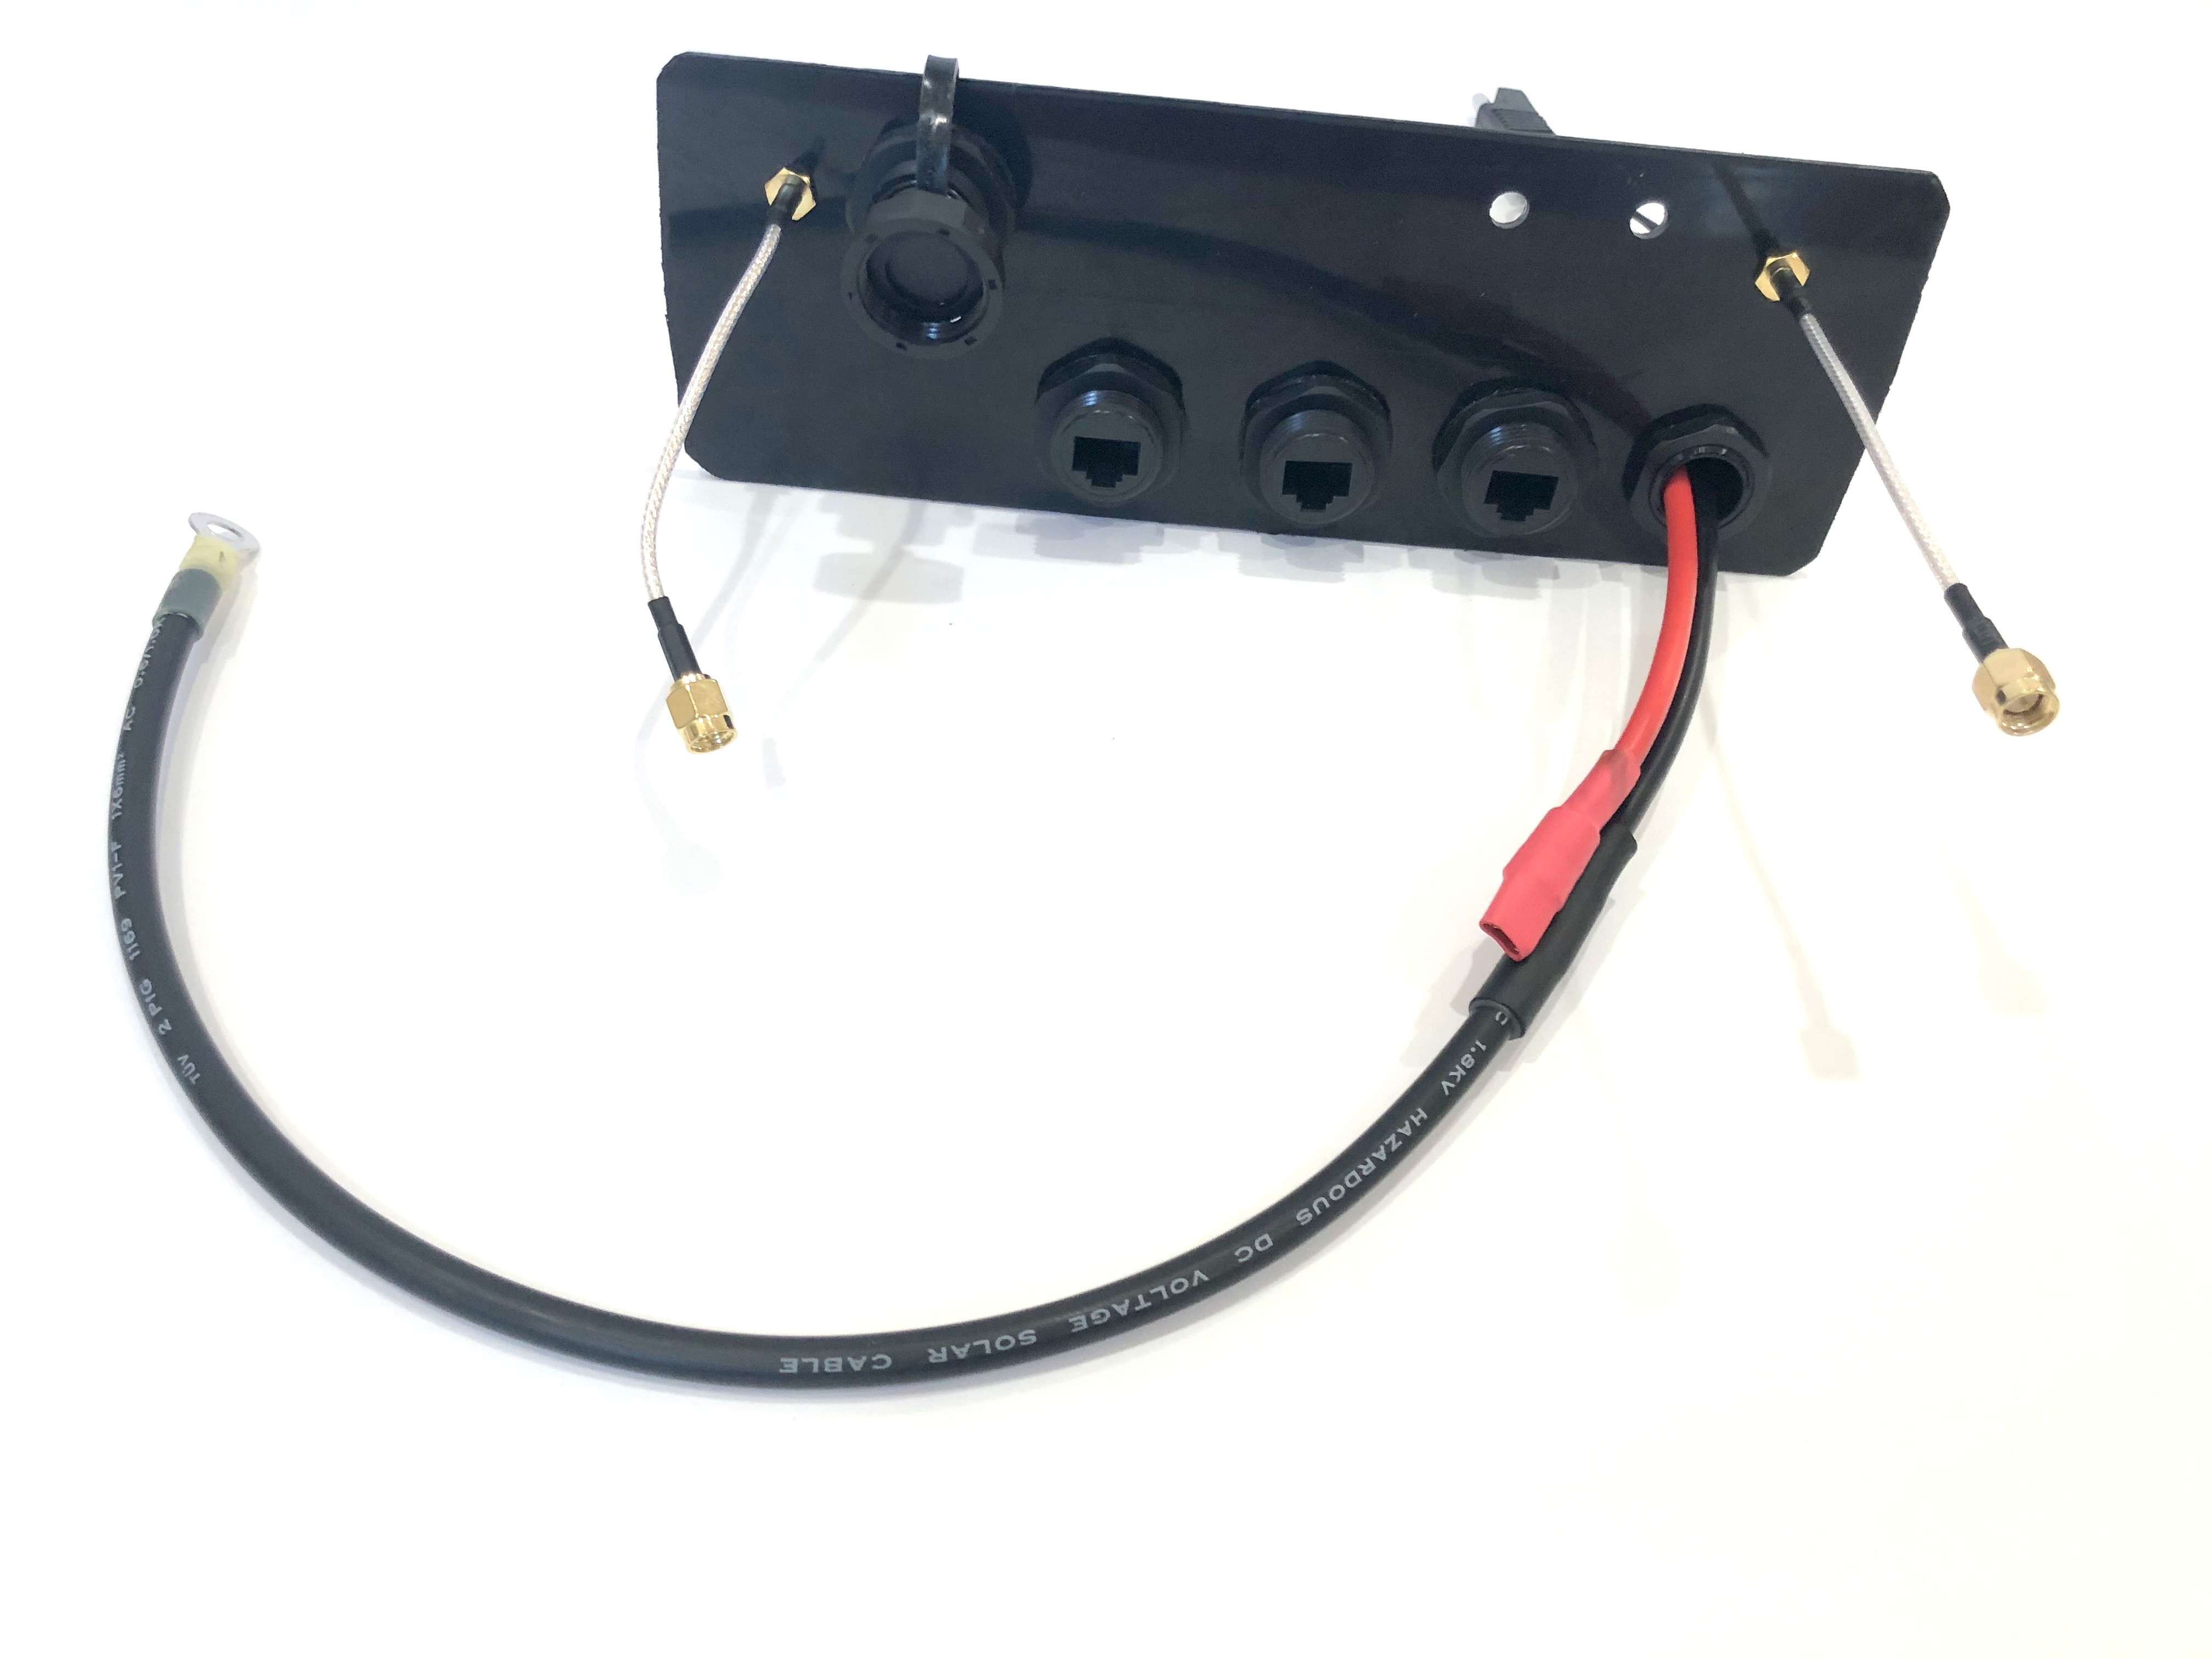
1.3.3. Inside Boat Gateway
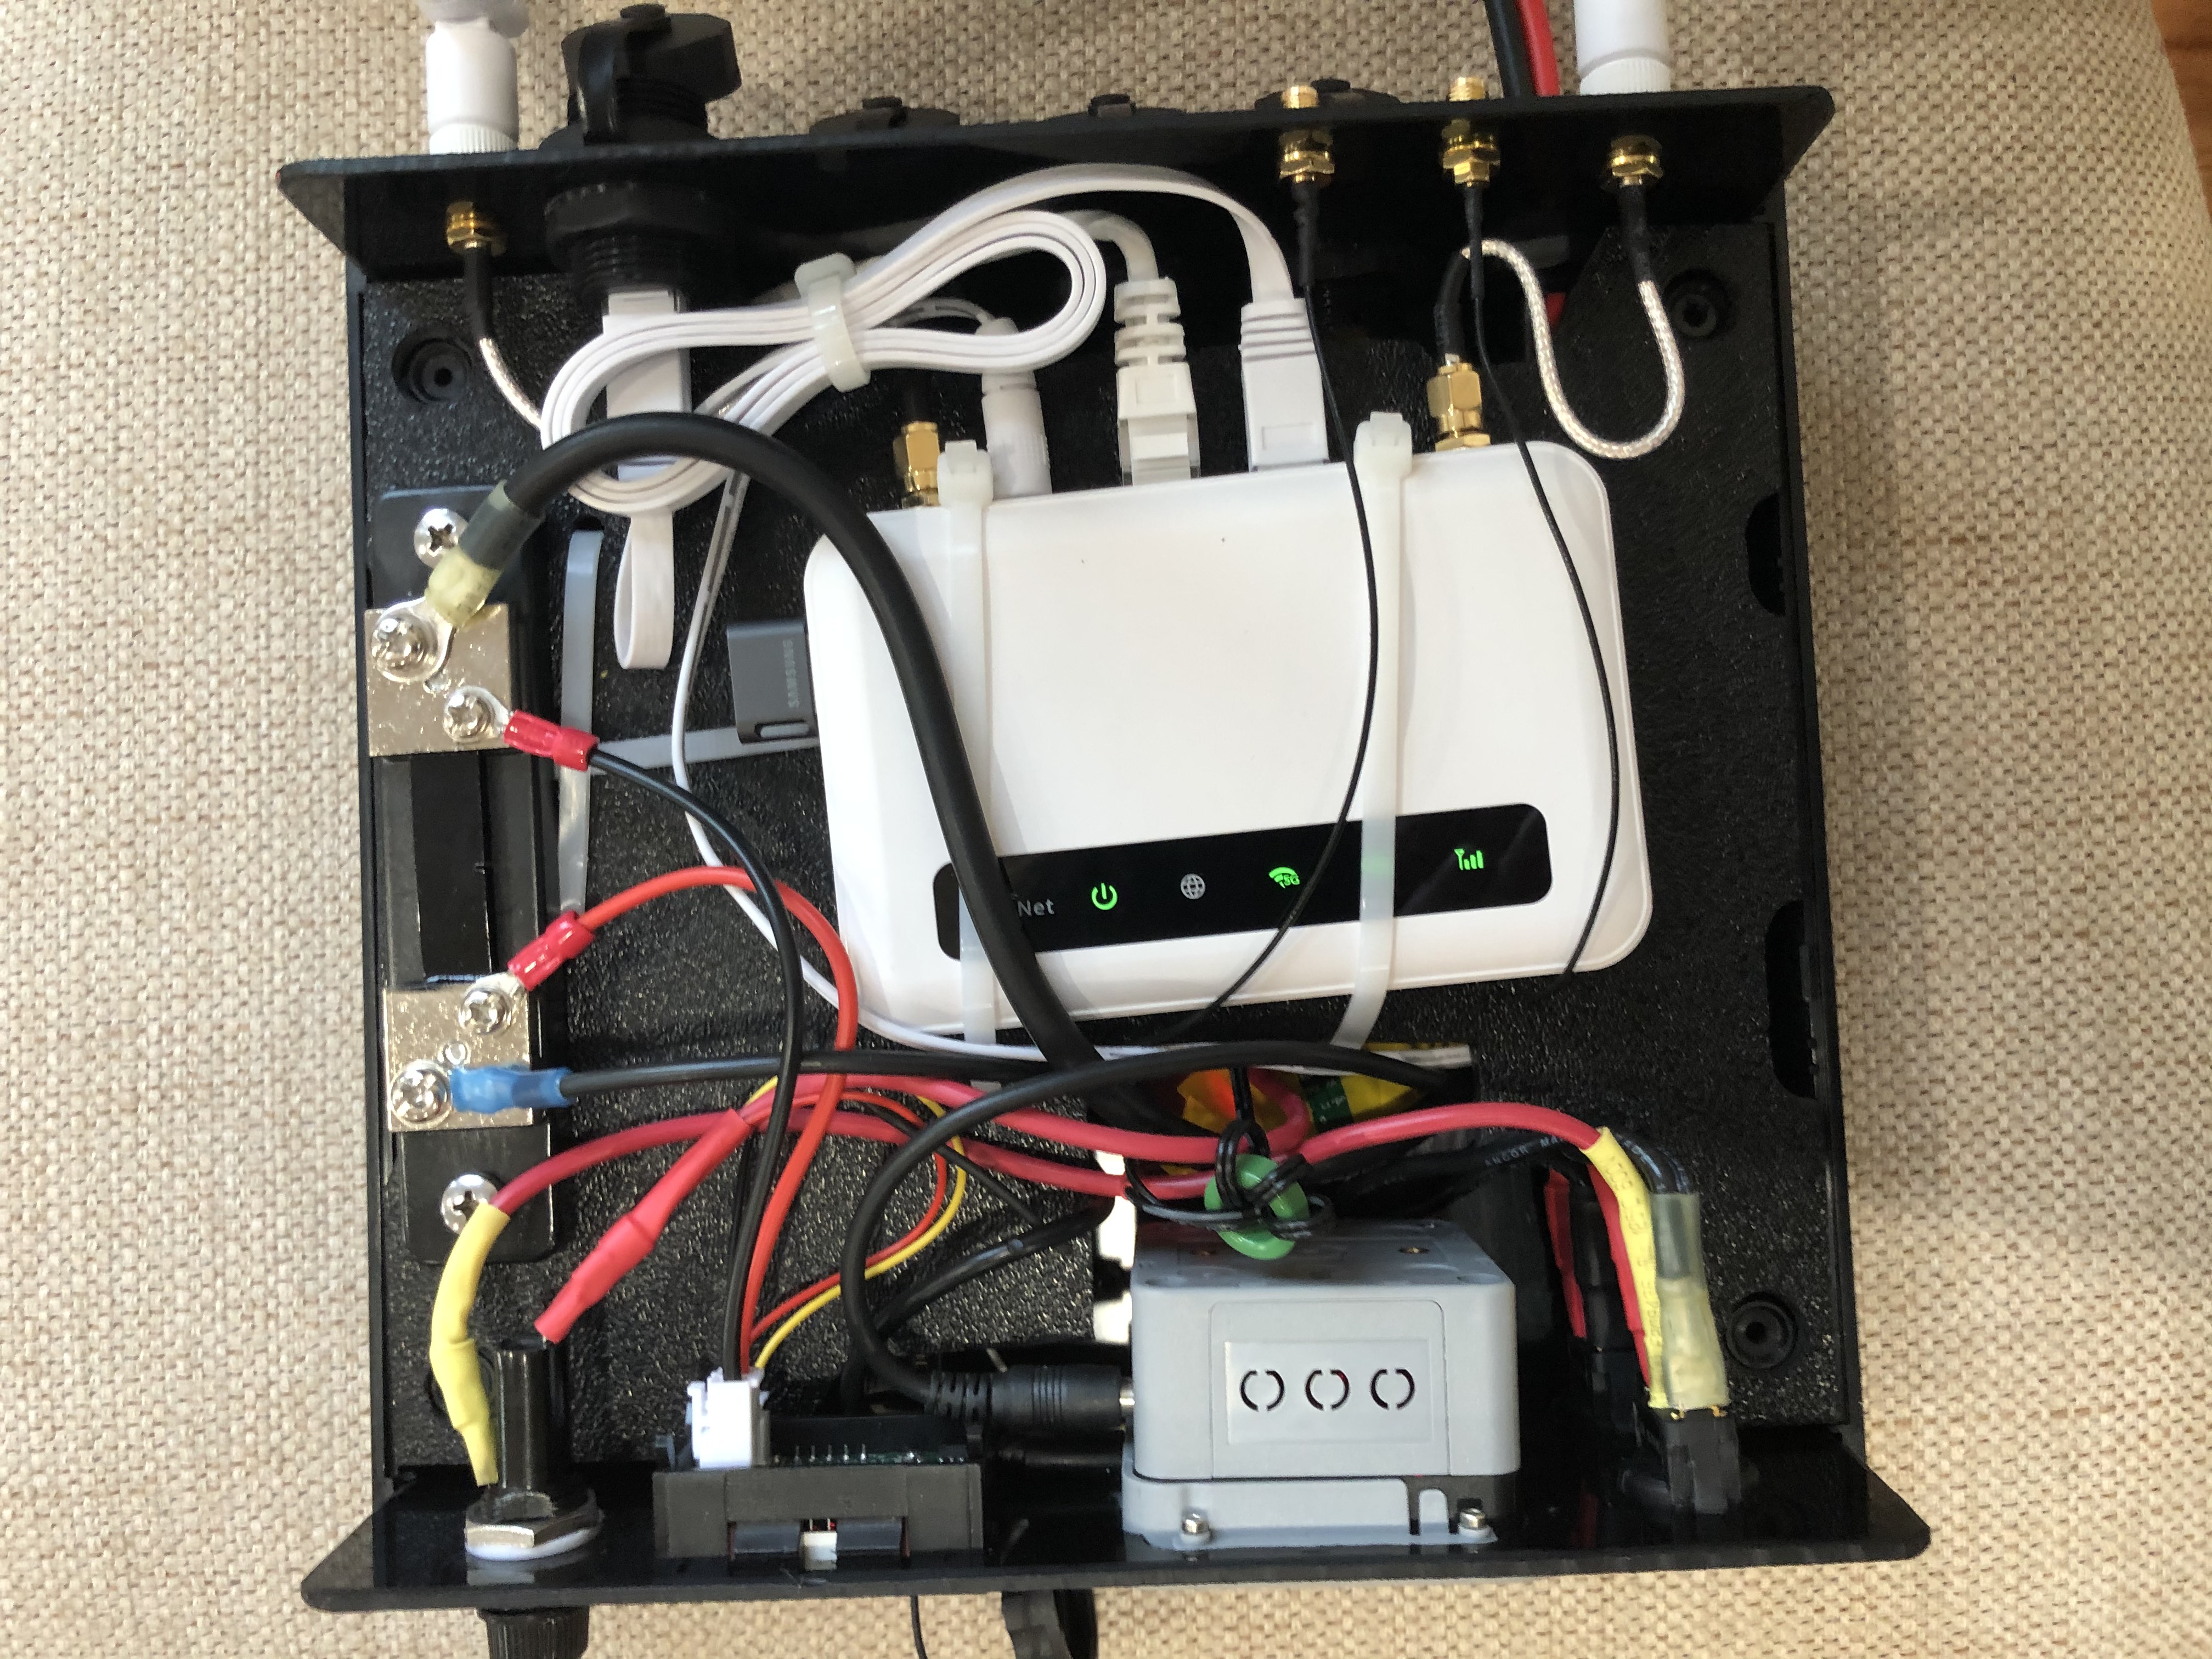
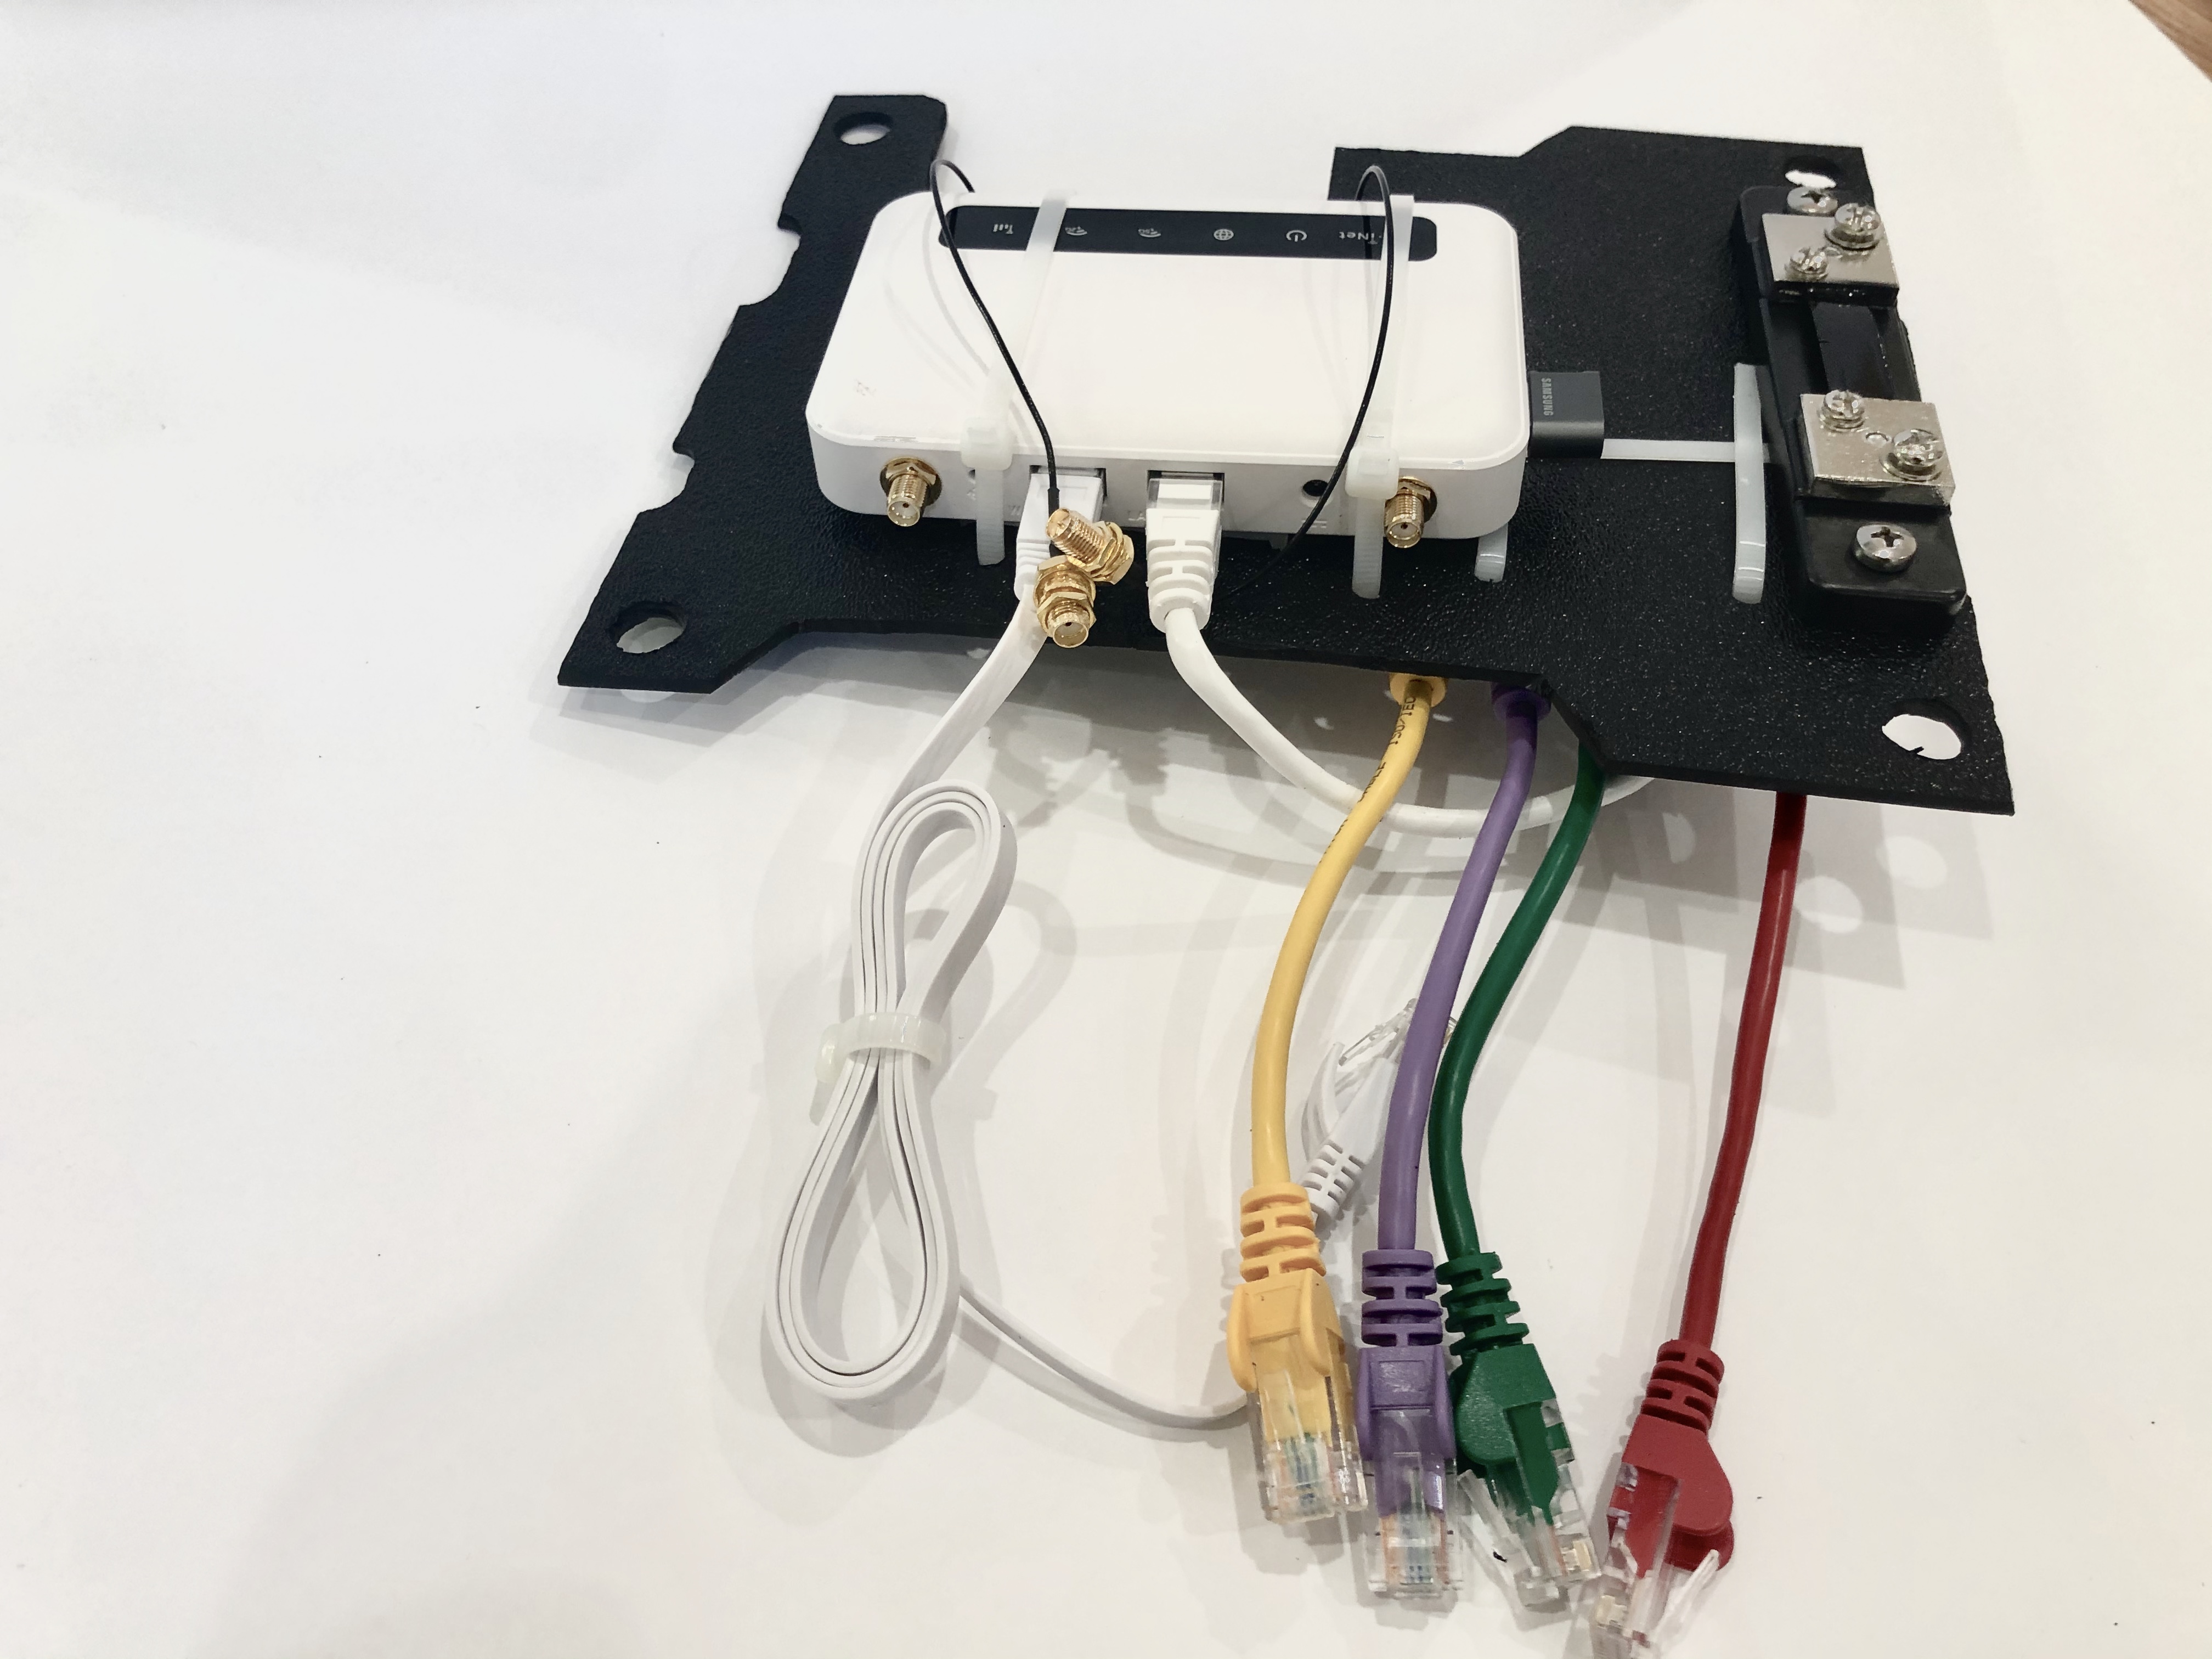
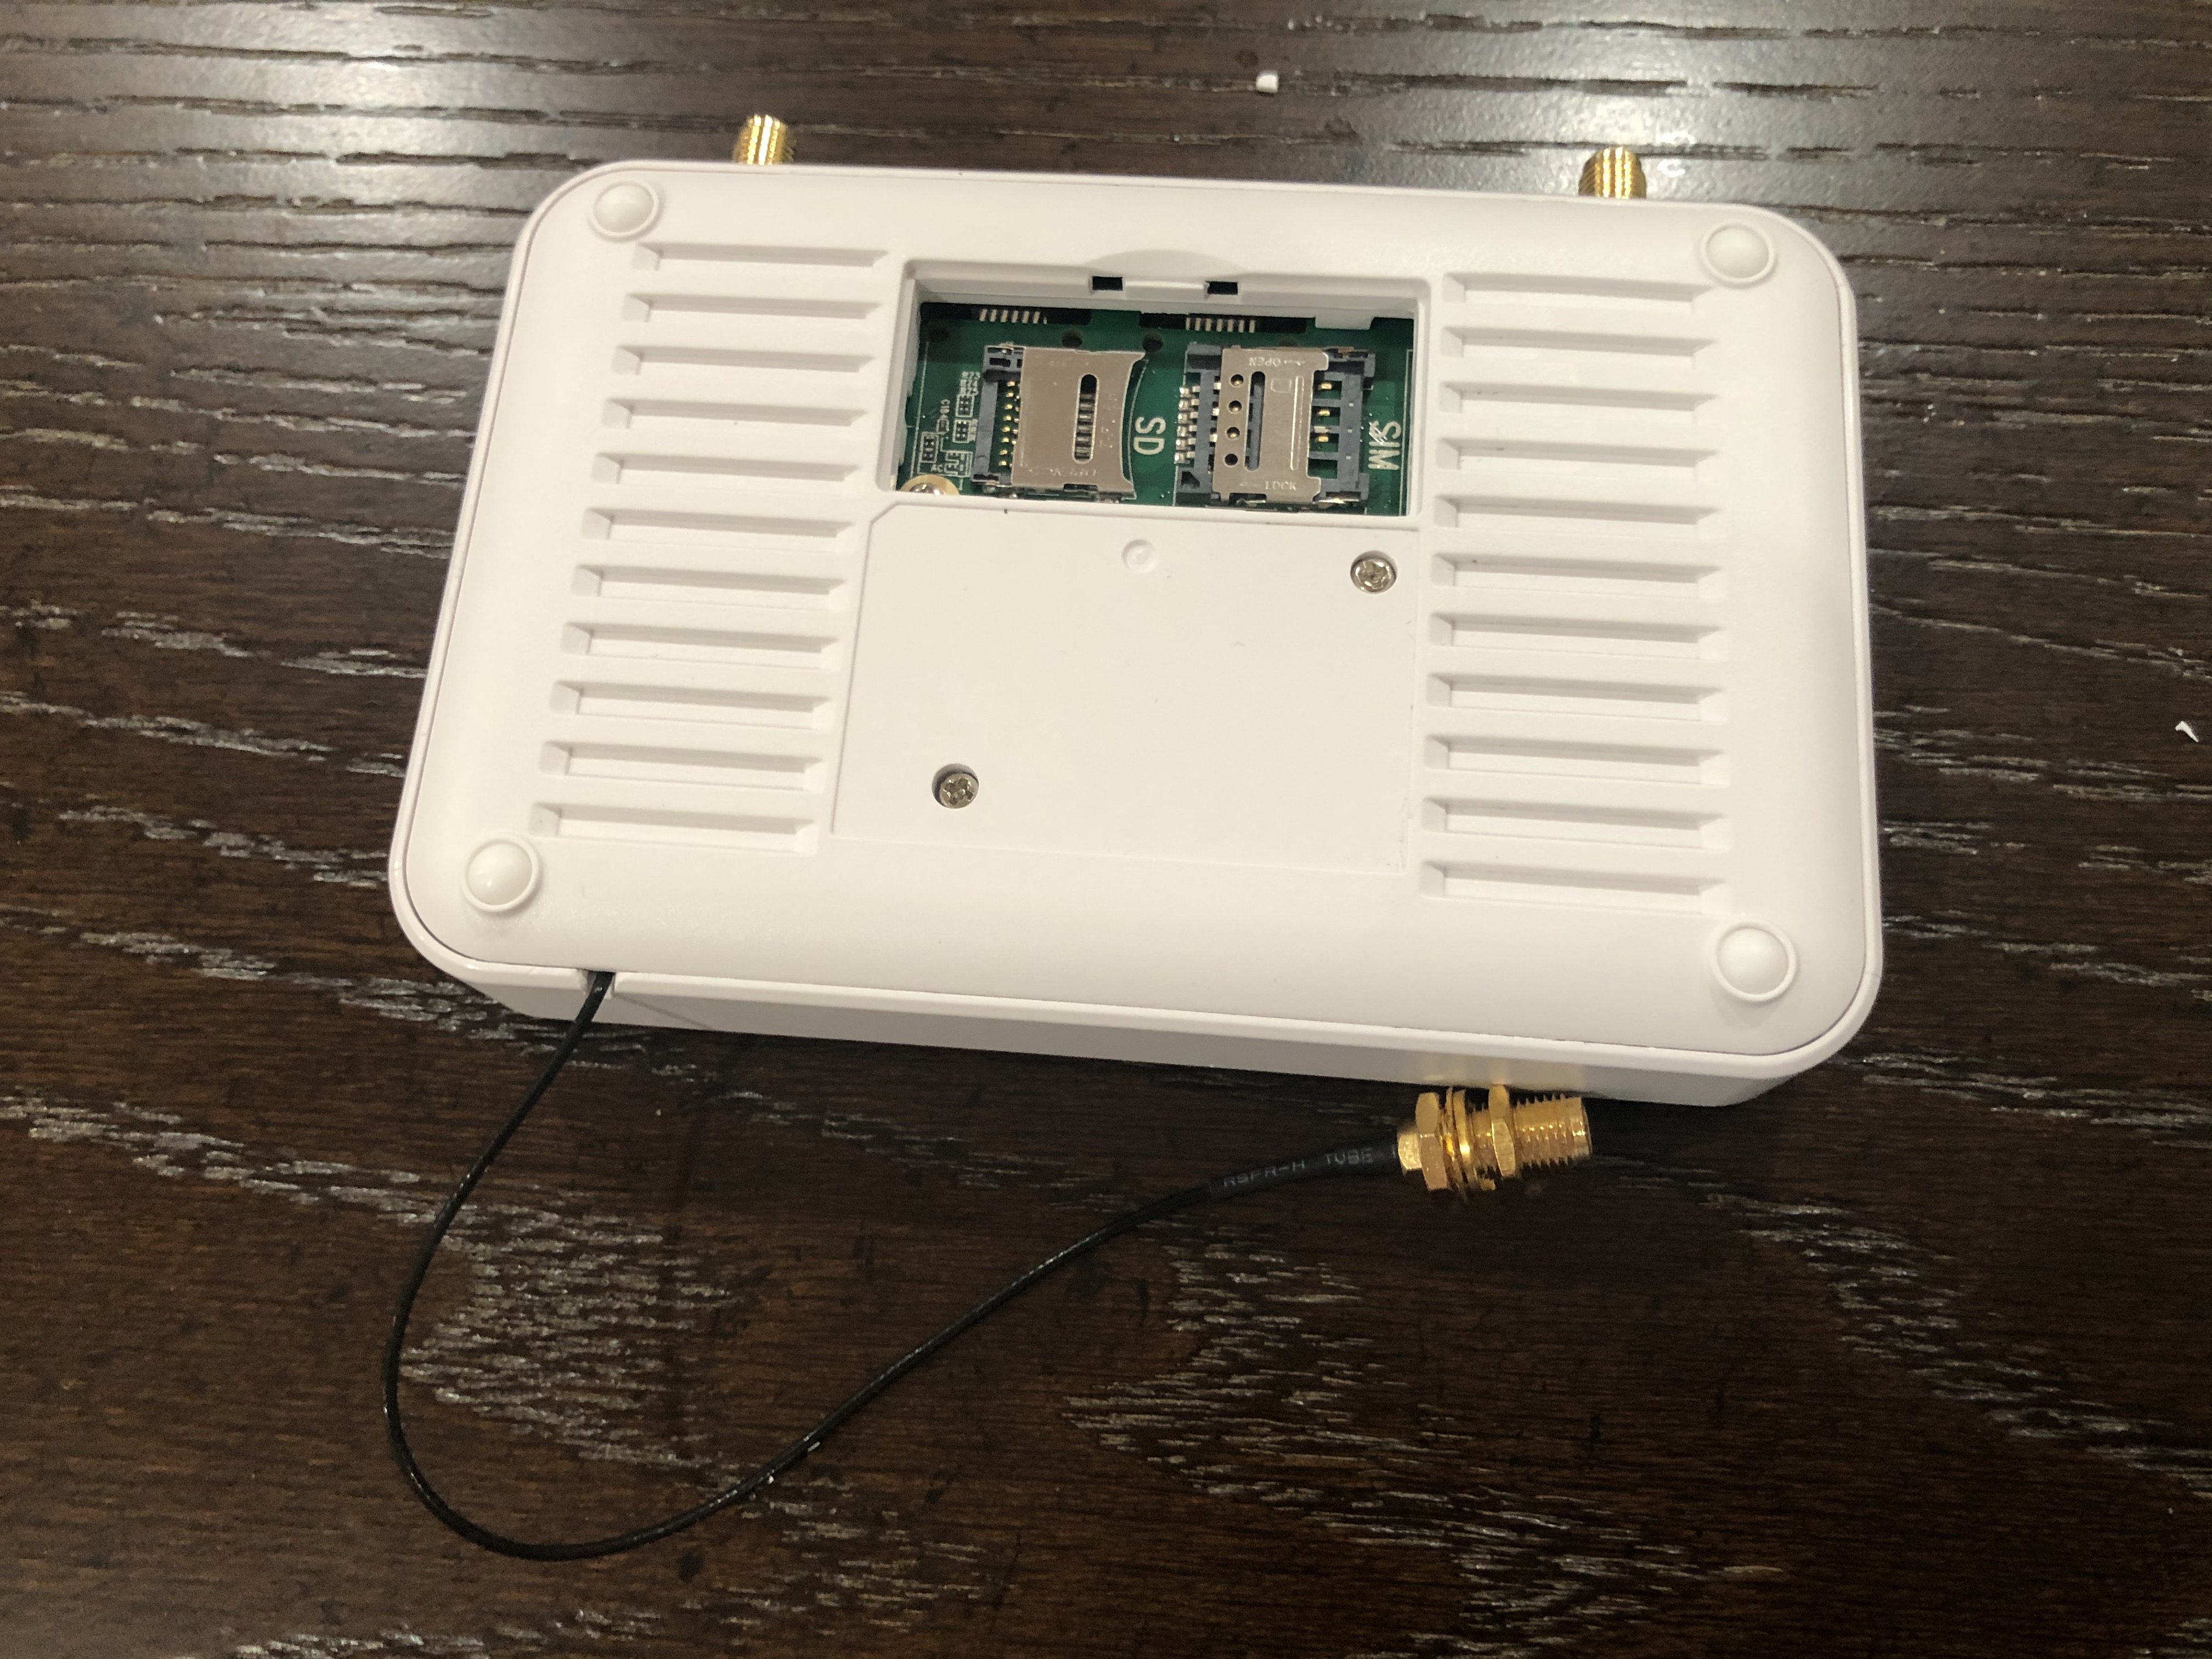
I’ve made an opening for easier access to SIM card and SD card slots. A better idea probably would be to have SD and SIM card extension cords and panel mounted slots.
| Item | Description | Cost | Source | ||
|---|---|---|---|---|---|
GL-X750 LTE 4G/3G and Wi-Fi Router (It’s the best choice, GL-AR750 is not needed if you pick this) |
GL.iNet Spitz (GL-X750) 4G Router & 4G Modem (with Sim card slot) for your area and cellular provider
|
$119 + Modem: $20 + (Optional not really needed bluetooth module and wall mount: $16) |
gl-inet.com |
||
Wi-Fi Router (not needed if you go with GL-X750 option) |
GL.iNet GL-AR750 Travel AC Router, 300Mbps(2.4G)+433Mbps(5G) Wi-Fi, 128MB RAM, MicroSD Storage Support, OpenWrt/LEDE
|
$45 |
Amazon |
||
Wi-Fi RF Connector Cable (RP) |
U.FL Mini PCI to Reverse Polarity SMA Pigtail Antenna Wi-Fi Cable Pack of 2
|
$5.30 |
Amazon |
||
GPS RF Connectors |
Pack of 4 RF U.FL(IPEX/IPX) Mini PCI to SMA Female Pigtail Antenna Wi-Fi Coaxial RG-178 Low Loss Cable (7 inches (17.8 cm)) |
$14.30 |
Amazon |
||
LTE RF Connectors |
SMA Extension Cable Pigtail Male to Female Wi-Fi Antenna Cable RF RG316 Coaxial Coax Jumper FPV SMA Antenna Wire (4 inch (4 Pcs)) |
$12 |
Amazon |
||
Ethernet Switch |
Tenda S105 V2.0 Slim 5-Port Fast Ethernet Switch |
$9 |
Microcenter |
||
Ethernet short patch cables 5-pack |
Ethernet short patch cables 5-pack QVS CAT 5e Snagless Network Cable 6 in. 5 Pack – Multi-Colored |
$12.50 |
Microcenter |
||
4 Panel Mount RJ45 Sockets |
RJ45 Extension Female Cable Connector CAT5/6 Network Cable Socket Connector IP67 Waterproof |
$13.80 |
AliExpress |
||
USB 2.0 Panel Mount |
IP67 USB 2.0 4pin female to Female Waterproof data Connector plug socket Adapter IP 67 Water Proof Connectors |
$9 |
AliExpress |
||
5V/6V 3A Switch-mode UBEC, Max 5A Lowest RF |
$3 |
Amazon |
|||
Micro Sim Adapter |
Sim Card Adapter Kit Includs Nano Sim Adapter / Micro Sim Adapter / Needle / Storage Sheet( Sim Card Holder ) |
$4.30 |
Amazon |
||
Panel Mount Waterproof SIM card adapter |
Cable Gland for SIM: Waterproof IP67 Feed-Thru |
$6.80 |
data-alliance.net |
||
WiFi Antenna Cable |
Low Loss RG58 Wi-Fi Cable N Male to RP SMA Male Connector Hole in Center Pigtail SMA Cable 10M for 3G/4G/LTE/Ham/GPS/RF Radio to Antenna or Surge Arrester Use
|
$16 |
Amazon |
||
Long Range WiFi Antenna |
Lysignal Outdoor Omni Directional Antenna Fiberglass 2.4GHz 8dBi N Female Connector for Cell Phone Signal Booster, WiFi Router
|
$36 |
Amazon |
||
IPEX U.FL Solder Sockets |
10pcs IPEX U.FL SMD SMT Solder for PCB Mount Socket Jack Female RF Coaxial Connector |
$7 |
Amazon |
||
LTE/4G/3G Antenna |
700~2600mhz 88dbi 3g 4g Lte Antenna Mobile Antenna 2 * SMA Male Connectors Booster Mimo Panel Antenna, 5 Meters
|
$15.10 |
AliExpress |
||
M5Stack Core |
ESP32 Basic Core IoT Development Kit
|
$28 |
m5stack.com |
||
M5Stack LAN Module Base |
LAN is a M5 Base that having a W5500 chip, which is a Hardwired TCP/IP embedded Ethernet controller that provides easier Internet connection to embedded systems. This Base is specifically designed for industrial application scenarios, comes with a couple of HT3.96 connectors
|
$14 |
m5stack.com |
||
M5Stack Panel Mount Accessory |
FRAME Panel Extended Install Components (2 Sets) |
$3.40 |
m5stack.com |
"M5Stack" stands for "Modular 5cm Stackable".
Looks like waterproof version is already in works.
GL-AR750 Router Modifications
The AR-750 router needs to be modified to add external 2.4GHz antenna. Test U.FL connectors need to be removed and real ones should be soldered. The existing U.FL connector is used by internal 5G band antenna. See here:
GL-X750 (Spitz) Router Modifications
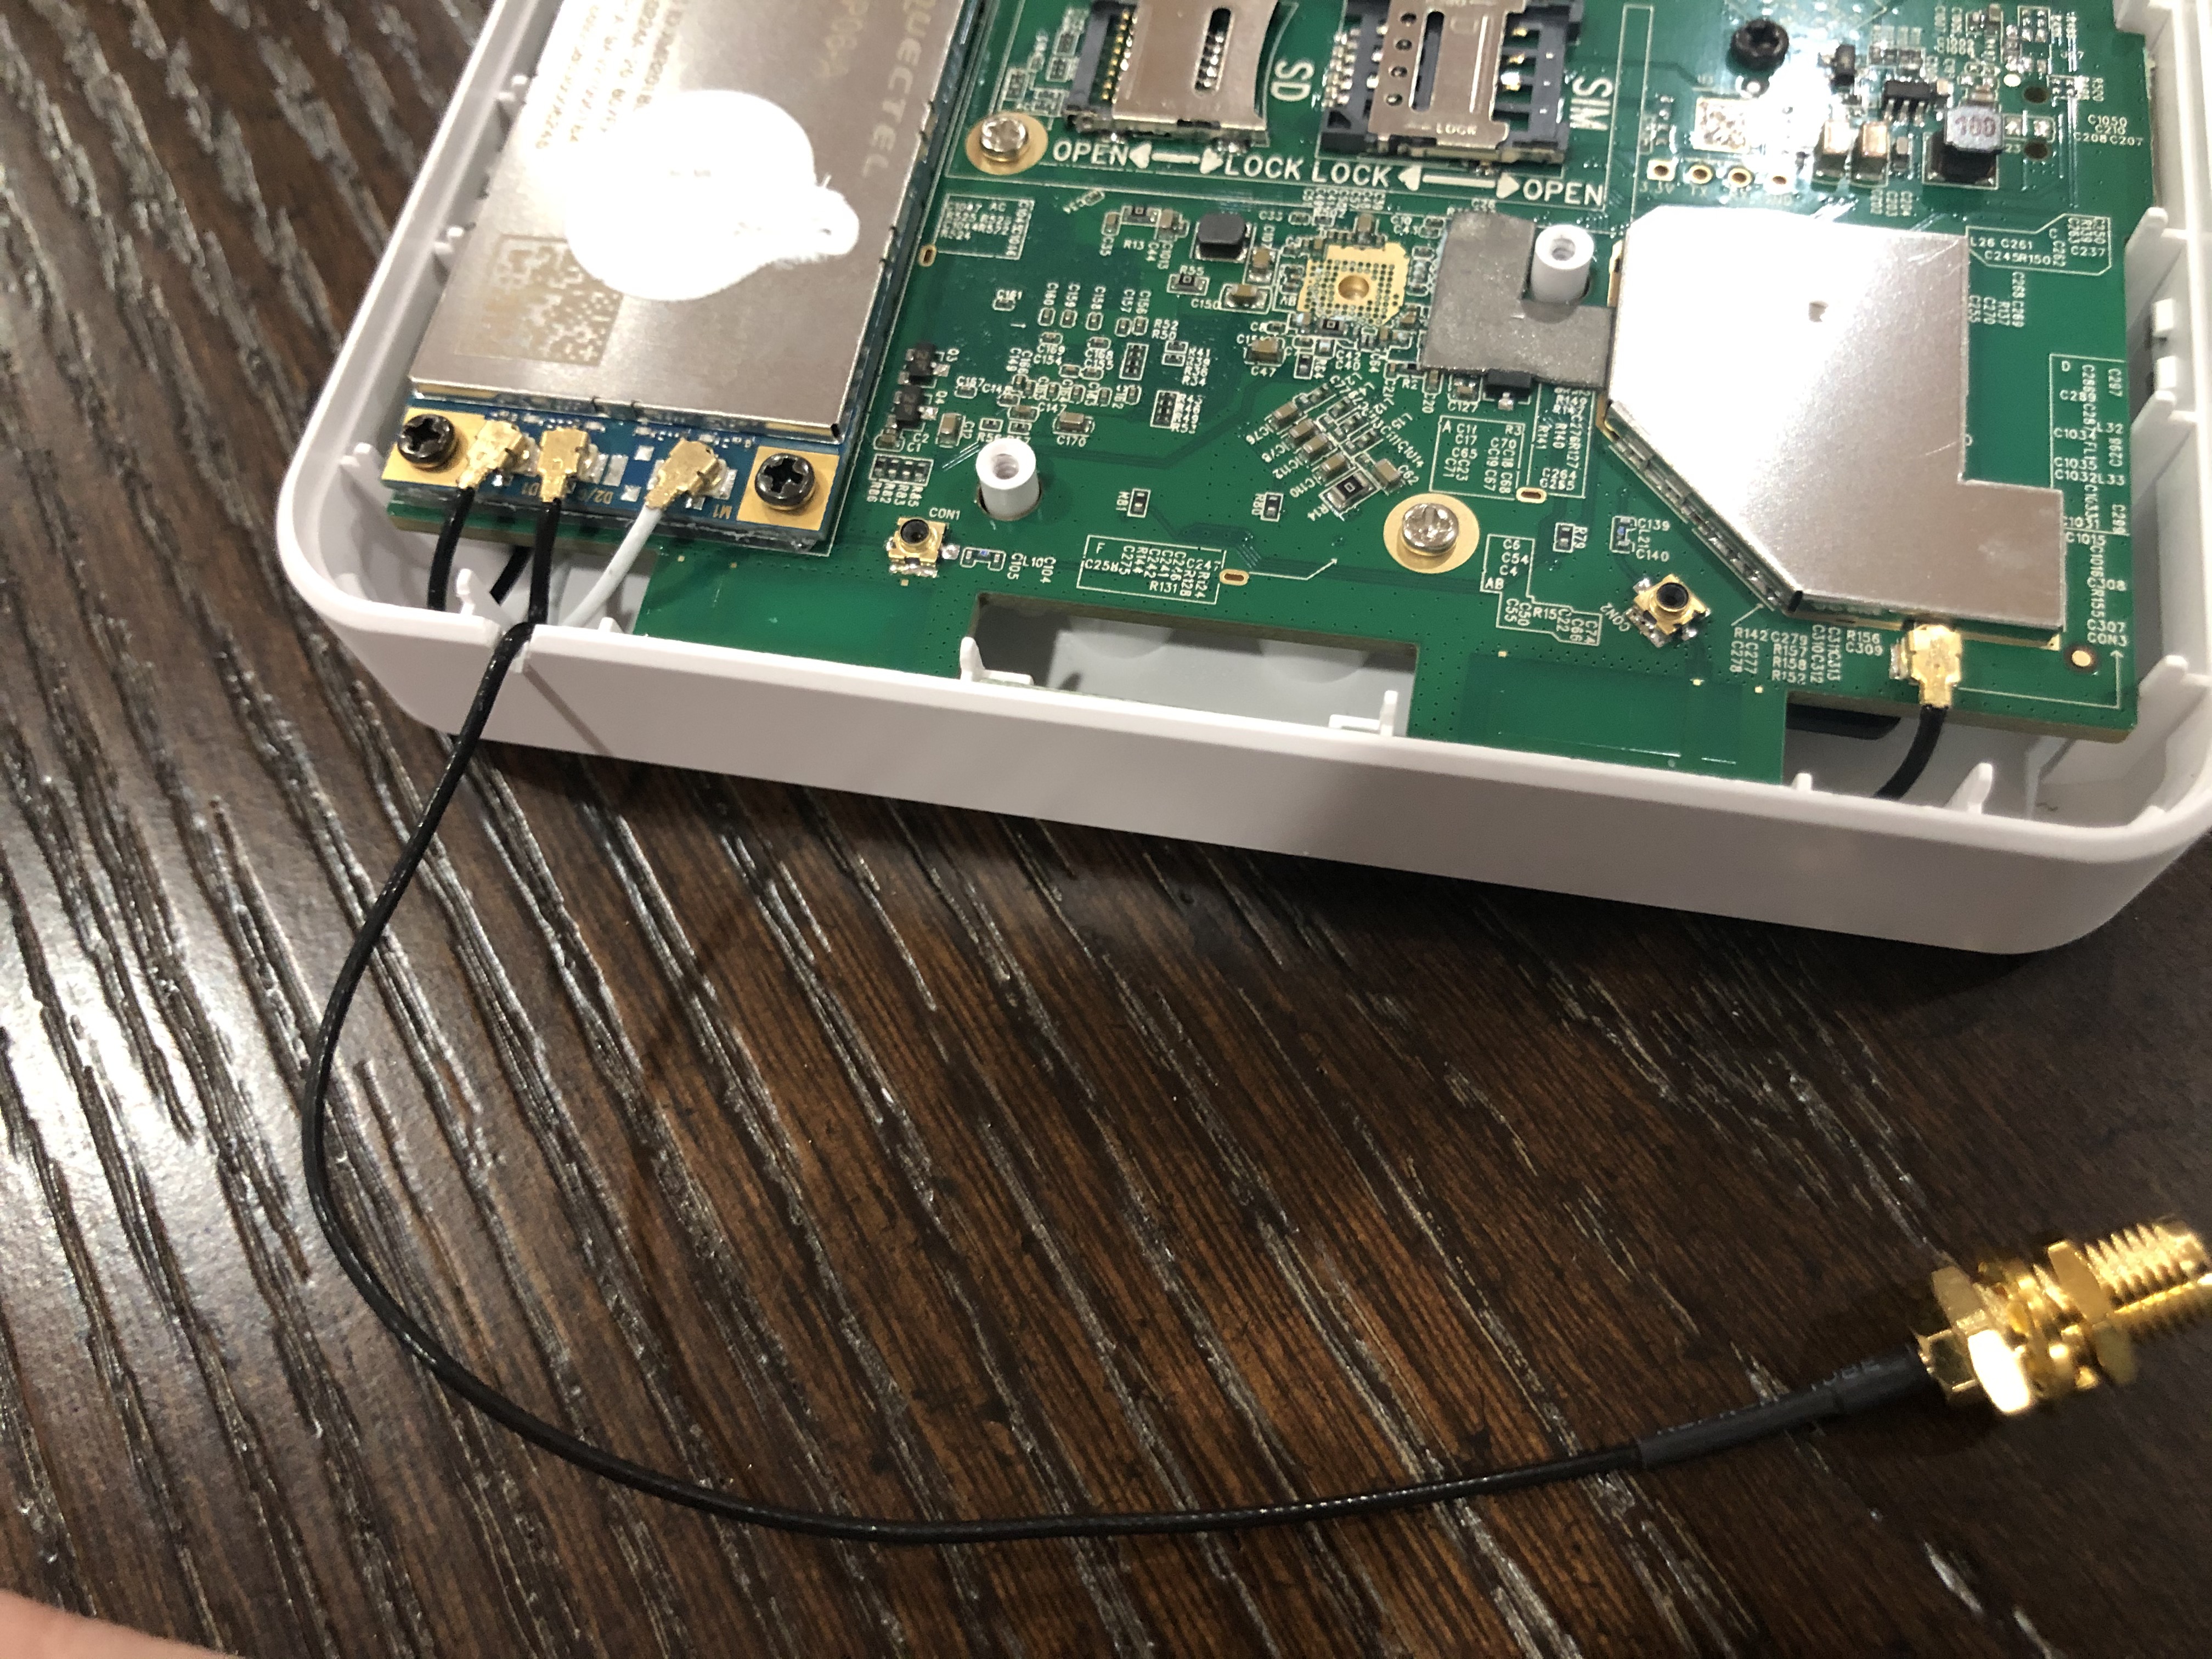
You get this router with the modem you selected for your region. My modem is Quectel EP06-A. EP06-A has 3 antenna connectors. One is connected to external LTE antenna connector, another one is Rx Diversity antenna to external connector and middle one is GPS antenna not connected. You can open up router by unscrewing two screws under serial number sticker (it’s easy to remove and put back after). I’ve just put another coax cable to GPS antenna connector and cut a bit of plastic in the case just enough to put that cable through (SMA side on outside).
The modem is controlled via 'AT' commands.
Make sure you connect antennas first before activating SIM card in the network, or you might get error like:
SIM card not registered
APN for AT&T has to be set to "broadband". Device: /dev/ttyUSB2 Service: LTE/UMTS/GPRS
To enable the GPS you have to use
AT+QGPS=1
command on /dev/ttyUSB2 and then one can read the nmea sentences on /dev/ttyUSB1. There are additional commands to configure the GNSS functions, but they’re very limited compared to “regular GNSS chips”. The details can be found in the Quectel EP06&EG06&EM06 GNSS AT Commands Manual. (Registration required to download)
The command to reset the modem to factory defaults is
AT+QPRTPARA=3
The router is running linux. While setting it up you can log in into it like this:
ssh root@192.168.8.1
The password would be the one you set in web UI.
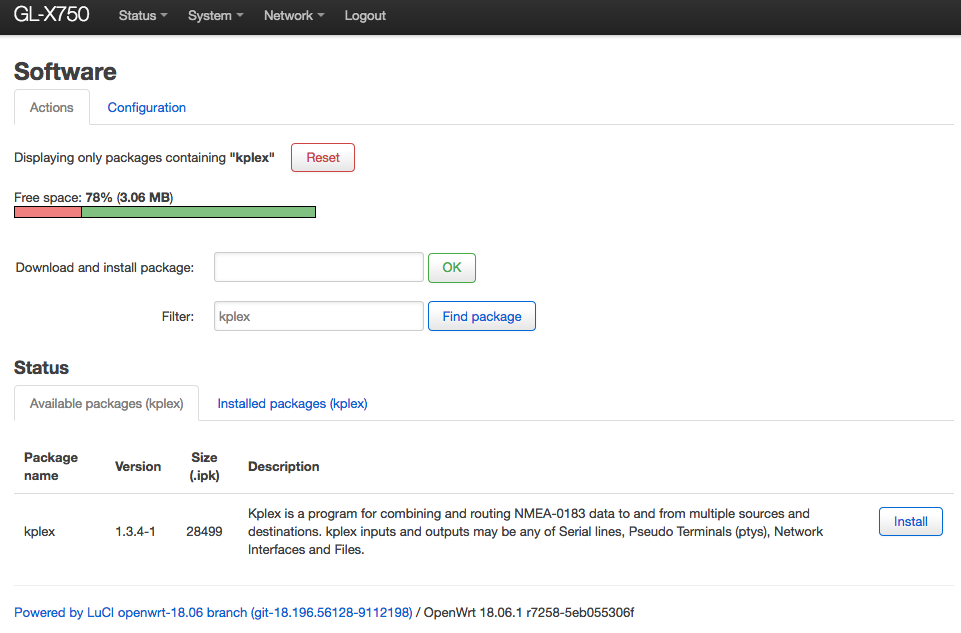
Hmm: There is even KPlex for OpenWrt. I think this GPS can be fed into OpenPlotter from the router!
And you can install KPlex on a router (precompiled) from the router itself!
AT command for the GPS needs to be run every time on boot. This needs to be scripted. Install the program called 'socat'. With it, you can send commands to the modem from command line.
echo "AT+QGPS=1" | socat - /dev/ttyUSB2,crnlvi /etc/kplex.confPut these lines
[serial]
name=gps
filename=/dev/ttyUSB1
direction=in
baud=9600
strict=no

[tcp]
name=router
mode=server
port=10110
direction=out
Add startup script
cat > /etc/init.d/modem-gps-init
#!/bin/sh  /etc/rc.common

START=98

start()
{
     echo "AT+QGPS=1" | socat - /dev/ttyUSB2,crnl
}

^D

chmod 755 /etc/init.d/modem-gps-init
Another modification: By default in GL-X750 one Ethernet port is set up as WAN and another is LAN. You can reassign them both as LAN. It is done in web UI of the router. One LAN port will go to main boat computer and another lan port you can connect to M5Stack LAN base module. Or even have an ethernet hub inside if you plan bigger boat LAN (in that case you can leave one port as WAN and connect the router via hub).
GL-X750 aka Spitz router power supply is 12v (No need for buying step-down converter).
| If you just need chart plotter capabilities it seems you do not even need raspberry pi. You could just install KPlex on GL-X750 router make sure the modem you picked when you buy the router has GPS. And then you use OpenCPN installed on an android tablet connected via Wi-Fi to KPLex. And with this you have LTE internet on your boat and local private Wi-Fi. |
| FlashDrive Stick inserted into the router USB port is automatically shared on network via samba. You should mount it using this command from Raspberry Pi: |
sudo mount -t cifs //gl-x750/SamsungUSB /media/Share -o user=guest,vers=1.0Local WiFi, VNC, etc
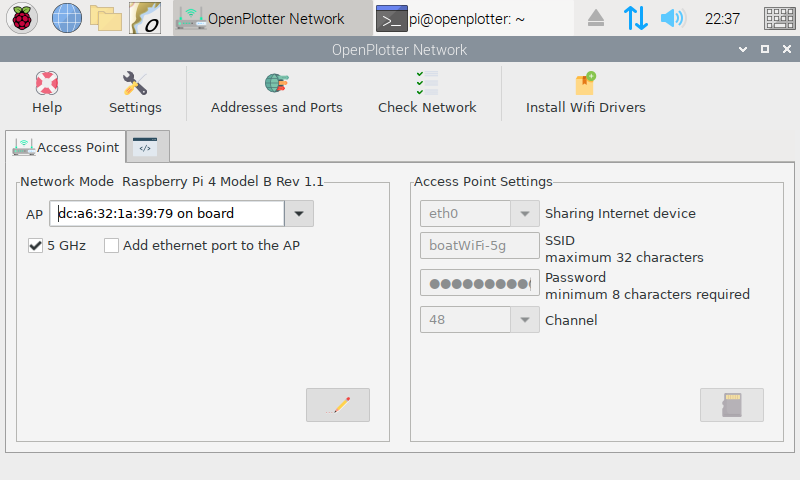
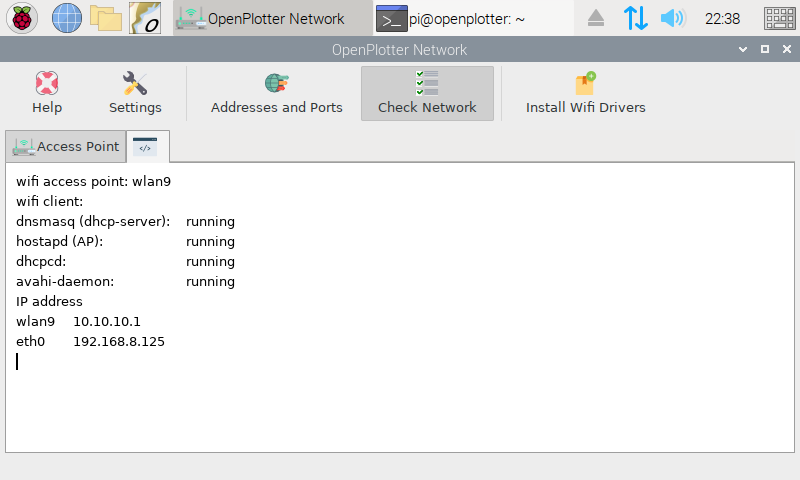
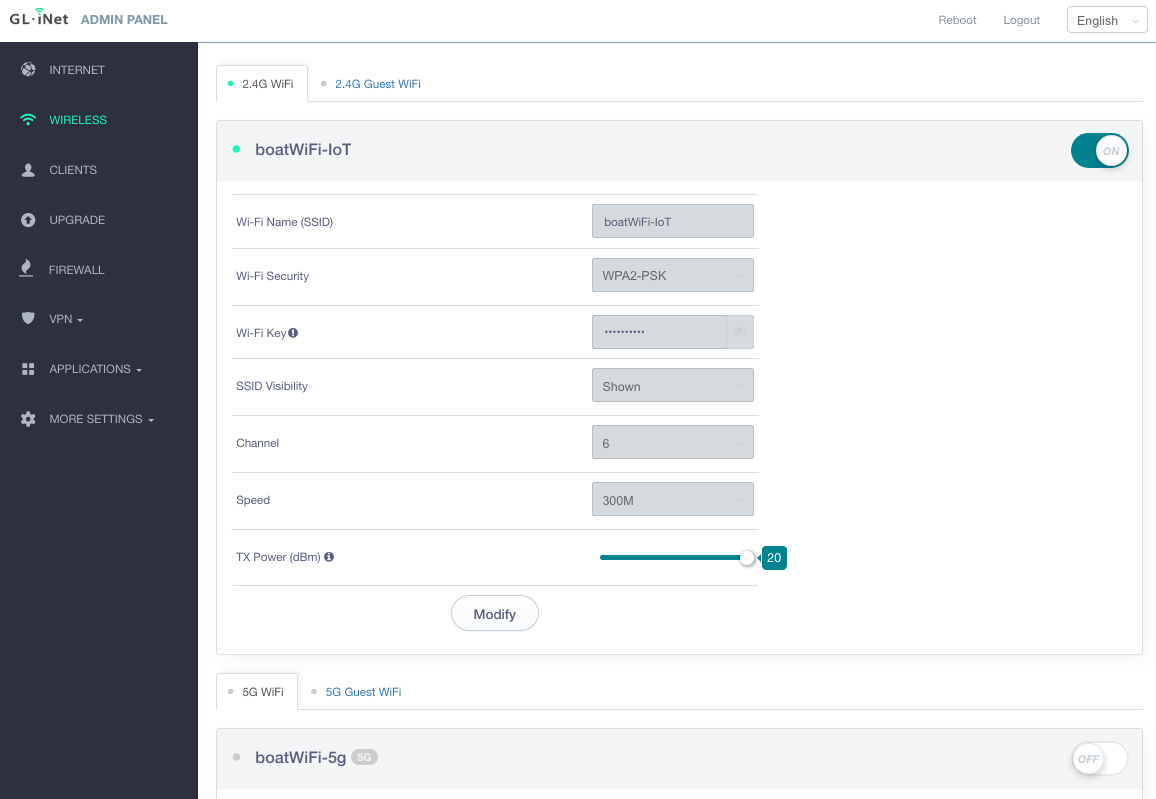
Raspberry Pi4 supports only one band in access point (AP) mode. So it is either 2.4GHz or 5GHz but not both. I’ve set it up to be on 5G for faster speed. For IoT devices I’ve enabled 2G band on the router.
On the screenshots below their SSIDs are "boatWiFi-5g" and "boatWiFi-IoT".
Wi-Fi Gateway
In web UI of your OpenWrt router:
-
Click internet.
-
Add repeater.
-
Connect to marina Wi-Fi
The UI should look like this when you set up LTE and port Wi-Fi connections:
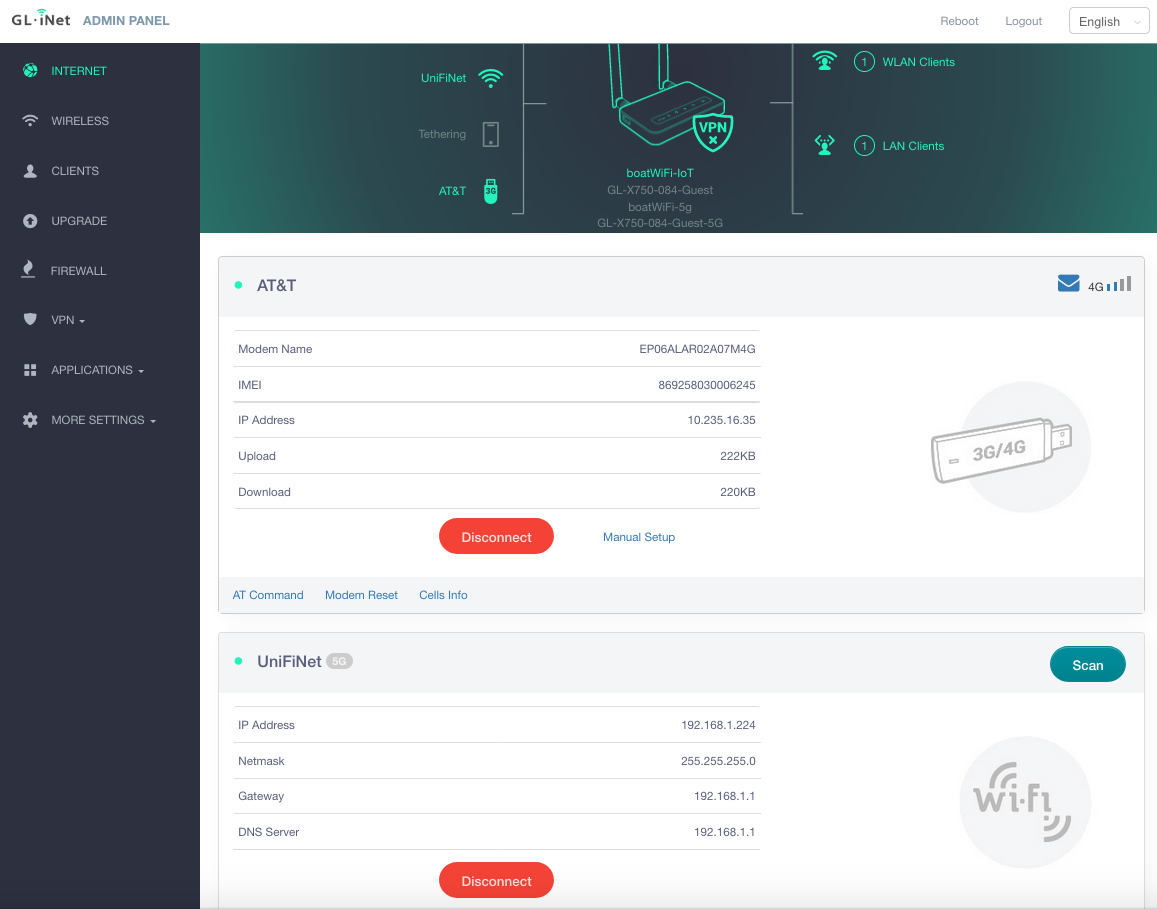
On the screenshot above UniFiNet would be marina’s Wi-Fi SSID.
OpenVPN
OpenWrt
LongFi Helium
Boat IoT, MQTT, M5Stack
M5Stack is programmed using Arduino IDE. I’ve set it up on iMac following these instructions:
The basic steps are:
-
Install cp210x driver
-
Install Arduino IDE
-
Register board manager
-
Download and install m5stack libraries (m5stack core development kit, m5ez, ezTime)
NMEA Display software for M5Stack https://github.com/andyrbarrow/MQTTNMEADisplay
I’ve made my own custom version. It doesn’t require MQTT. It can connect via TCP to SignalK NMEA stream or to Kplex. The code for the sketch is located here:
Currently, it supports GPS and Wind displays. I have an idea how to display more from AIS in the future.
NMEA to Wi-Fi on ESP32
Couple projects
M5Stack ESP32
Boat Cellular LTE Voice and Data Gateway
1.3.4. Testing the Boat Gateway
Good
-
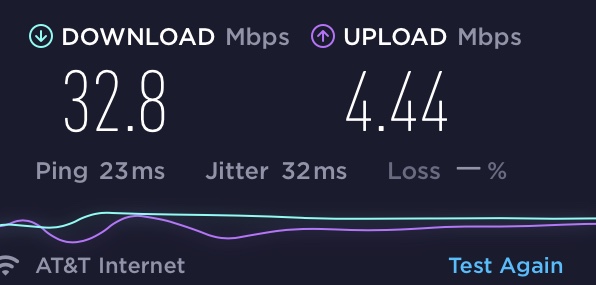
LTE speed is good even with two little antennas it came with.
-
Time to acquire a GPS location fix is very short with external antenna. I do not have exact time, but it’s under few minutes even inside the house. Having external GPS antenna made a huge improvement.
-
Power usage of the whole gateway box in well under 2 watts. 2 watts is under speed stress test with uploads over LTE.
Not so good
-
External Wi-Fi antenna (the one from the bill of material) did very little to improve the range. (Again I’ve tested it inside the house, without placing the antenna outside). My modification of the connector inside the router and soldering it might have been not good, so you might have better results.
-
Bigger LTE antenna (again from the bill of material) didn’t give better signal quality (even a bit lower) than original antennas supplied with Spritz router. (Could be different picture on other bands though). With either of antennas LTE performed well.
1.3.5. Other Ideas
Connect NMEA multiplexer to the router via USB. Here is one affordable NMEA multiplexer:
Rudder Position project
Cockpit UI design
2. Boat Software
2.1. Key Open Source Software Components / Players
-
Charting Software, OpenCPN (by David Register and others)
-
Offshore features, Climatology/Weather Routing/Weather Fax/GRIB/Celestial Navigation/DIY Autopilots/PyPilot (by Sean D’Pagnier)
-
Sensors and Marine Data Protocols, SignalK (Scott Bender and others)
-
User-friendly raspberry pi server configuration, OpenPlotter and some hardware, sensors (by sailoog and other)
-
Web based tiling charting, AvNav (by Andreas Vogel)
-
Decoding radio signal protocols, HamRadio and SDR community
-
Many others who build core protocol/sensor/data formats/controller code libraries
-
User UI friendly OS distribution bundling all components together (cockpit/touchscreen and more) (by authors of lysmarine and BBN edition of it)
2.2. Software Data Flow

2.3. Network Diagram

Issuing this command:
ifconfig -aOn a router and on the boat computer will give good idea of the current configuration and status of local network (TCP/IP) interfaces.
On your boat computer install nmap
sudo apt-get -y install nmapand use
nmap -sP 192.168.8.0/24To discover all network devices on your boat local network. After you done with all the set up there would be Pi, router, m5stack.
2.4. Important local URLs on your boat
-
Router admin UI http://192.168.8.1 or http://gl-x750
-
SignalK web UI http://localhost:3000
-
Connects to KPlex running on the router
telnet gl-x750 10110 -
Connects to SignalK running on the boat computer (Should be configured to output NMEA data, with a SignalK NMEA translation plugin)
telnet localhost 10110 -
Connects to SignalK running on the boat computer (SignalK protocol)
telnet localhost 8375 -
Chronograf http://localhost:8888
-
Grafana http://localhost:3001
-
Freeboard (in-browser chart plotter) http://localhost:3000/@signalk/freeboard-sk/
-
Instruments Dashboard http://localhost:3000/@signalk/instrumentpanel/
-
KIP Dashboard http://localhost:3000/@mxtommy/kip/
-
SailGauge Wind Display http://localhost:3000/@signalk/sailgauge/
-
Music Player (Mopidy) http://localhost:6680
2.5. Openplotter
2.5.1. Basic Installation Steps

2.5.2. Installation
After completing installation you can see which packages got installed.
sudo apt list --installed | grep opencpn
sudo apt list --installed | grep openplotter
To see which available OpenCPN packages are there:
apt-cache search opencpnInstall missing ones:
sudo apt-get -y install `apt-cache search opencpn | cut -d ' ' -f1`I also like to add firefox as additional browser in case chromium fails to display some page.
sudo apt-get -y install firefox-esr2.5.3. Initial Settings
sudo rc_guiYou would need to enable SPI, I2C, Serial Port, 1-Wire and Remote GPIO and disable Serial Console in Raspberry Pi Configuration utility. Set video memory to 512 (MB). See:
Disable screen blanking. Reboot after changing settings in Raspberry Pi Configuration screen.
In Openplotter Serial you need to enable UART. This will disable Bluetooth. Reboot after it.
Edit /boot/config.txt to add (to enable 64-bit kernel)
arm_64bit=1Your /boot/config.txt should look like this (I’ve stripped the commented lines):
arm_64bit=1

disable_overscan=1

dtparam=i2c_arm=on
dtparam=spi=on
dtparam=audio=on

[pi4]
dtoverlay=vc4-fkms-v3d
max_framebuffers=2

[all]
gpu_mem=512
enable_uart=1
dtoverlay=w1-gpio
dtoverlay=pi3-disable-bt-
arm_64bit=1 is for enabling 64-bit linux kernel.
-
gpu_mem=512 reserves 512Mb of memory to the graphic video card.
2.5.4. Look & Feel Settings
You want to change all your look and feel settings BEFORE you install OpenCPN (otherwise it will still mix it with old settings)
Dark Theme
sudo apt-get -y install breeze-gtk-theme breeze-icon-theme breeze-icon-theme breeze-icon-theme-rcc breeze-cursor-themeStart lxappearance
lxappearanceand choose 'Breeze-Dark' widget theme click 'Color tab' and set foreground colors to "#808080". This is needed to overcome existing bugs in OpenPlotter and OpenCPN handling of dark themes (There are reported bugs that in some screens they draw white font on white background).
I use PXFlat for icon, mouse, window border themes.
Back to 'Widget' tab and 'Apply'
For 800x480 resolution 12pt fonts in menus and dialogs are too big. You might not see full content of the forms. So change it to 11pt in OpenCPN and Desktop Settings.
Change desktop background color to black and text color to white (Right Click on desktop → Desktop Preferences).
Fonts
Default Raspberry OS fonts are not very readable on small displays in cocktpit (especially under sunlight) Install Ubuntu fonts and switch to using them.
sudo apt-get -y install fonts-ubuntuMultiple Desktops
Start OpenBox config
obconfClick 'Desktops' tab, add new desktop. Create couple desktops, give them names ('One', 'Two'). Click 'Margins' tab, set all margins to 0. Save changes and exit obconf.
Right click on taskbar. Check: 'Icons Only', 'Show windows from all desktops'.
Right click on taskbar. Select 'Add/Remove Panel Items', then 'Panel Applets/Add/Desktop Pager. Close.
Or:
lxpanelctrl configAdd desktop pager to panel
Desktop
Desktop is actually configured via file manager preferences.
pcmanfm'Edit'/'Preferences'. Check 'Don’t ask options on launch executable'.
You can copy *.desktop files into ~/Desktop and use them as application launch shortcuts.
Example:
cp /usr/share/applications/opencpn.desktop ~/Desktop/You can use 'wmctrl' command to switch between desktops and start programs on different desktops.
sudo apt-get -y install wmctrlExamples:
# Switch to desktop #2
wmctrl -s 1

# Move Chromium to desktop #2
wmctrl -i -r `wmctrl -l | grep Chromium | cut -d ' ' -f1` -t 1
Menus
You will be installing other software which you do not what to appear mostly under 'Other' menu. You want more gradual menu structure than default. Install 'extra-xdg-menus'.
sudo apt-get -y install extra-xdg-menus2.5.5. Setting Serial Devices
pi@raspberrypi:~ $ lsusb
Bus 002 Device 004: ID 05e3:0612 Genesys Logic, Inc. Hub
Bus 002 Device 003: ID 090c:1000 Silicon Motion, Inc. - Taiwan (formerly Feiya Technology Corp.) Flash Drive
Bus 002 Device 002: ID 05e3:0612 Genesys Logic, Inc. Hub
Bus 002 Device 001: ID 1d6b:0003 Linux Foundation 3.0 root hub
Bus 001 Device 009: ID 067b:2303 Prolific Technology, Inc. PL2303 Serial Port
Bus 001 Device 013: ID 0000:0009
Bus 001 Device 014: ID 1c4f:0034 SiGma Micro
Bus 001 Device 011: ID 0c45:8101 Microdia
Bus 001 Device 010: ID 1a2c:2124 China Resource Semico Co., Ltd
Bus 001 Device 008: ID 05e3:0610 Genesys Logic, Inc. 4-port hub
Bus 001 Device 007: ID 0403:6001 Future Technology Devices International, Ltd FT232 Serial (UART) IC
Bus 001 Device 006: ID 05e3:0610 Genesys Logic, Inc. 4-port hub
Bus 001 Device 005: ID 16d0:0b03 MCS AIS Receiver [dAISy]
Bus 001 Device 004: ID 0bda:2838 Realtek Semiconductor Corp. RTL2838 DVB-T
Bus 001 Device 003: ID 05e3:0610 Genesys Logic, Inc. 4-port hub
Bus 001 Device 002: ID 2109:3431 VIA Labs, Inc. Hub
Bus 001 Device 001: ID 1d6b:0002 Linux Foundation 2.0 root hub
lsusb command will output all devices connected to USB bus.
Run
openplotter-serialand set aliases to each serial device OpenPlotter recognizes. Aliases should be marked to be associated with unique device IDs. See:
After that create connections to SignalK
2.6. Geolocation
2.6.1. GNSS
BU-353S4 GPS USB mouse by default is using binary SiRF protocol. You need to switch it once to NMEA before first use.
sudo apt-get -y install gpsd-clientsDo
lsusbPlug in USB mouse into raspberry pi USB port. Do lsusb again to see which new USB device appeared. Use that device port in the command below.
sudo stty -F /dev/ttyUSB0 4800
sudo gpsctl -n /dev/ttyUSB0
To obtain a fix GPS receiver needs a clear sky view. You need to have it outside. Chances are it is not going to find a location from inside your house.
2.6.2. Celestial Navigation
OpenCPN has a plugin to calculate a fix from various object sightings.
KStars is a program for the night sky view catalog. Can be installed from official archives using apt.
Stellarium is a free open source planetarium for your computer
sudo apt-get -y install stellariumStellarium starts in full screen mode and with my screen resolution the 'Exit' button is not visible on my touchscreen. You need to go into configuration screen in Stellarium and disable one more group of buttons in front of 'Exit' button.
'Exit' button is on bottom right.
Also change fonts in settings to size 11 (from 13).
Challenge: It would be interesting to integrate Stellarium for on board IMU to turn it into augmented reality app. And make a planetarium in the cabin with a projector. :) Also stars will let you check if your magnetic compass is correct. You will be able to locate satellites easier and tune your antennas better.
I think it shouldn’t be difficult based on this code:
See history in https://github.com/daniel-s-ingram/stellarium-oculus
sudo apt-get -y installv build-essential cmake zlib1g-dev libgl1-mesa-dev gcc g++ \
 graphviz doxygen gettext git \-plugins \
 libqt5serialport5 libqt5serialport5-dev qtpositioni
 qtscript5-dev libqt5svg5-dev qttools5-dev-tools qttools5-dev \
 libqt5opengl5-dev qtmultimedia5-dev libqt5multimedia5ng5-dev libgps-dev \
 libqt5positioning5 libqt5positioning5-plugins
sudo apt-get -y install libdrm-dev qtbase5-dev
curl -O -L https://github.com/Stellarium/stellarium/releases/download/v0.20.1/stellarium-0.20.1.tar.gz
gzip -cd < stellarium-0.20.1.tar.gz | tar xvf -
cd stellarium-0.20.1 && mkdir -p builds/unix
cd builds/unix
cmake ../../
make -j4
sudo make install
The manually built version of Stellarium will have GPSD support compiled in.
/usr/local/bin/stellarium
Hit F6 and select to read location from GPS (GPSD daemon).
Enable RemoteControl plugin in Stellarium:
Edit ~/.stellarium/config.ini
set
[RemoteControl]
autostart = true
...

[plugins_load_at_startup]
RemoteControl = true
...
To control view using heading we can issue the following command:
curl -X POST -d 'az=3.14' http://localhost:8090/api/main/viewaz is azimuth in radians.
Install shell calculator
sudo apt-get -y install bcNow if we read heading from SignalK we can update azimuth of view in Stellarium
MV=`curl -s http://localhost:3000/signalk/v1/api/vessels/self/navigation/magneticVariation/value`
MH=`curl -s http://localhost:3000/signalk/v1/api/vessels/self/navigation/headingMagnetic/value`
HT=`echo $MH + $MV | bc`
curl -X POST -d "az=$HT" http://localhost:8090/api/main/view
2.6.3. NTP Time Server Synchronization from GPS
This post describes how to set it up with couple of lines in config files.
In case if you have OpenWrt boat router then it might be better to set it up on the router.
2.6.4. Time Zones at Sea
A ship within the territorial waters of any nation uses that nation’s time. In international waters, time zone boundaries are meridians 15° apart, except that UT−12 and UT+12 are each 7.5° wide and are separated by the 180° meridian (not by the International Date Line, which is for land and territorial waters only). A captain can change ship’s clocks any time after entering a new time zone; midnight changes are common.
Time Zones at Sea
2.6.5. GPSBabel
GPSBabel converts waypoints, tracks, and routes between popular GPS receivers such as Garmin or Magellan and mapping programs like Google Earth or Basecamp. Literally hundreds of GPS receivers and programs are supported.
sudo apt-get -y install gpsbabel2.7. Charts and OpenCPN
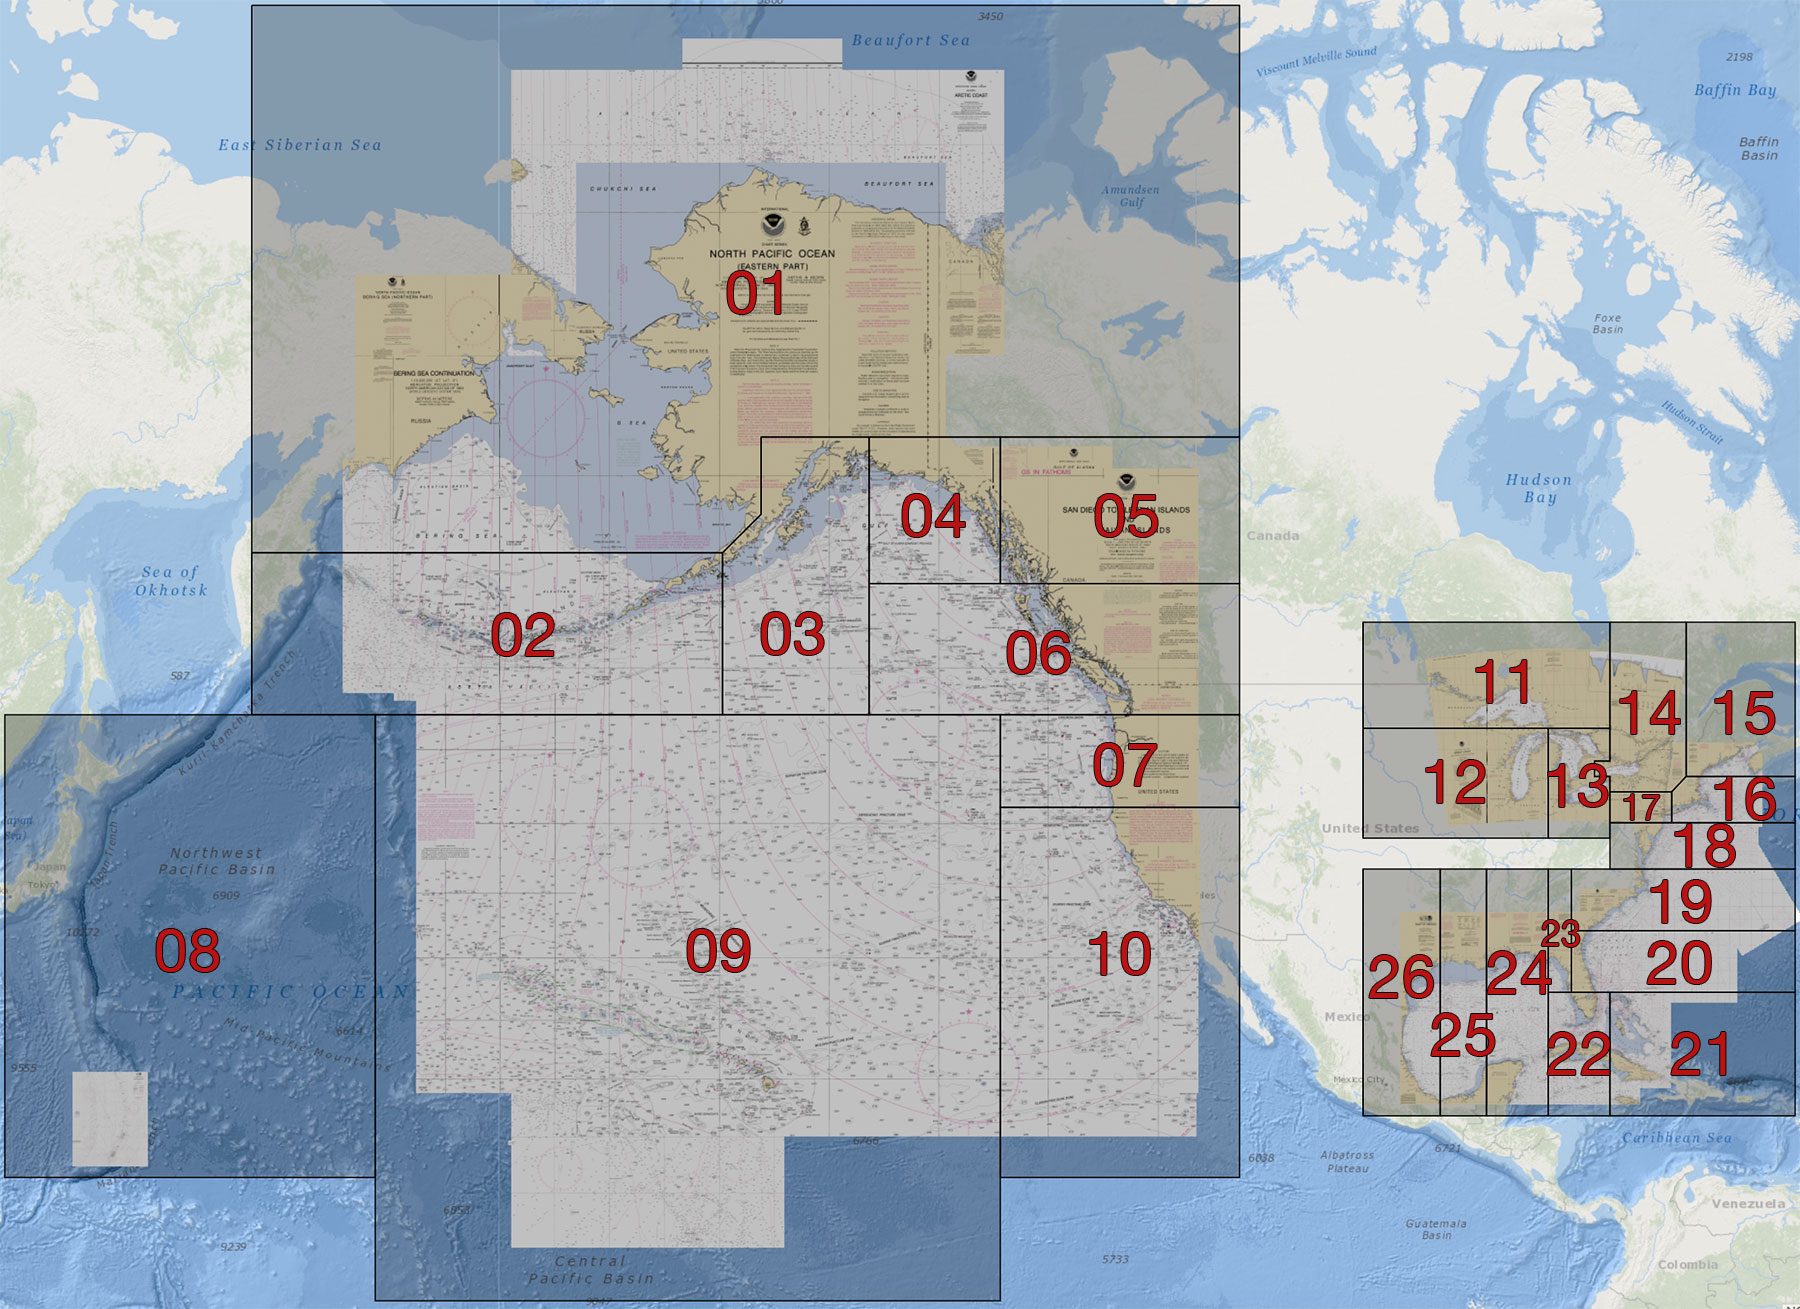
2.7.1. Charts
You download charts via OpenCPN chart downloader plugin.
NOAA RNC Regions
| Num | Description |
|---|---|
02 |
Block Island, RI to the Canadian Border |
03 |
New York to Nantucket and Cape May, New Jersey |
04 |
Chesapeake and Delaware Bays |
06 |
Norfolk, VA to Florida - The Intra-coastal Waterway |
07 |
Florida East Coast and the Keys |
08 |
Florida West Coast and the Keys |
10 |
Puerto Rico and US Virgin Islands |
12 |
Southern California - Point Arena to Mexican Border |
13 |
Lake Michigan |
14 |
San Francisco to Cape Flattery |
15 |
Pacific NorthWest - Puget Sound to Canadian Border |
17 |
Mobile, AL to Mexican Border |
22 |
Lake Superior and Lake Huron |
24 |
Lake Erie (US Waters) |
26 |
Lake Ontario (US Waters) |
30 |
Southeast Alaska |
32 |
South Central Alaska |
34 |
Alaska - The Aleutians and Bristol Bay |
36 |
Alaska - Norton Sound to Beaufort Sea |
40 |
Hawaiian Islands |
NOAA Nautical Chart MBTiles
Additionally, you can use links for MBtiles from here:
This is a list of available NOAA quilted nautical chart tilesets in MBTiles format. For the original NOAA Chart Tile Service please visit http://tileservice.charts.noaa.gov/
| No | Baseline MBTiles | Updates MBTiles |
|---|---|---|
01 |
||
02 |
||
03 |
||
04 |
||
05 |
||
06 |
||
07 |
||
08 |
||
09 |
||
10 |
||
11 |
||
12 |
||
13 |
||
14 |
||
15 |
||
16 |
||
17 |
||
18 |
||
19 |
||
20 |
||
21 |
||
22 |
||
23 |
||
24 |
||
25 |
||
26 |
OpenMap Tiles (Non-marine)
2.7.2. Touch Screen
Multitouch emulation with twofing
One of the issues that kept bugging me was the lack of multitouch support on a touchscreen in OpenCPN and Raspbian UI in general. Well there is a fix! The solution requires the program called 'twofing'. It is easy to install. I’ve combined the script for my Argonaut M7 waterproof display.
wget https://raw.githubusercontent.com/bareboat-necessities/my-bareboat/master/twofing/rpi_twofing_install.sh
chmod +x rpi_twofing_install.sh
./rpi_twofing_install.sh
reboot
Now zooming works with two fingers, there is a right click emulation with two fingers touch as well. With few modifications it can work for other screens. You will need to find out vendorID, productID and name for your touch screen display. I have Argonaut M7 gen2 screen. It gives me VendorID: 0000, ProductId: 0009, Name: 'Argonaut. Touchscreen'. For Argonaut M7 gen1 I’ve seen in posts VendorID: 04d8, ProductId: f724 and reported device name as 'Microchip Technology, Inc.'. For VendorID:ProductId 04D8:F724 these instructions might work: https://chalk-elec.com/?p=2028
Another issue with twofing and Chromium browser is that latest Chromium browser does handle multitouch fine by itself and twofing interferes with that. To fix that you need to add "chrome" into 'profiles.h' 'blacklist' variable in twofing code. Edit 'profiles.h', recompile it and copy into /usr/bin/ :
rm *.o twofing
make
sudo cp twofing /usr/bin/
Right click emulation with long touch
| After using it underway during two-week cruise I noticed that more important than two finger zoom is the ability to perform right click. I’ve added the script which will turn on emulation of right click with a long touch. This way you can add way points in OpenCPN and do other actions which require a right mouse click. (Ex: access to the context menu). The program is called evdev-rce. |
wget https://raw.githubusercontent.com/bareboat-necessities/my-bareboat/master/right-click-emu/right-click-emu.sh
chmod +x right-click-emu.sh
./right-click-emu.sh
reboot
On-screen keyboard
One more issue is entering the text on a touchscreen. I’ve added virtual on screen keyboard. I’ve compared several ones, and the one I liked the most is onboard https://github.com/linuxmint/onboard
I’ve made a script to install it. See: https://github.com/bareboat-necessities/my-bareboat/blob/master/onboard-rpi/onboard-install-rpi.sh
sudo apt-get -y install dbus-x11 onboardWith 'twofing' fix and an on-screen 'onboard' keyboard OpenCPN is much more usable on my touch screen display. Smooth Panning/Zooming, OpenGL, and Touchscreen should be all enabled in OpenCPN settings.
The sound didn’t work out of aux port. By default, Raspberry Buster uses HDMI audio output and Argonaut M7 doesn’t have a speaker. This command switches it to aux (You will need to add it into linux startup scripts if you want it on every boot):
amixer cset numid=3 12.7.3. OpenCPN Plugins
There are many plugins which you should install for OpenCPN. The script to install them is here:
There are two dashboard plugins with overlapping functionality. One is Dashboard Plugin and another one is Dashboard Tactics Plugin. It seems Dashboard Tactics Plugin is going to be a better choice for long term.
OpenCPN plugin for AIS radar was missing from the repositories. Here is the way to install it:
wget https://dl.cloudsmith.io/public/dan-dickey/opencpn-raspbian-unstable/deb/raspbian/pool/buster/main/a/ai/aisradar_pi_1.1-1_armhf.deb
sudo dpkg -i aisradar_pi_1.1-1_armhf.deb
2.7.4. Building OpenCPN from source
sudo apt-get -y install build-essential cmake gettext git-core gpsd gpsd-clients libgps-dev wx-common libwxgtk3.0-dev libglu1-mesa-dev libgtk2.0-dev wx3.0-headers libbz2-dev libtinyxml-dev libportaudio2 portaudio19-dev libcurl4-openssl-dev libexpat1-dev libcairo2-dev libarchive-dev liblzma-dev libexif-dev libelf-dev libsqlite3-dev bc bison flex libssl-dev python3 ddd htop

git clone https://github.com/opencpn/opencpn.git

cd opencpn && mkdir build && cd build

cmake -DOCPN_BUNDLE_TCDATA=ON -DOCPN_BUNDLE_GSHHS=CRUDE -DCMAKE_BUILD_TYPE=RelWithDebInfo -DOCPN_USE_CRASHREPORT=OFF -DOCPN_ENABLE_PORTAUDIO=OFF -DOCPN_ENABLE_SYSTEM_CMD_SOUND=ON -DOCPN_FORCE_GTK3=OFF ..

make -sj5

sudo make install
2.8. Compass / IMU / Barometer / Thermometer
Launch
openplotter-i2cand create sensors and connections as per screenshots below:
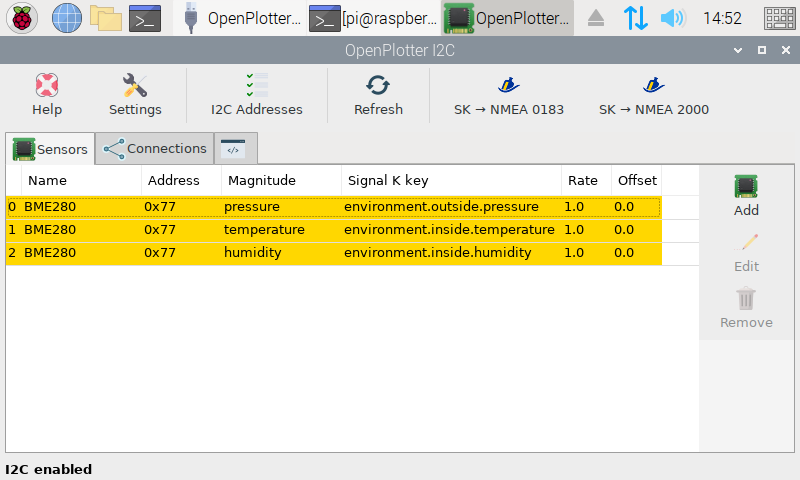
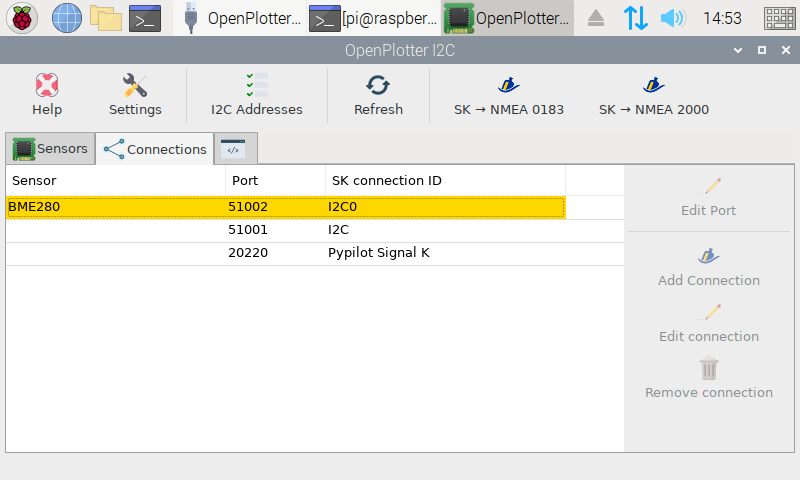
To add compass you need to launch
openplotter-pypilotCreate a connection like that:
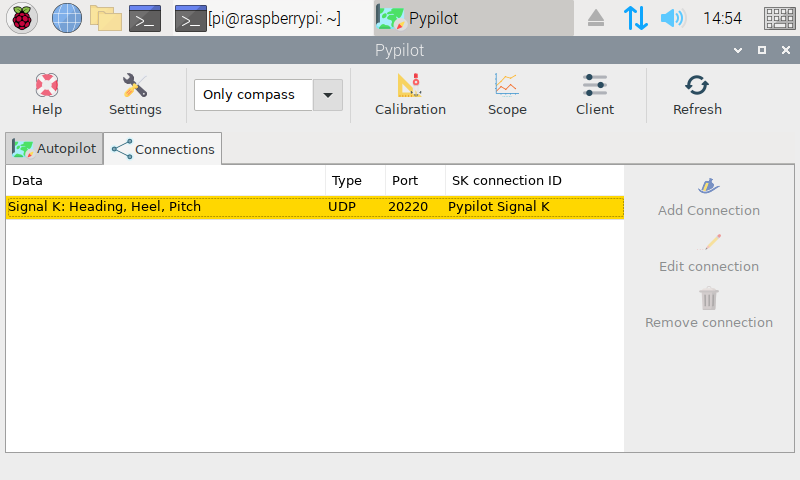
Check your set-up
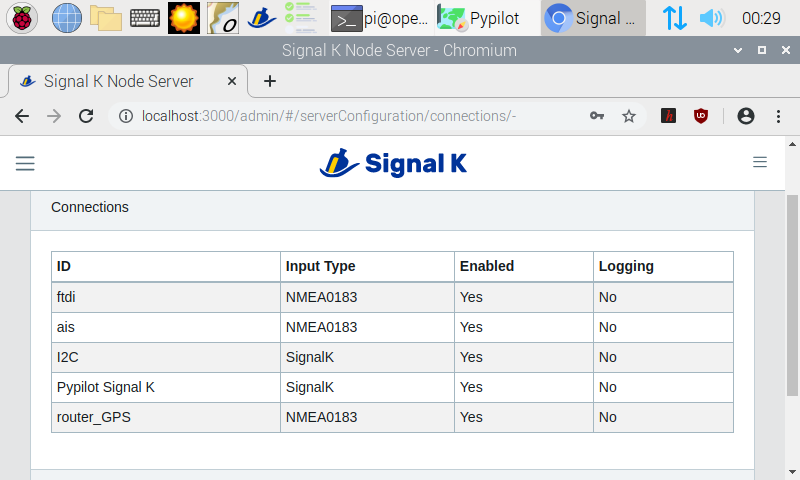
openplotter-startup check2.8.1. SignalK Connections
-
Set up SignalK to Sync uptime with GPS.
-
Set up SignalK to translate data into NMEA0183
-
The created connections should look like this:
2.8.2. Calibration
IMU needs to be calibrated.
In case you run into issues doing it you can start
pypilot_boatimuand check for errors.
2.9. Troubleshooting
Run
telnet localhost 10110to see NMEA data from SignalK. This is the stream you would need to set up as a connection in OpenCPN.
Press Ctrl-] to get to telnet prompt anf type 'quit' and hit 'Enter' to exit from telnet session.
Sample output:
Trying ::1...
Connected to localhost.
Escape character is '^]'.
$IIVTG,281.60,T,292.20,M,0.00,N,0.00,K,A*32
$IIHDG,167.67,-10.60,E,,*39
$IIHDT,157.1,T*20
$IIZDA,200813.020,20,01,2020,,*48
$IIMMB,30.2445,I,1.0242,B*78
$IIXDR,P,1.0242,B,Barometer*12
$IIHDG,167.68,-10.60,E,,*36
$IIHDM,167.7,M*25
$IIHDT,157.1,T*20
$IIXDR,A,3.2,D,PTCH,A,-91.3,D,ROLL*4B
^]
telnet> quit| You would need to calibrate your IMU sensors on your boat after mounting the computer inside the boat. Unfortunately OpenPlotter calibration dialogs are a bit big for the resolution of your cockpit monitor. So for calibration you might need to bring a higher resolution HDMI screen. |
| When complicated issues arise (if you think it is hardware related) try to find out a chipset of the device in question and start googling the chipset and the symptoms. Usually it gives better results than just searching by the vendor/model. |
2.10. SDR
2.10.1. Install Command line RTL_SDR with direct sample mode support
sudo apt-get -y install cmake libusb-1.0.0-dev build-essential
git clone https://github.com/bareboat-necessities/my-bareboat
cd my-bareboat/rtl-sdr/ && mkdir build && cd build
cmake ../ -DINSTALL_UDEV_RULES=ON
make && sudo make install && sudo ldconfig
sudo cp ../rtl-sdr.rules /etc/udev/rules.d/
/usr/local/bin/rtl_sdr
You should see an option to enable direct sample mode
rtl_sdr, an I/Q recorder for RTL2832 based DVB-T receivers

Usage: -f frequency_to_tune_to [Hz]
[-s samplerate (default: 2048000 Hz)]
[-d device_index (default: 0)]
[-g gain (default: 0 for auto)]
[-p ppm_error (default: 0)]
[-b output_block_size (default: 16 * 16384)]
[-n number of samples to read (default: 0, infinite)]
[-S force sync output (default: async)]
[-D direct_sampling_mode, 0 (default/off), 1 (I), 2 (Q), 3 (no-mod)]
[-N no dithering (default: use dithering)]
filename (a '-' dumps samples to stdout)
Blacklist interfering Linux RTL drivers
sudo bash -c 'cat << EOF > /etc/modprobe.d/no-rtl.conf
blacklist dvb_usb_rtl28xxu
blacklist rtl2832
blacklist rtl2830
EOF'
reboot
2.10.2. Command Line
Command line receiver and demodulator:
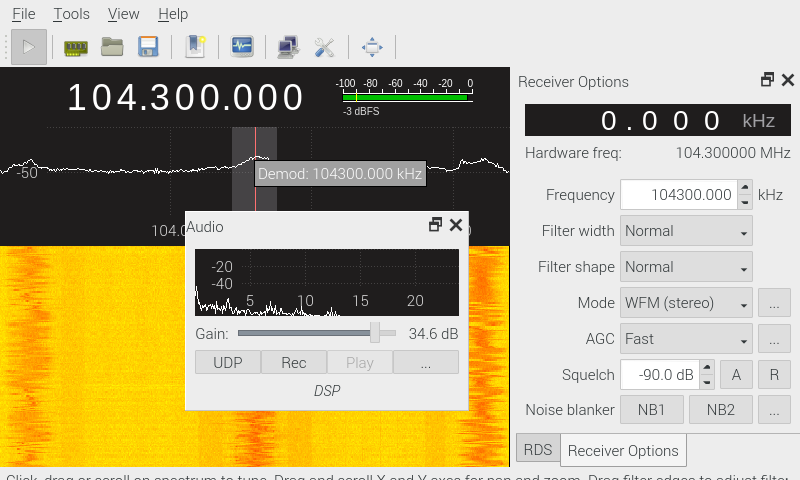
Example: The following command will play FM 104.3 MHz Station on your speaker:
rtl_fm -M wbfm -f 104.3M | play -r 32k -t raw -e s -b 16 -c 1 -V1 -2.10.3. MultimonNG decoders
sudo apt-get -y install multimon-ng netcat2.10.4. Meta Packages for SDR and HAM radio
Because there are so many separate packages for SDR and HAM radio software someone made a set of meta-packages which install bundles of packages for different aspects of radio interests.
Names start with hamradio-*
Example:
sudo apt-get -y install hamradio-sdr2.10.5. GQRX
Install SDR receiver app called GQRX
sudo apt-get -y install rtl-sdr rtl-ais gqrx-sdrEasiest way to try your RTL-SDR dongle is via tuning to FM station.
-
Launch GQRX
-
Set up input SDR dongle and audio output
-
Tune to an FM station (Example 104.3 MHz in my area) (see screenshot)
-
Adjust gain in audio control. You should hear clear radio.
See also:
2.10.6. Cubic SDR
Another SDR application available for Raspberry Pi is CubicSDR:
sudo apt-get -y install cubicsdr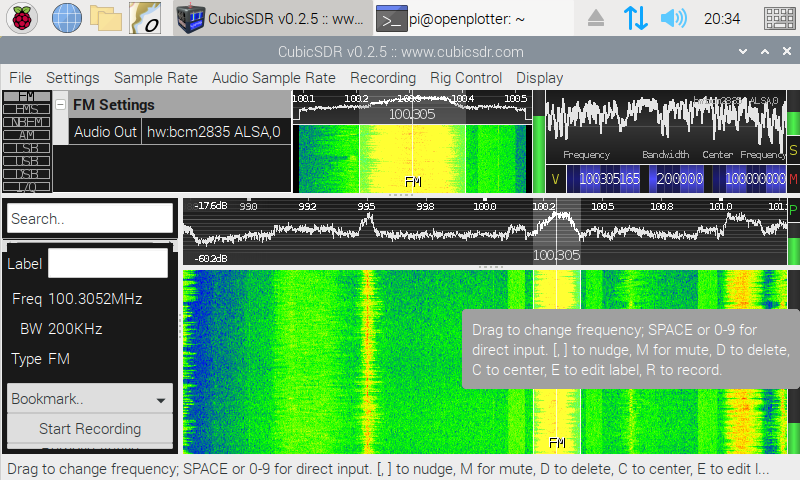
2.10.7. SdrGlut
Lightweight SDR radio
sudo apt-get -y install build-essential libsoapysdr0.6 libsoapysdr-dev libopenal-dev \
 libliquid-dev freeglut3 freeglut3-dev libalut0 libalut-dev librtaudio-dev
sudo apt-get -y install git
cd /home/pi
git clone https://github.com/righthalfplane/SdrGlut.git
cd SdrGlut
make -f makefileRaspbian
There are several recent versions of libliquid. The call to ampmodem_create differs. If a complier error happens, switch the line that is commented out. It occurs in two places.
   f->demodAM = ampmodem_create(0.5, mode, iflag);
// f->demodAM = ampmodem_create(0.5, 0.0, mode, iflag);
Running:
cd /home/pi/SdrGlut
./sdrglut.x
2.10.8. Quisk
Quisk is a Software Defined Radio (SDR) and is the software that controls receivers
sudo apt-get -y install python3-wxgtk4.0 ## Use this for Python3
sudo apt-get -y install libfftw3-dev
sudo apt-get -y install libasound2-dev
sudo apt-get -y install portaudio19-dev
sudo apt-get -y install libpulse-dev
sudo apt-get -y install python3-dev
sudo apt-get -y install libpython3-dev
sudo apt-get -y install python3-usb
sudo apt-get -y install python3-setuptools
sudo apt-get -y install python3-pip
sudo python3 -m pip install --upgrade quisk
Running:
python3 -m quisk2.10.9. GNU Radio Companion
GNU Radio Companion is generic signal processing library often used with SDR.
sudo apt-get -y install gnuradioRunning:
gnuradio-companion2.10.10. FlDigi - Universal Software Modem for SDR, and more
FlDigi has decoders for use in marine communications SitorB/NavTex, RTTY, WeFax, CW, etc
sudo apt-get -y install fldigi2.10.11. PACTOR
PACTOR is a radio modulation mode used by amateur radio operators, marine radio stations, military or government users such as the Department of Homeland Security, and radio stations in isolated areas to send and receive digital information via radio.
# https://www.p4dragon.com/en/PMON.html
echo "deb https://www.scs-ptc.com/repo/packages/ buster non-free" | sudo tee /etc/apt/sources.list.d/scs.list > /dev/null
wget -q -O - https://www.scs-ptc.com/repo/packages/scs.gpg.key | sudo apt-key add -
sudo apt update
sudo apt-get -y install pmon
Running:
pmon2.11. NavTex
Decoder software for NavTex is available here. Download the Java version to work on raspberry pi. http://www.frisnit.com/navtex/
OpenSource (GPL Licensed) NavTex decoder: https://arachnoid.com/JNX/
| Item | Description | Cost | Source |
|---|---|---|---|
Antenna for SDR radio weather fax and NavTex |
2020 New PA0RDT Mini-Whip HF,VLF active RX antenna, 10kHz to 30MHz, Active RX SDR Antenna Mini-Whip 10kHz -30MHz H217 https://www.aliexpress.com/item/4000744804149.html Note: Search also for PA0RDT mini whip antennas. |
$42.00 |
AliExpress |
HF Upconverter |
Ham It Up Nano - Tiny HF, MF & LF Upconverter w/TCXO
|
$50.00 |
Amazon |
RTL SDR v3 in Direct sampling mode allows listening to HF signals between about 500 kHz to 28.8 MHz
More info here : https://www.rtl-sdr.com/rtl-sdr-blog-v-3-dongles-user-guide/
Upconverters for SDR:
See also this discussion:
Newbie Startup Bumps - RTL-SDR for NavTex and Weatherfax
2.11.1. JNX Installation
sudo apt-get -y install default-jdk
cd /home/pi
mkdir JNX
cd JNX
curl https://arachnoid.com/JNX/JNX.jar > JNX.jar
curl https://arachnoid.com/JNX/JNX_source.tar.gz > JNX_source.tar.gz

sudo bash -c 'cat << EOF > /usr/share/raspi-ui-overrides/applications/jnx.desktop
[Desktop Entry]
Type=Application
Name=JNX
GenericName=JNX
Comment=JNX NavTex Decoder
Exec=sh -c "cd /home/pi/JNX; java -jar JNX.jar"
Terminal=false
Icon=radio
Categories=HamRadio;Radio;Weather
Keywords=HamRadio;Radio;Weather
EOF'
2.12. WeatherFax JWX
sudo apt-get -y install default-jdk
sudo apt-get -y install hamfax
cd /home/pi
mkdir JWX
cd JWX
curl https://arachnoid.com/JWX/resources/JWX.jar > JWX.jar
curl https://arachnoid.com/JWX/resources/JWX_source.tar.bz2 > JWX_source.tar.bz2

sudo bash -c 'cat << EOF > /usr/share/raspi-ui-overrides/applications/jwx.desktop
[Desktop Entry]
Type=Application
Name=JWX
GenericName=JWX
Comment=JWX WeatherFax Decoder
Exec=sh -c "cd /home/pi/JWX; java -jar JWX.jar"
Terminal=false
Icon=radio
Categories=HamRadio;Radio;Weather
Keywords=HamRadio;Radio;Weather
EOF'
2.13. GPredict for Satellite Weather
sudo apt-get -y install predict
sudo apt-get -y install gpredict

cd /home/pi
curl https://wxtoimgrestored.xyz/beta/wxtoimg-armhf-2.11.2-beta.deb > wxtoimg-armhf-2.11.2-beta.deb
sudo dpkg -i wxtoimg-armhf-2.11.2-beta.deb
wxtoimgInstead of wxtoimg I think it’s possible to use:
-
NOAA APT weather satellite image decoder, for Linux, Windows, RPi 2+ and OSX
GPredict which comes from default raspberry Pi archives doesn’t seem to support reading GPS location from GPSD daemon. You might have to compile it from the source.
mkdir ~/noaa-apt
cd ~/noaa-apt
wget https://github.com/martinber/noaa-apt/releases/download/v1.1.2/noaa-apt-1.1.2-armv7-linux-gnueabihf.zip
unzip noaa-apt-1.1.2-armv7-linux-gnueabihf.zip
cd ~/noaa-apt
./noaa-apt2.14. AIS
Setting up dAISy AIS is very straight forward. It does require higher baud rate, so make sure you specify it correctly. After plugging into USB and antenna and registering in openplotter-serial in device mapping and connections it should start giving AIS targets sentences via NMEA. If it doesn’t see any ships close by then it doesn’t send any sentences.
2.14.1. GNU AIS + GUI
GNU AIS + GUI
sudo apt-get -y install gnuais
sudo apt-get -y install gnuaisgui

sudo bash -c 'cat << EOF > /usr/share/raspi-ui-overrides/applications/gnuaisgui.desktop
[Desktop Entry]
Type=Application
Name=GNU AIS
GenericName=GNU AIS
Comment=GNU AIS
Exec=gnuaisgui
Terminal=false
Categories=Navigation;ChartPlotter
Keywords=Navigation;ChartPlotter
EOF'
start
gnuaisgui2.14.2. AIS with SDR
2.15. Other Free Chart Plotting Software and Weather Routing
There are multiple ways to receive weather predictions:
-
Download GRIB files via internet. (Only works if internet is available). You have this functionality as a part of GRIB OpenCPN plugin.
-
GRIB files via SSB radio (out of scope here)
-
Weather FAX (some people just connect radio to computer audio input, record audio file and covert it using utility into image). You have this supported via OpenCPN WeatherFax plugin. It would be nice to completely automate this process using RTL-SDR.
-
Images from NOAA satellites via radio. RTL-SDR can be used to automate this as well.
Discussion about WeatherFax on Raspberry Pi https://www.raspberrypi.org/forums/viewtopic.php?t=260690
2.15.1. QtVlm
OpenCPN Weather plugins provide weather and weather routing functionality.
There is one more (non-opensource) software solution called 'QtVlm'
which is available for Raspberry Pi.
I’ve installed and played with it, and I have found it is too difficult to use on a small cockpit touchscreen with default settings, but they can be adjusted. It can also use the charts you would download for OpenCPN. So it even can be used as your main chart plotter.
Installation:
cd /home/pi
curl https://www.meltemus.com/index.php/en/download/send/9-raspberrypi/209-qtvlm-5-9-8-p1-6 > qtVlm-5.9.8-p1-rpi.tar.gz
gzip -cd < qtVlm-5.9.8-p1-rpi.tar.gz | tar xvf -
mkdir -p /home/pi/.qtVlm
curl https://raw.githubusercontent.com/bareboat-necessities/my-bareboat/master/qtvlm-conf/qtVlm.ini > /home/pi/.qtVlm/qtVlm.ini

sudo bash -c 'cat << EOF > /usr/share/raspi-ui-overrides/applications/qtvlm.desktop
[Desktop Entry]
Type=Application
Name=QtVlm
GenericName=QtVlm
Comment=QtVlm ChartPlotter
Exec=sh -c "cd /home/pi/qtVlm; ./qtVlm -platform xcb"
Terminal=false
Icon=/home/pi/qtVlm/icon/qtVlm_48x48.png
Categories=Navigation;ChartPlotter
Keywords=Navigation;ChartPlotter
EOF'
Running:
cd qtVlm
./qtVlm -platform xcb
2.15.2. AvNav
This is a nice chart plotter which runs in a browser supports number of chart formats (You need to convert them though with the provided utility). Since it is running in Chromium browser, the touchscreen support is better. This is another option to use as main chart plotter instead of OpenCPN.
References:
Installation:
sudo wget -q -O - https://open-mind.space/repo/open-mind.space.gpg.key |  sudo apt-key add -

sudo bash -c 'cat << EOF > /etc/apt/sources.list.d/extra.list
deb https://open-mind.space/repo/ buster-stable avnav
EOF'

sudo apt update
sudo apt-get -y install avnav
sudo apt-get -y install xterm
sudo apt-get -y install mpg123

mkdir -p /home/pi/AvNavCharts/out

sudo adduser avnav audio

sudo systemctl enable avnav
Edit config:
sudo nano /var/lib/avnav/avnav_server.xmlEdit host, NMEA port and http port:
<AVNServer>
 ...
 <AVNSocketReader host="localhost" port="10110"/>
 <AVNHttpServer navurl="/viewer/avnav_navi.php" httpPort="8099" upzoom="0"
     chartbase="maps" empty="nonexistent">
   <Directory urlpath="maps" path="/home/pi/AvNavCharts/out"/>
 ...
 </AVNHttpServer>
</AVNServer>
Running:
sudo systemctl start avnavOpen browser with URL: http://localhost:8099/
Register menu item:
sudo apt-get -y install xdotool

cd /home/pi
curl https://raw.githubusercontent.com/bareboat-necessities/my-bareboat/master/raspberrypi-ui-mods/usr/share/raspi-ui-overrides/desktop-directories/Navigation.directory > Navigation.directory && \
sudo cp Navigation.directory /usr/share/raspi-ui-overrides/desktop-directories/

curl https://raw.githubusercontent.com/bareboat-necessities/my-bareboat/master/raspberrypi-ui-mods/etc/xdg/menus/lxde-pi-applications.menu > lxde-pi-applications.menu  && \
sudo cp lxde-pi-applications.menu /etc/xdg/menus/

sudo bash -c 'cat << EOF > /usr/share/raspi-ui-overrides/applications/avnav.desktop
[Desktop Entry]
Type=Application
Name=AvNav
GenericName=AvNav
Comment=AvNav ChartPlotter
Exec=sh -c "chromium-browser -new-window http://localhost:8099; sleep 6; xdotool key F11"
Terminal=false
Icon=globe
Categories=Navigation;ChartPlotter
Keywords=Navigation;ChartPlotter
EOF'
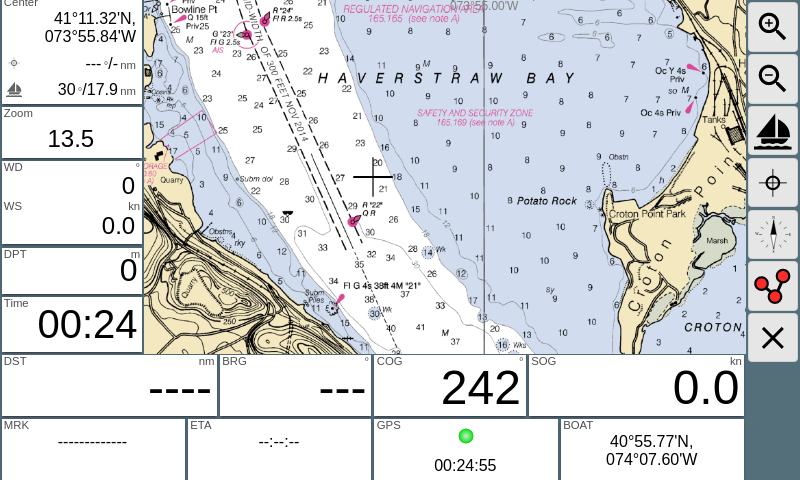
AvNav Charts
You can use mbtiles which you downloaded for OpenCPN. AvNav needs to convert them first. To convert:
avnav -gselect .mbtiles file, press 'Convert', wait for process to finish. Next
chromium-browser http://localhost:8099-
click arrow down icon on right side toolbar, this will bring you to chart upload screen
-
click arrow up icon on right side. select .gemf file and upload the file
For more documentation:
 git clone https://github.com/wellenvogel/avnav.git
 chromium-browser avnav/docs/en_install.html
 chromium-browser avnav/docs/en_charts.html
2.16. NMEA Wind Sensor
You can connect via NMEA to your boat computer or for older wind transducers there is a hard way:
2.17. NMEA Sleuth Chromium Extension
Install NMEA Sleuth from https://panaaj.bitbucket.io/ Launch Chromium browser and install NMEA Sleuth extension from Chrome Web Store.
2.18. Text to Speech
Visual alarms are of no use if you do not watch. So we could add text-to-speech:
wget -q https://ftp-master.debian.org/keys/release-10.asc -O- | sudo apt-key add -
echo "deb http://deb.debian.org/debian buster non-free" | sudo tee -a /etc/apt/sources.list
sudo apt update
sudo apt-get -y install libttspico-utils
sudo apt-get -y install sox
Example of playing message:
pico2wave -l  en-US -w /tmp/pico2wave.wav "Passenger Announcement... \
 Follow these few rules, to make your trip enjoyable for everyone on board. \
 Move around the boat on its high side. \
 Always hold on to something steady, and that does not move: shrouds, grab rails, when you are outside of the cockpit. \
 If you can not swim, wear a life jacket, if you move outside of the cockpit. \
 Watch your head and listen to the crew warnings when you are around the boom. \
 The boom can swing fast, if the wind changes. \
 In case if someone falls overboard, throw anything, that floats to the victim and \
 shout: Man overboard! pointing at the victim. \
 Do not put into a marine toilet anything, which you have not eaten or drunk first. \
 Do not throw plastic overboard. \
 Watch the horizon. If you feel sea sick, try to stay active outside of the cabin." && play -qV0 /tmp/pico2wave.wav treble 24  gain -l 6
2.19. Creating Backup Boot SD Card
Tutorial is here:
It is based on rpi-clone software https://github.com/billw2/rpi-clone
2.20. SignalK Applications
2.20.1. Freeboard-SK
Freeboard SK takes charts from SignalK Charts plugin which you install from SignalK app store. I’ve configured it to point to .mbtiles chart file for my sailing region.
Login into SignalK (http://localhost:3000) as admin and go to AppStore link (left side) and install Charts plugin. Then restart the SignalK server from UI and login again as admin. Go to 'Server' (left side) then 'Plugin Config' / 'Signal K Charts'. Put word 'charts' into Path field, check 'Active', and proceed with creating symbolic links to your .mbtiles files in /home/pi/.signalk/charts directory. (See TukTuk Charts installation section in this document).
You can check for charts by accessing this URL:
The following plugins should be installed on the Signal K node server to enable full functionality:
-
freeeboard-sk-helper (Course information)
-
sk-resources-fs (Routes, Waypoints, Notes & Regions provider)
-
@signalk/charts-plugin (Charts provider)
-
signalk-anchoralarm-plugin (anchor alarm settings & notifications)
-
signalk-simple-notifications (depth alarm notifications)
It takes some time to download and install them from AppStore via SignalK web UI.
Create Menu entry:
sudo apt-get -y install xdotool

sudo bash -c 'cat << EOF > /usr/share/raspi-ui-overrides/applications/freeboard-sk.desktop
[Desktop Entry]
Type=Application
Name=Freeboard-SK
GenericName=Freeboard-SK
Comment=Freeboard-SK ChartPlotter
Exec=sh -c "chromium-browser -new-window http://localhost:3000/@signalk/freeboard-sk; sleep 8; xdotool key F11"
Terminal=false
Icon=globe
Categories=Navigation;ChartPlotter
Keywords=Navigation;ChartPlotter
EOF'
You can also add additional sail instruments to the main view.
2.20.2. InstrumentPanel
InstrumentPanel in installable via SignalK AppStore.
Add menu entry:
sudo apt-get -y install xdotool

sudo bash -c 'cat << EOF > /usr/share/raspi-ui-overrides/applications/instrument-panel-sk.desktop
[Desktop Entry]
Type=Application
Name=InstrumentPanel
GenericName=InstrumentPanel
Comment=InstrumentPanel for SignalK
Exec=sh -c "chromium-browser -new-window http://localhost:3000/@signalk/instrumentpanel; sleep 7; xdotool key F11"
Terminal=false
Icon=globe
Categories=Navigation;ChartPlotter
Keywords=Navigation;ChartPlotter
EOF'
2.20.3. SailGauge
SailGauge in installable via SignalK AppStore.
Add menu entry:
sudo apt-get -y install xdotool

sudo bash -c 'cat << EOF > /usr/share/raspi-ui-overrides/applications/sailgauge-sk.desktop
[Desktop Entry]
Type=Application
Name=SailGauge
GenericName=SailGauge
Comment=SailGauge for SignalK
Exec=sh -c "chromium-browser -new-window http://localhost:3000/@signalk/sailgauge; sleep 7; xdotool key F11"
Terminal=false
Icon=globe
Categories=Navigation;ChartPlotter
Keywords=Navigation;ChartPlotter
EOF'
2.20.4. Tuktuk Chart Plotter
You can install it from inside SignalK AppStore. You would also need to install Charts SignalK plugin.
Create a symbolic link in ~/.signalk/charts to .mbtiles files of your sailing areas.
cd ~/.signalk/charts/
ln -s /home/pi/Charts/MBTiles/NOAA/MBTILES_17.mbtiles mbtiles_17.mbtiles
restart signalK (can be done from SignalK UI if you logged in as admin)
open browser with URL: http://localhost:3000/tuktuk-chart-plotter/
On the left side/bottom check the checkbox with the tiles file.
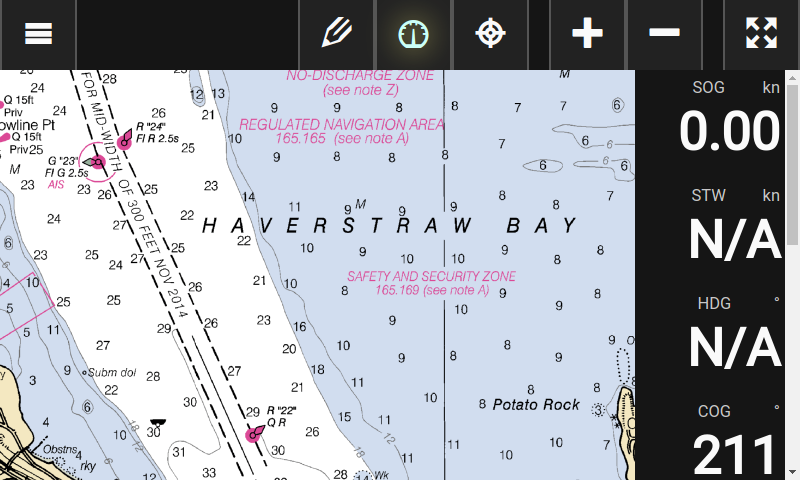
Register in Menu
sudo apt-get -y install xdotool

sudo bash -c 'cat << EOF > /usr/share/raspi-ui-overrides/applications/tuktuk.desktop
[Desktop Entry]
Type=Application
Name=TukTuk
GenericName=TukTuk
Comment=TukTuk ChartPlotter
Exec=sh -c "chromium-browser -new-window http://localhost:3000/tuktuk-chart-plotter; sleep 8; xdotool key F11"
Terminal=false
Icon=globe
Categories=Navigation;ChartPlotter
Keywords=Navigation;ChartPlotter
EOF'
2.20.5. KIP Dashboard
Set up:
Visit http://localhost:3000/@mxtommy/kip with your browser. Hit F11 to go fullscreen. Go to App Settings.
Put this into SignalK API URL:
http://localhost:3000
Now you can edit widgets to match your sensors. After you are done with it you can lock the screen. You can create several pages of dashboards
Add the menu:
sudo apt-get -y install xdotool

sudo bash -c 'cat << EOF > /usr/share/raspi-ui-overrides/applications/signalk-kip.desktop
[Desktop Entry]
Type=Application
Name=SignalK KIP Dashboard
GenericName=SignalK KIP Dashboard
Comment=SignalK KIP Dashboard
Exec=sh -c "chromium-browser -new-window http://localhost:3000/@mxtommy/kip; sleep 8; xdotool key F11"
Terminal=false
Icon=globe
Categories=Navigation;SignalK
Keywords=Navigation;SignalK
EOF'
2.21. Iridium Satellite Phone as dial-up modem
These couple links will give you information of how to connect your Satellite phone and use it as dial-up TCP/IP modem.
sudo apt-get -y install wvdial ppp pppstatus picocomI think it can be even done on your boat OpenWrt router.
2.22. Inmarsat Fleet Decoder with SDR
RTL-SDR Tutorial: Decoding Inmarsat STD-C EGC Messages
OpenSource Decoder code (C#):
Install C3 (Mono) on Raspberry Pi
sudo apt-get -y install mono-complete| Item | Description | Cost | Source |
|---|---|---|---|
Antenna for SDR radio Inmarsat |
RTL-SDR Blog Active L-Band 1525 - 1637 Inmarsat to Iridium Patch Antenna Set https://www.rtl-sdr.com/buy-rtl-sdr-dvb-t-dongles/ |
$42.00 |
rtl-sdr.com / Amazon / Ebay |
2.24. NMEA 2000
Raspberry Pi with PICAN-M NMEA 2000 board
2.25. Music Player
I’ve looked at number of media and music player projects available on raspberry pi and the one which works nice on OpenPlotter and cockpit touch display is Mopidy with Spotify extension and MusicBox Web UI extension.
Install from apt.mopidy.com
For Raspberry PI you should first try installing via apt. If pre-build package doesn’t exist then you use python3 pip.
# Add the archive’s GPG key:
wget -q -O - https://apt.mopidy.com/mopidy.gpg | sudo apt-key add -

# Add the APT repo to your package sources:
sudo wget -q -O /etc/apt/sources.list.d/mopidy.list https://apt.mopidy.com/buster.list

sudo adduser mopidy video
sudo adduser mopidy audio
sudo xhost +SI:localuser:mopidy

# Install Mopidy and all dependencies:
sudo apt update
sudo apt-get -y install mopidy mopidy-mpd mopidy-spotify mopidy-tunein

# Install some needed packages
sudo python3 -m pip install mem systems

# Install Mopidy MusicBox Web Client:
sudo python3 -m pip install Mopidy-MusicBox-Webclient

# Install YouTube support
sudo python3 -m pip install --pre Mopidy-YouTube
Configure Spotify https://mopidy.com/ext/spotify/
Edit mopidy.conf
nano /home/pi/.config/mopidy/mopidy.conf[mpd]
enabled = true
hostname = ::
[http]
enabled = true
hostname = ::
[audio]
#mixer = software
mixer_volume = 90
output = alsasink
[spotify]
enabled = true
username = alice
password = secret
client_id = ... client_id value you got from https://mopidy.com/ext/spotify/ ...
client_secret = ... client_secret value you got from https://mopidy.com/ext/spotify/ ...
timeout = 60Run:
/usr/bin/mopidyOpen Chromium browser http://localhost:6680
Now register mopidy as a service to start automatically
sudo systemctl enable mopidy
sudo cp /home/pi/.config/mopidy/mopidy.conf /etc/mopidy/mopidy.conf
sudo cp /home/pi/.config/mopidy/mopidy.conf /var/lib/mopidy/.config/mopidy/mopidy.conf
sudo nano /usr/lib/systemd/system/mopidy.servicemake sure you edit ExecStart line like this:
ExecStart=sh -c 'while ! ping -c 1 -n -w 1 spotify.com; do sleep 5; done;/usr/bin/mopidy --option mpd/enabled=true --config /usr/share/mopidy/conf.d:/etc/mopidy/mopidy.conf'MPD needs for spotify play list to be available to start properly.
Reboot.
Create a menu link to open Mopidy Web UI directly from desktop menu via this command:
sudo apt-get -y install xdotool

cd /home/pi

curl https://raw.githubusercontent.com/bareboat-necessities/my-bareboat/master/raspberrypi-ui-mods/usr/share/raspi-ui-overrides/desktop-directories/Radio.directory > Radio.directory && \
sudo cp Radio.directory /usr/share/raspi-ui-overrides/desktop-directories/

curl https://raw.githubusercontent.com/bareboat-necessities/my-bareboat/master/raspberrypi-ui-mods/etc/xdg/menus/lxde-pi-applications.menu > lxde-pi-applications.menu && \
sudo cp lxde-pi-applications.menu /etc/xdg/menus/

sudo bash -c 'cat << EOF > /usr/share/raspi-ui-overrides/applications/musicbox.desktop
[Desktop Entry]
Type=Application
Name=MusicBox
GenericName=MusicBox
Comment=Mopidy MusicBox
Exec=sh -c "chromium-browser -new-window http://openplotter:6680/musicbox_webclient; sleep 6; xdotool key F11"
Terminal=false
Icon=sound
Categories=AudioVideo;Multimedia;Sound
Keywords=AudioVideo;Multimedia;Sound
EOF'
You can use your smartphone to control the player with one of the MPD client applications. I used 'MPDPlayer' on iphone and MPDroid on android. You create connection:
openplotter:6600
or
10.10.10.1:6600
2.26. USB Audio Dongle with audio input/output
Raspberry Pi doesn’t have audio input. For it, you can use external USB audio dongle card.
Example: Adafruit https://www.adafruit.com/product/1475
Setting up instructions: https://www.alsa-project.org/wiki/Setting_the_default_device
Find your desired card with:
cat /proc/asound/cards
and then put into /etc/asound.conf the following:
defaults.pcm.card 1
defaults.ctl.card 1
Replace "1" with number of your card determined above.
2.27. Sail CAD
Sailcut CAD is a sail design and plotting software which allows you to design and visualise your own sail and compute the accurate development of all panels in flat sheets.
sudo apt-get -y install sailcut saillcut-doc
2.28. For Racers
Boats Scenario
Race Scenario drawing tool.
sudo apt-get -y install boats

sudo bash -c 'cat << EOF > /usr/share/applications/boats.desktop
[Desktop Entry]
Type=Application
Name=Boat Scenario
GenericName=Boat Scenario````
Comment=Race scenario drawing tool
Exec=boats %F
Terminal=false
Icon=boats.png
Categories=Navigation;Sailing
Keywords=Navigation;Sailing
MimeType=application/x-boats
EOF'
2.29. Testing
Another test site:
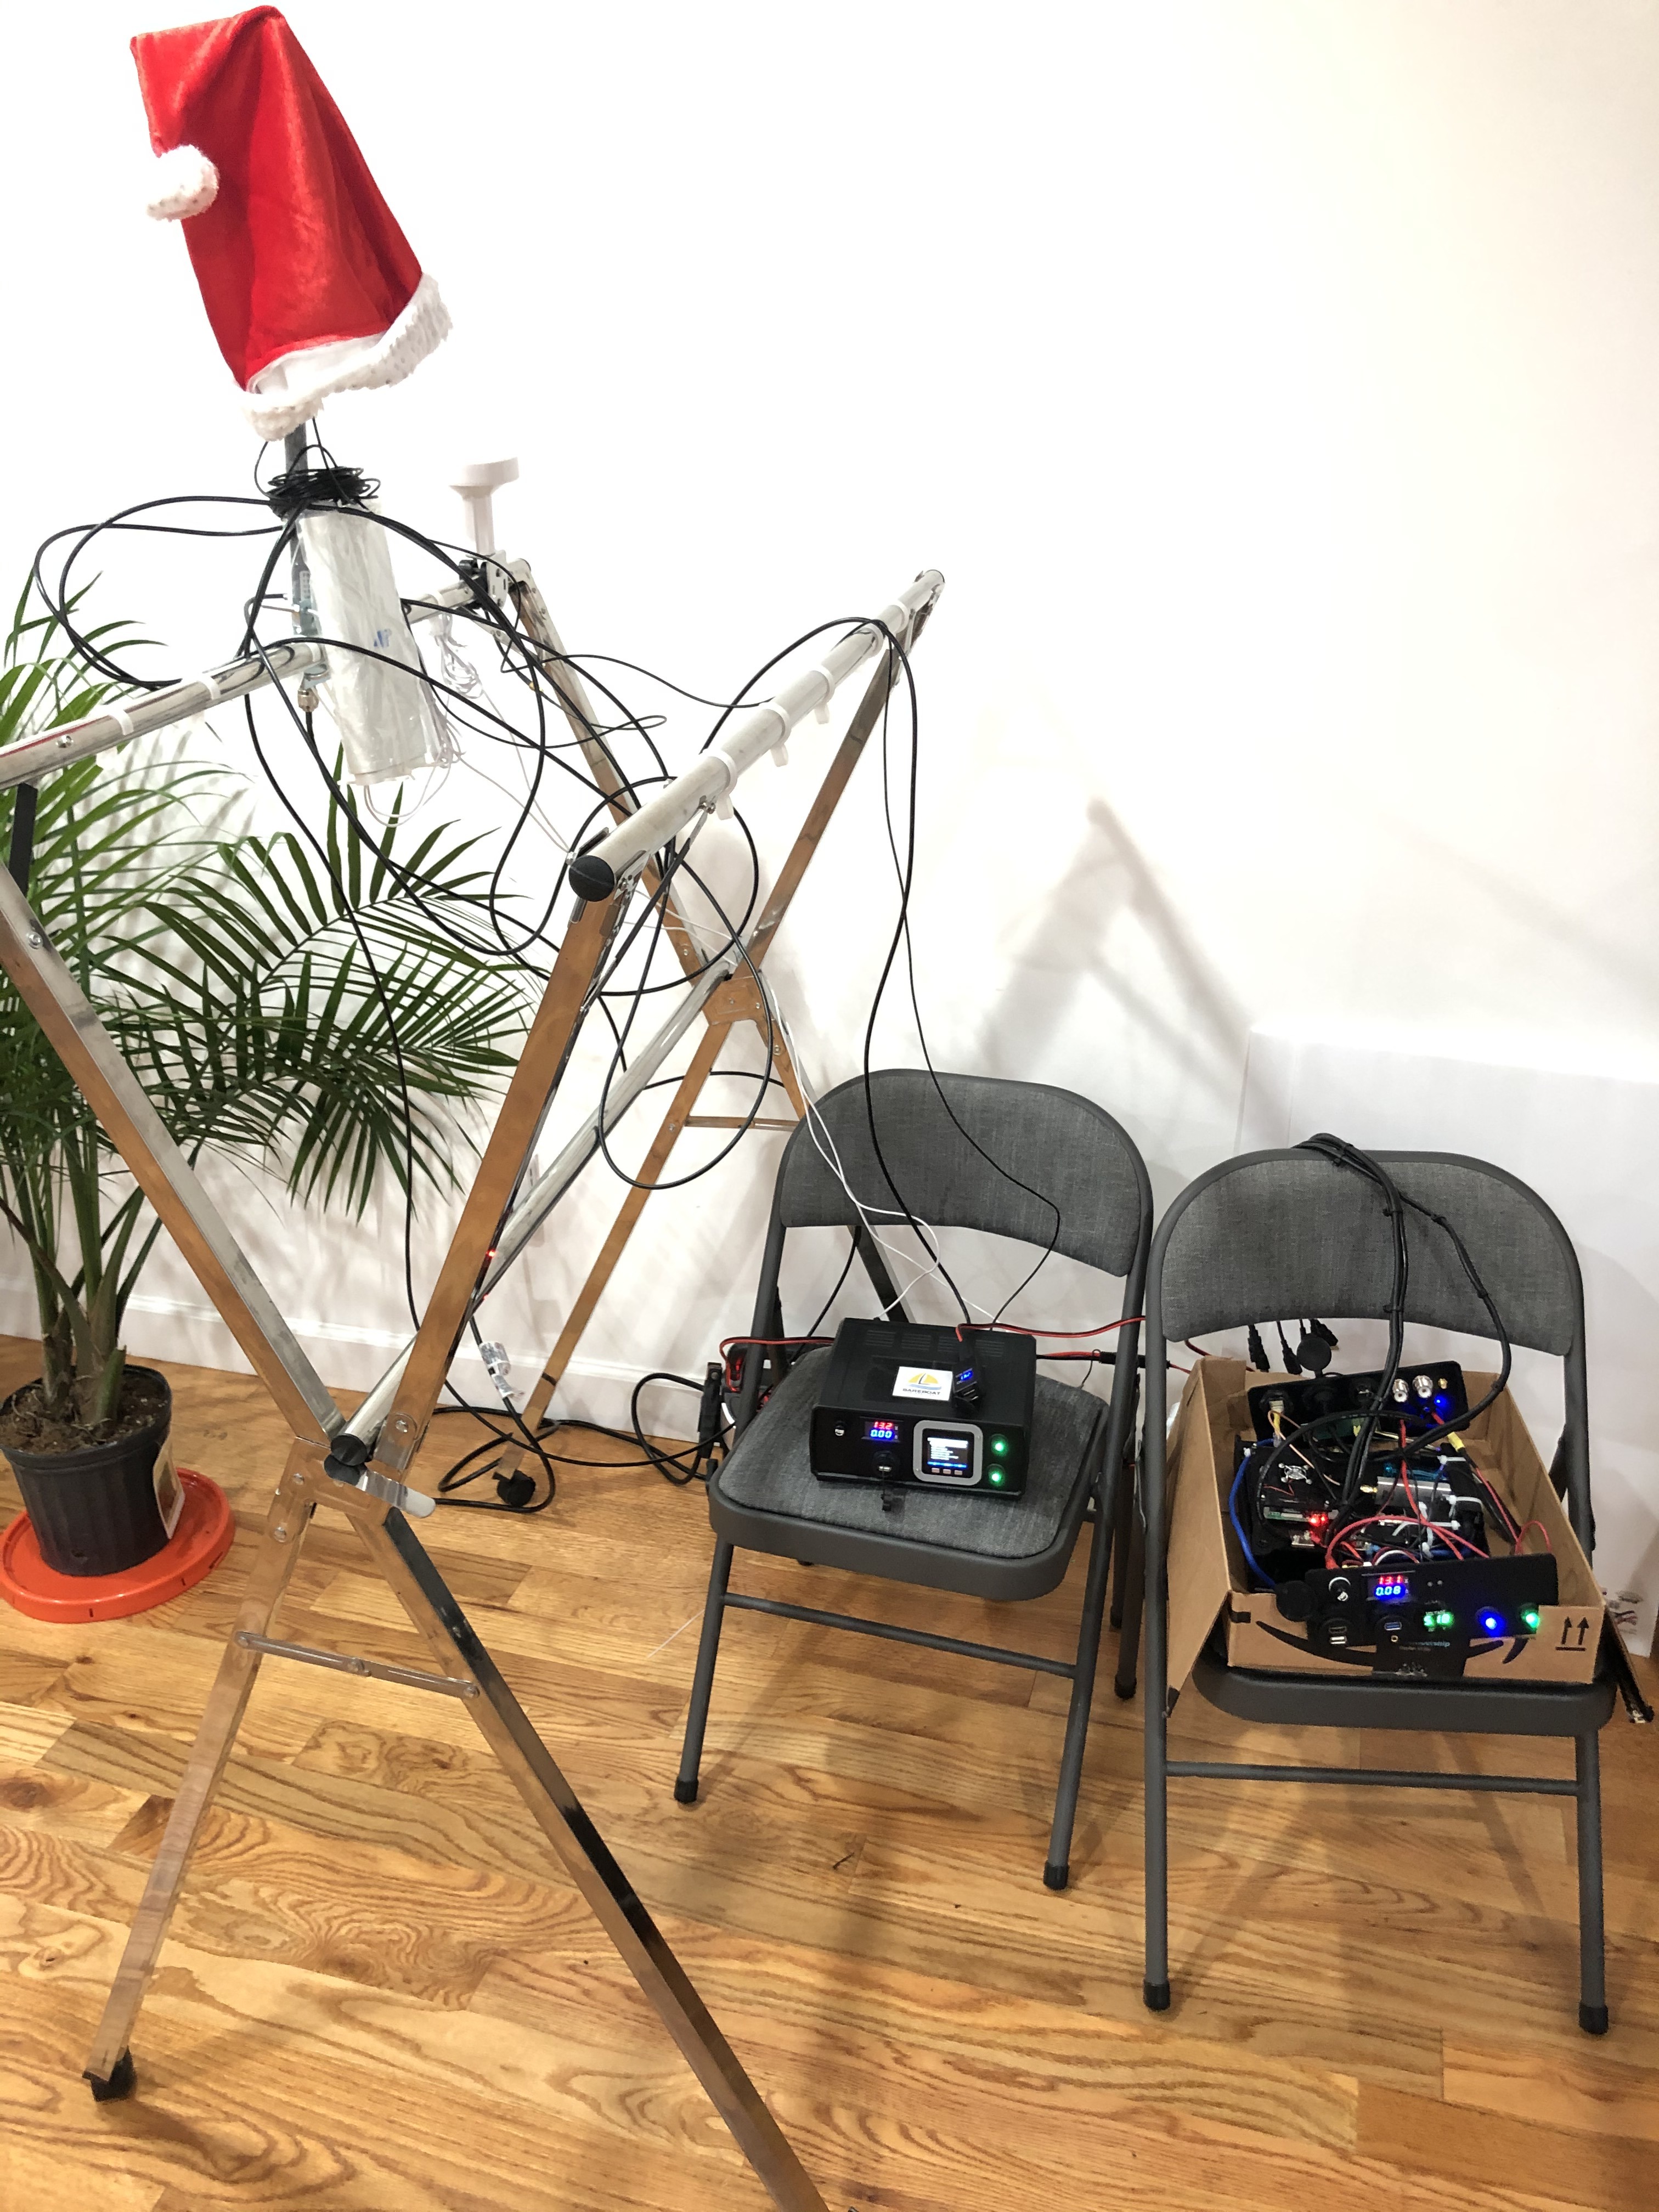
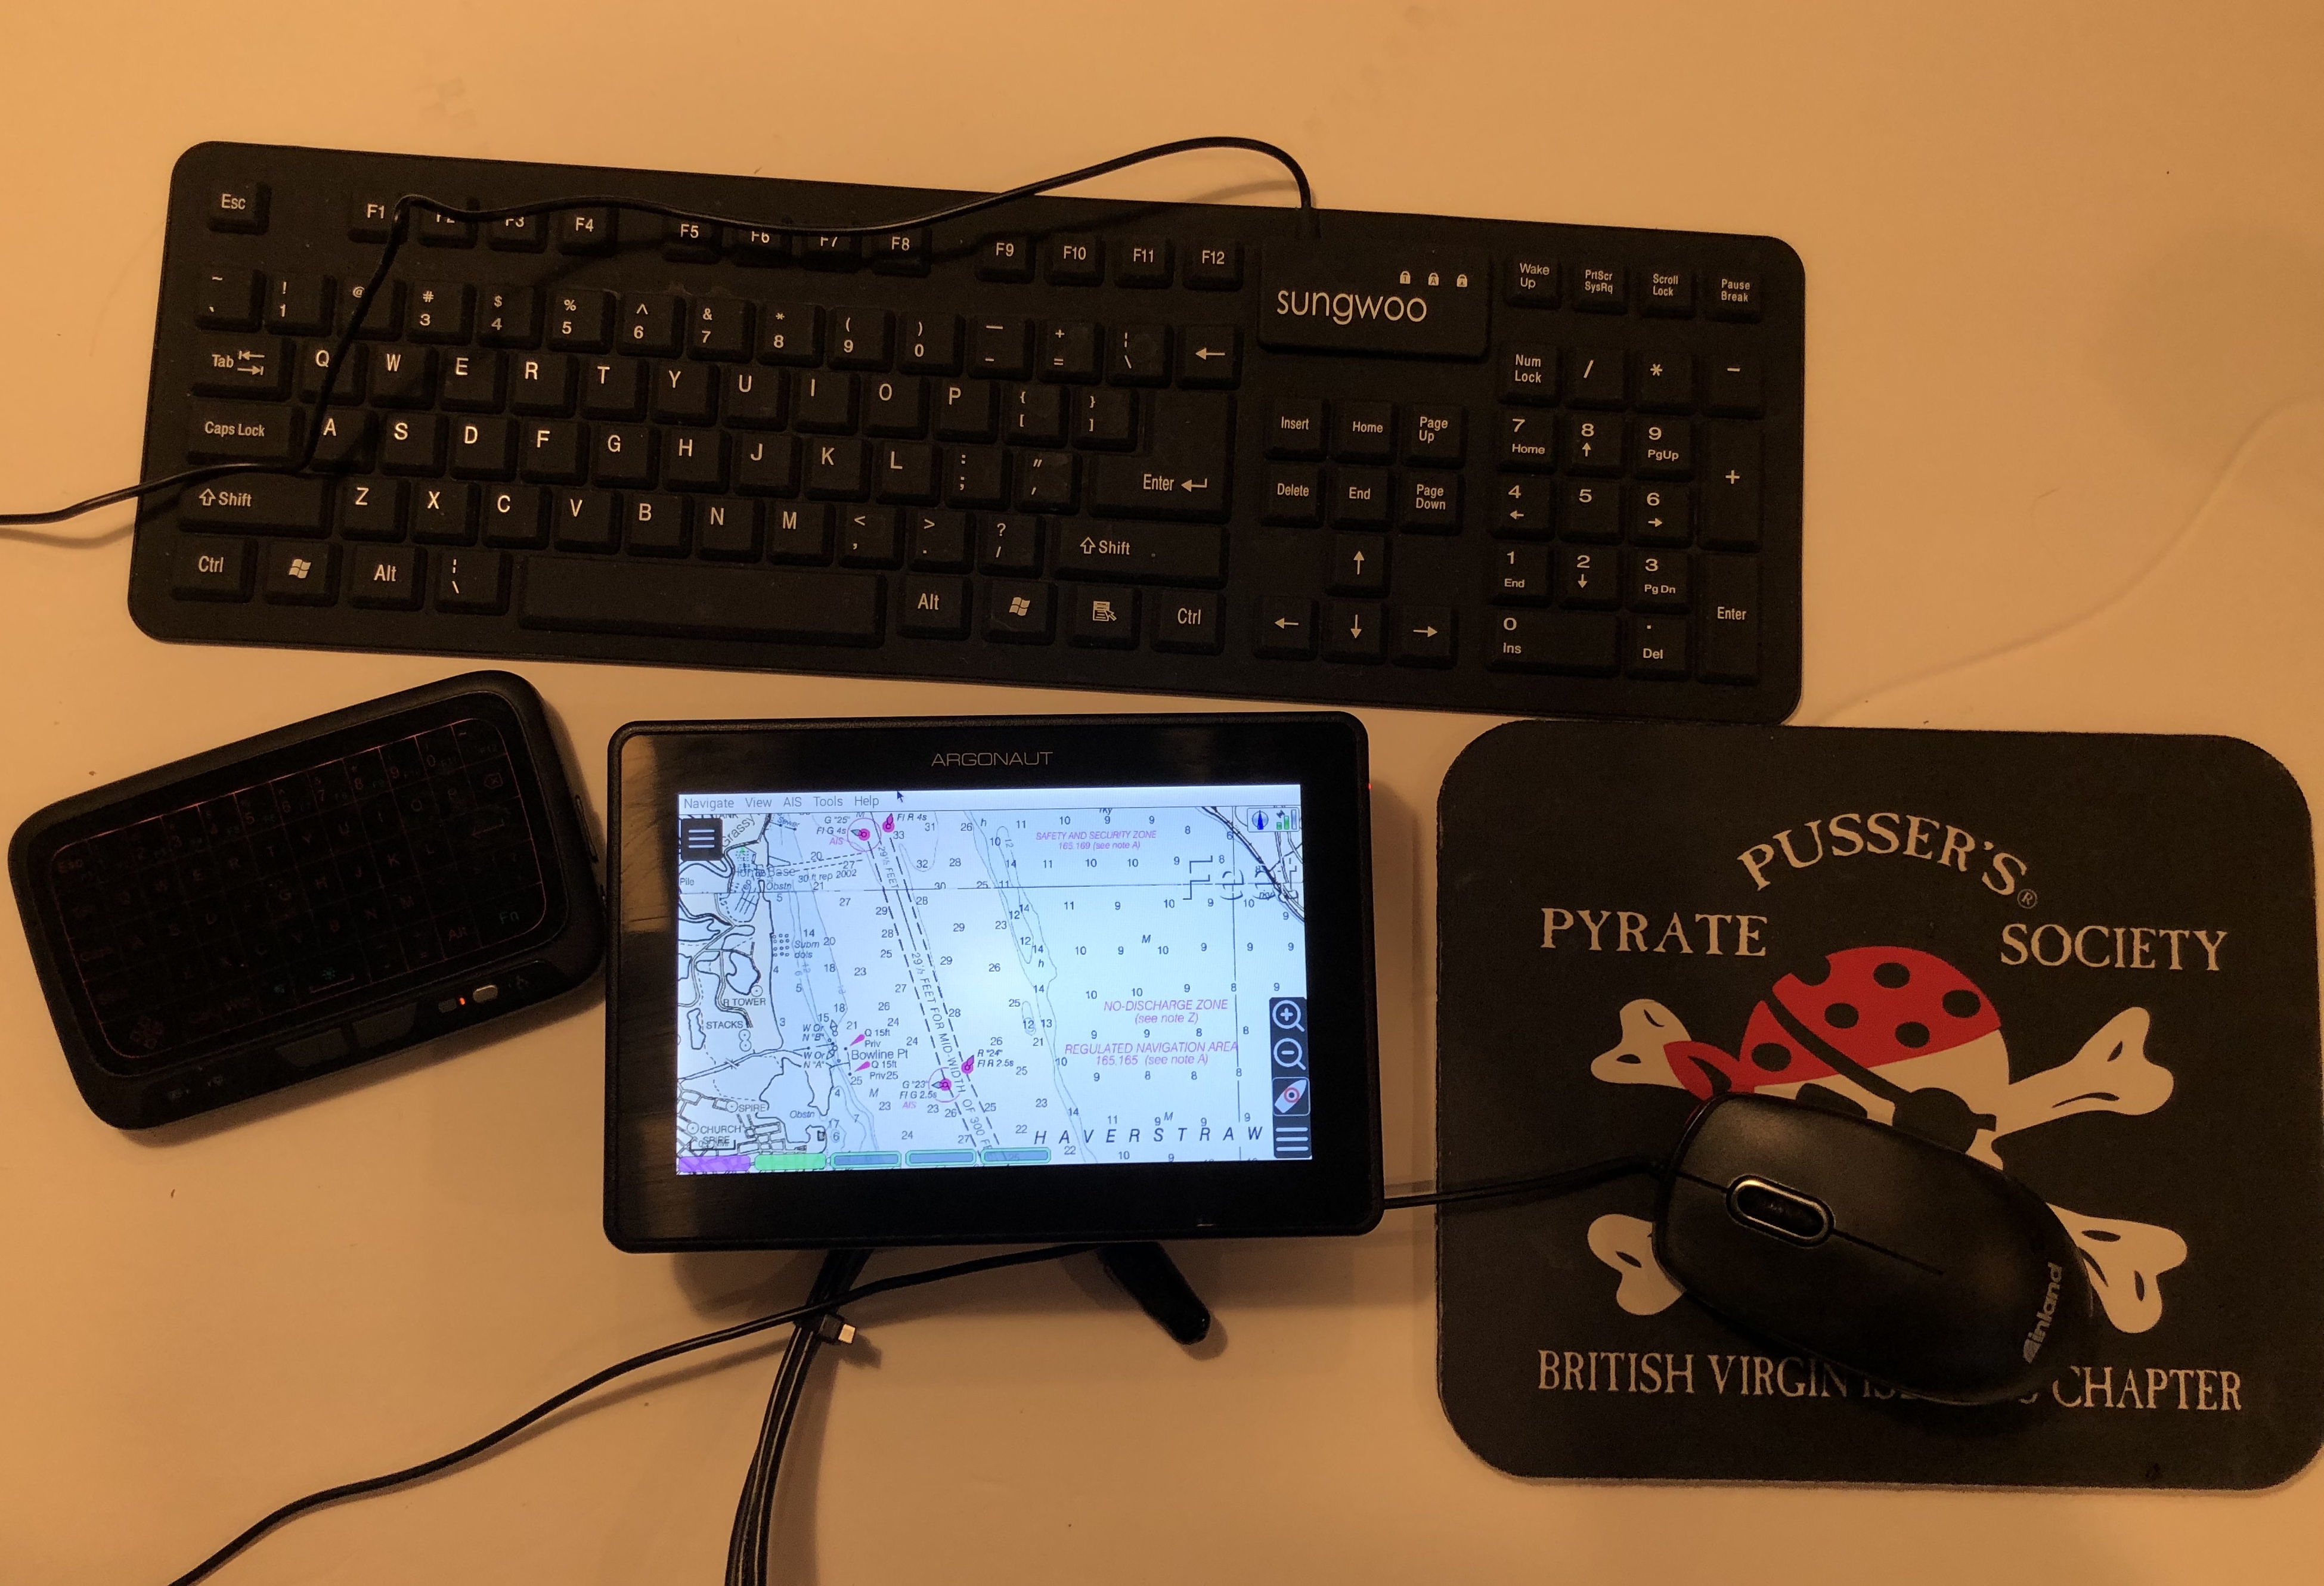
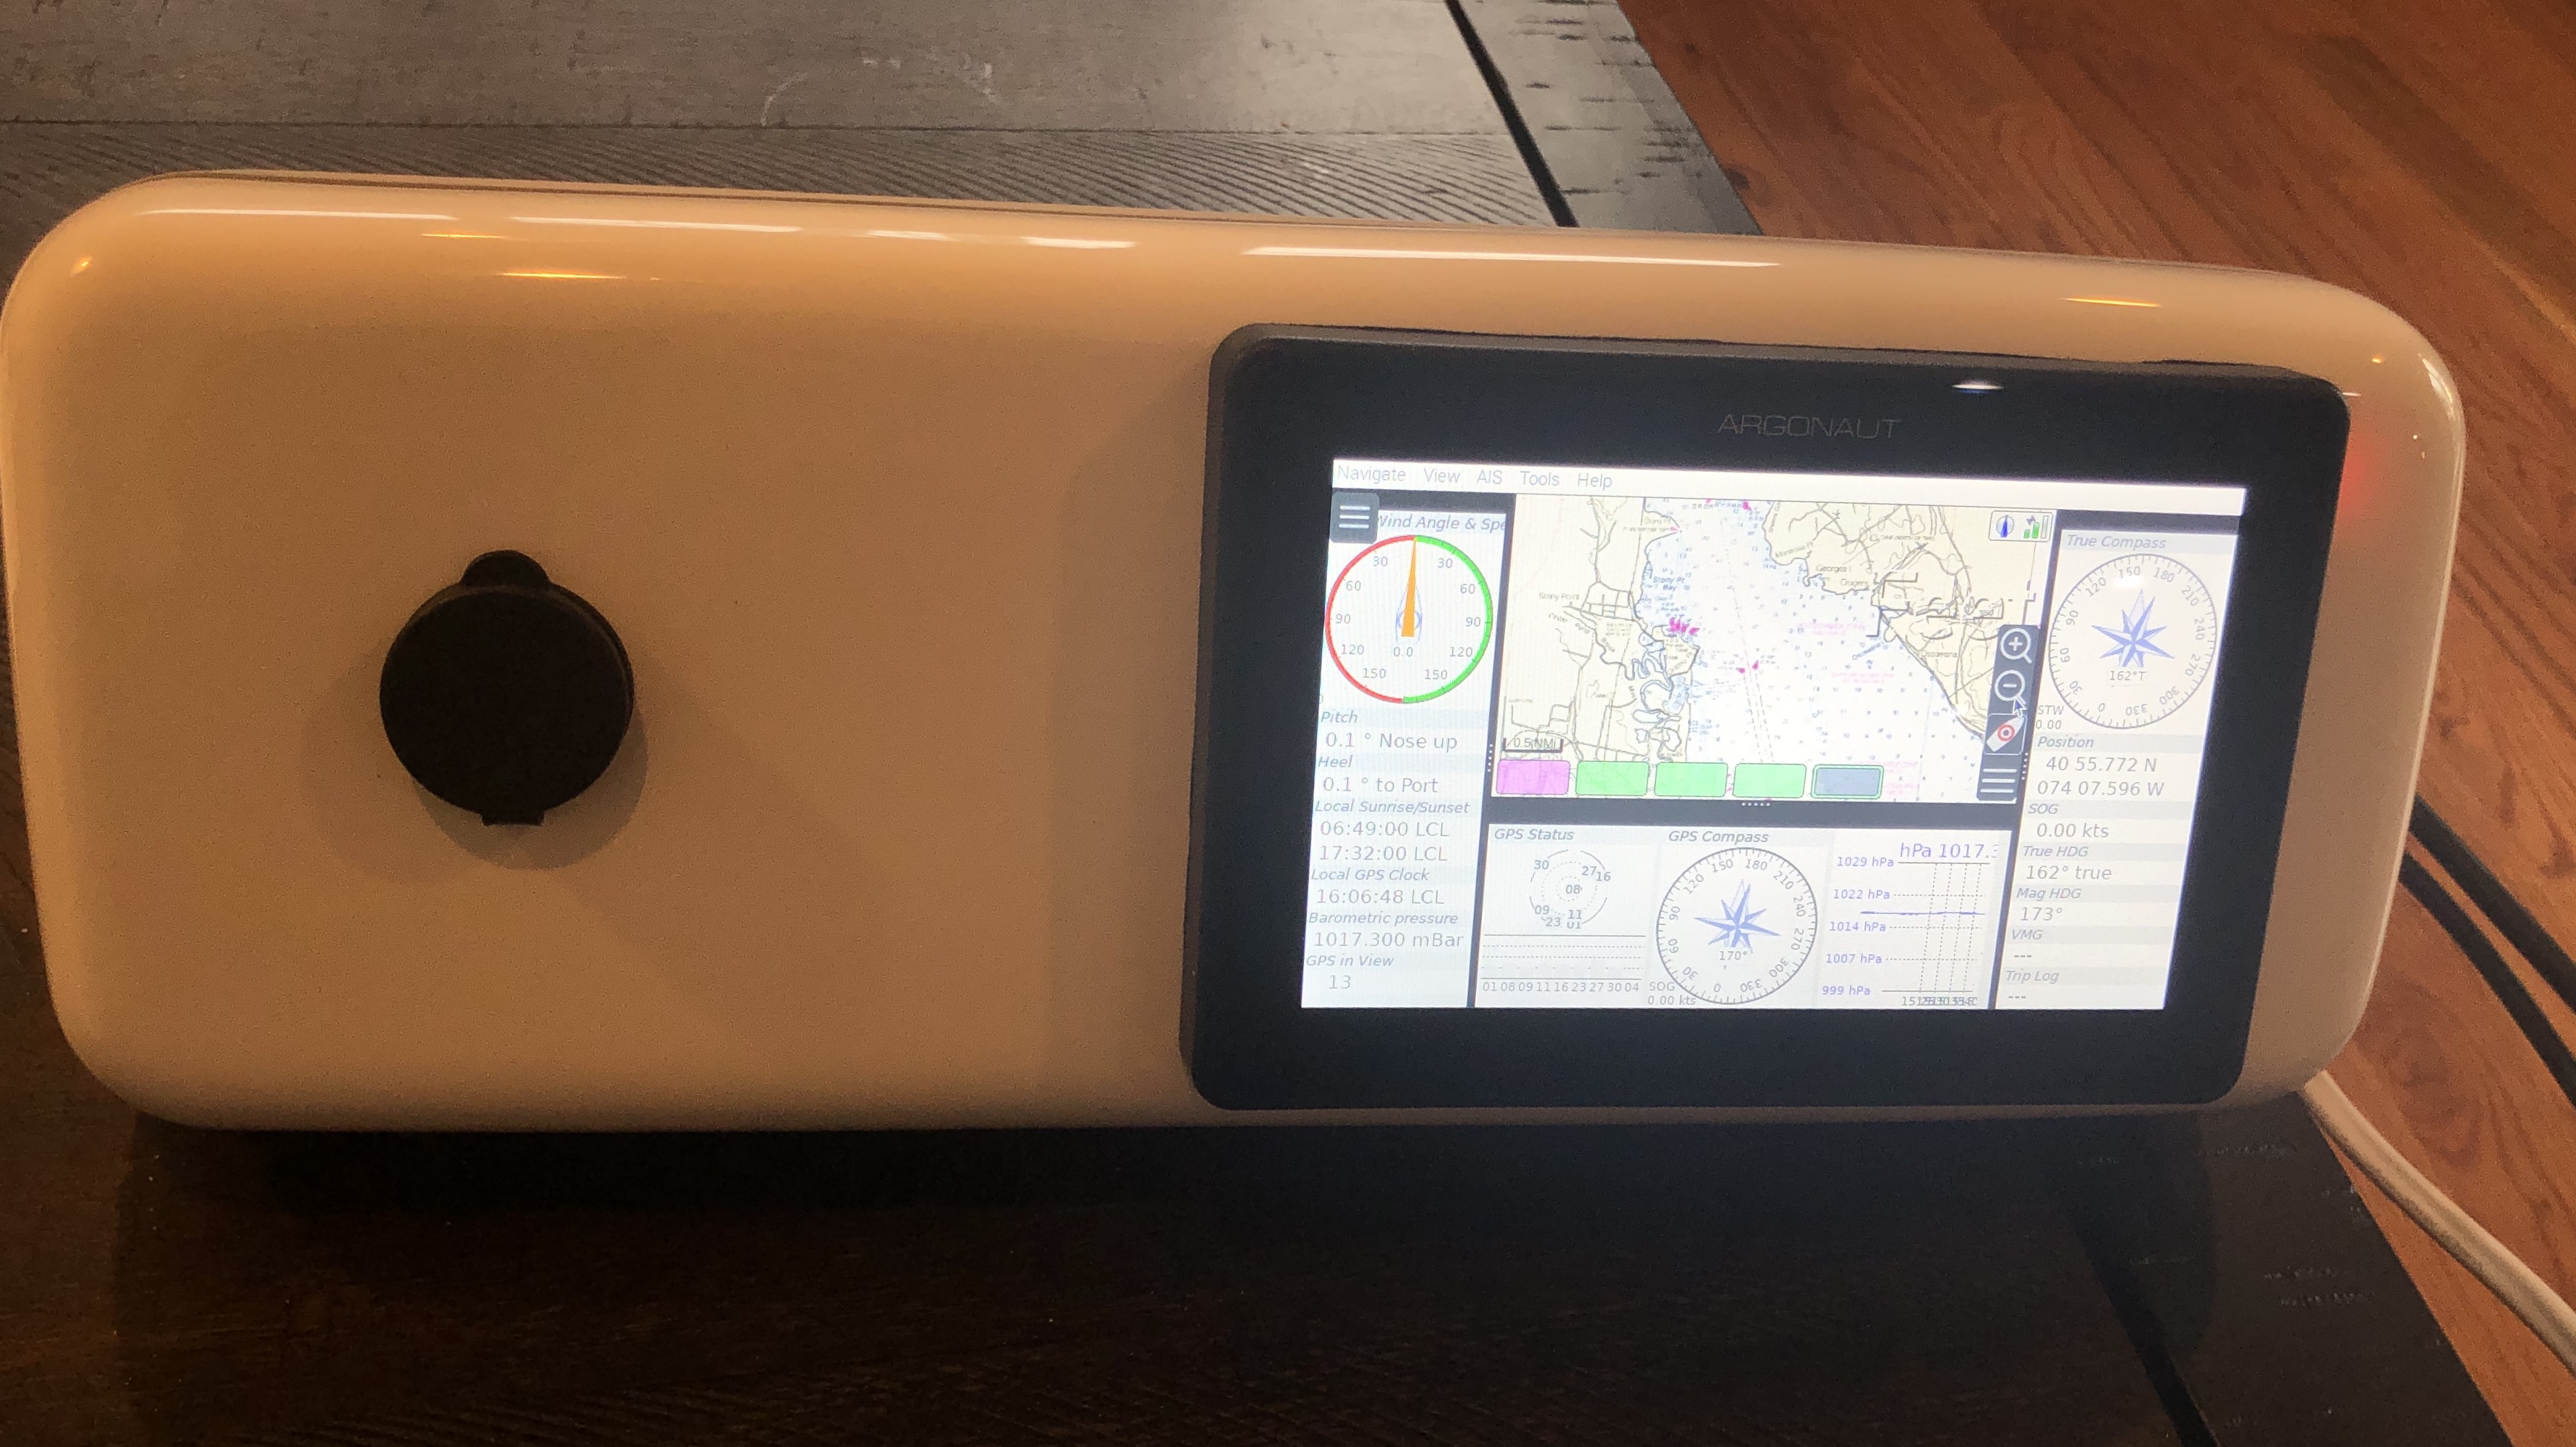
2.30. Set-up on the boat
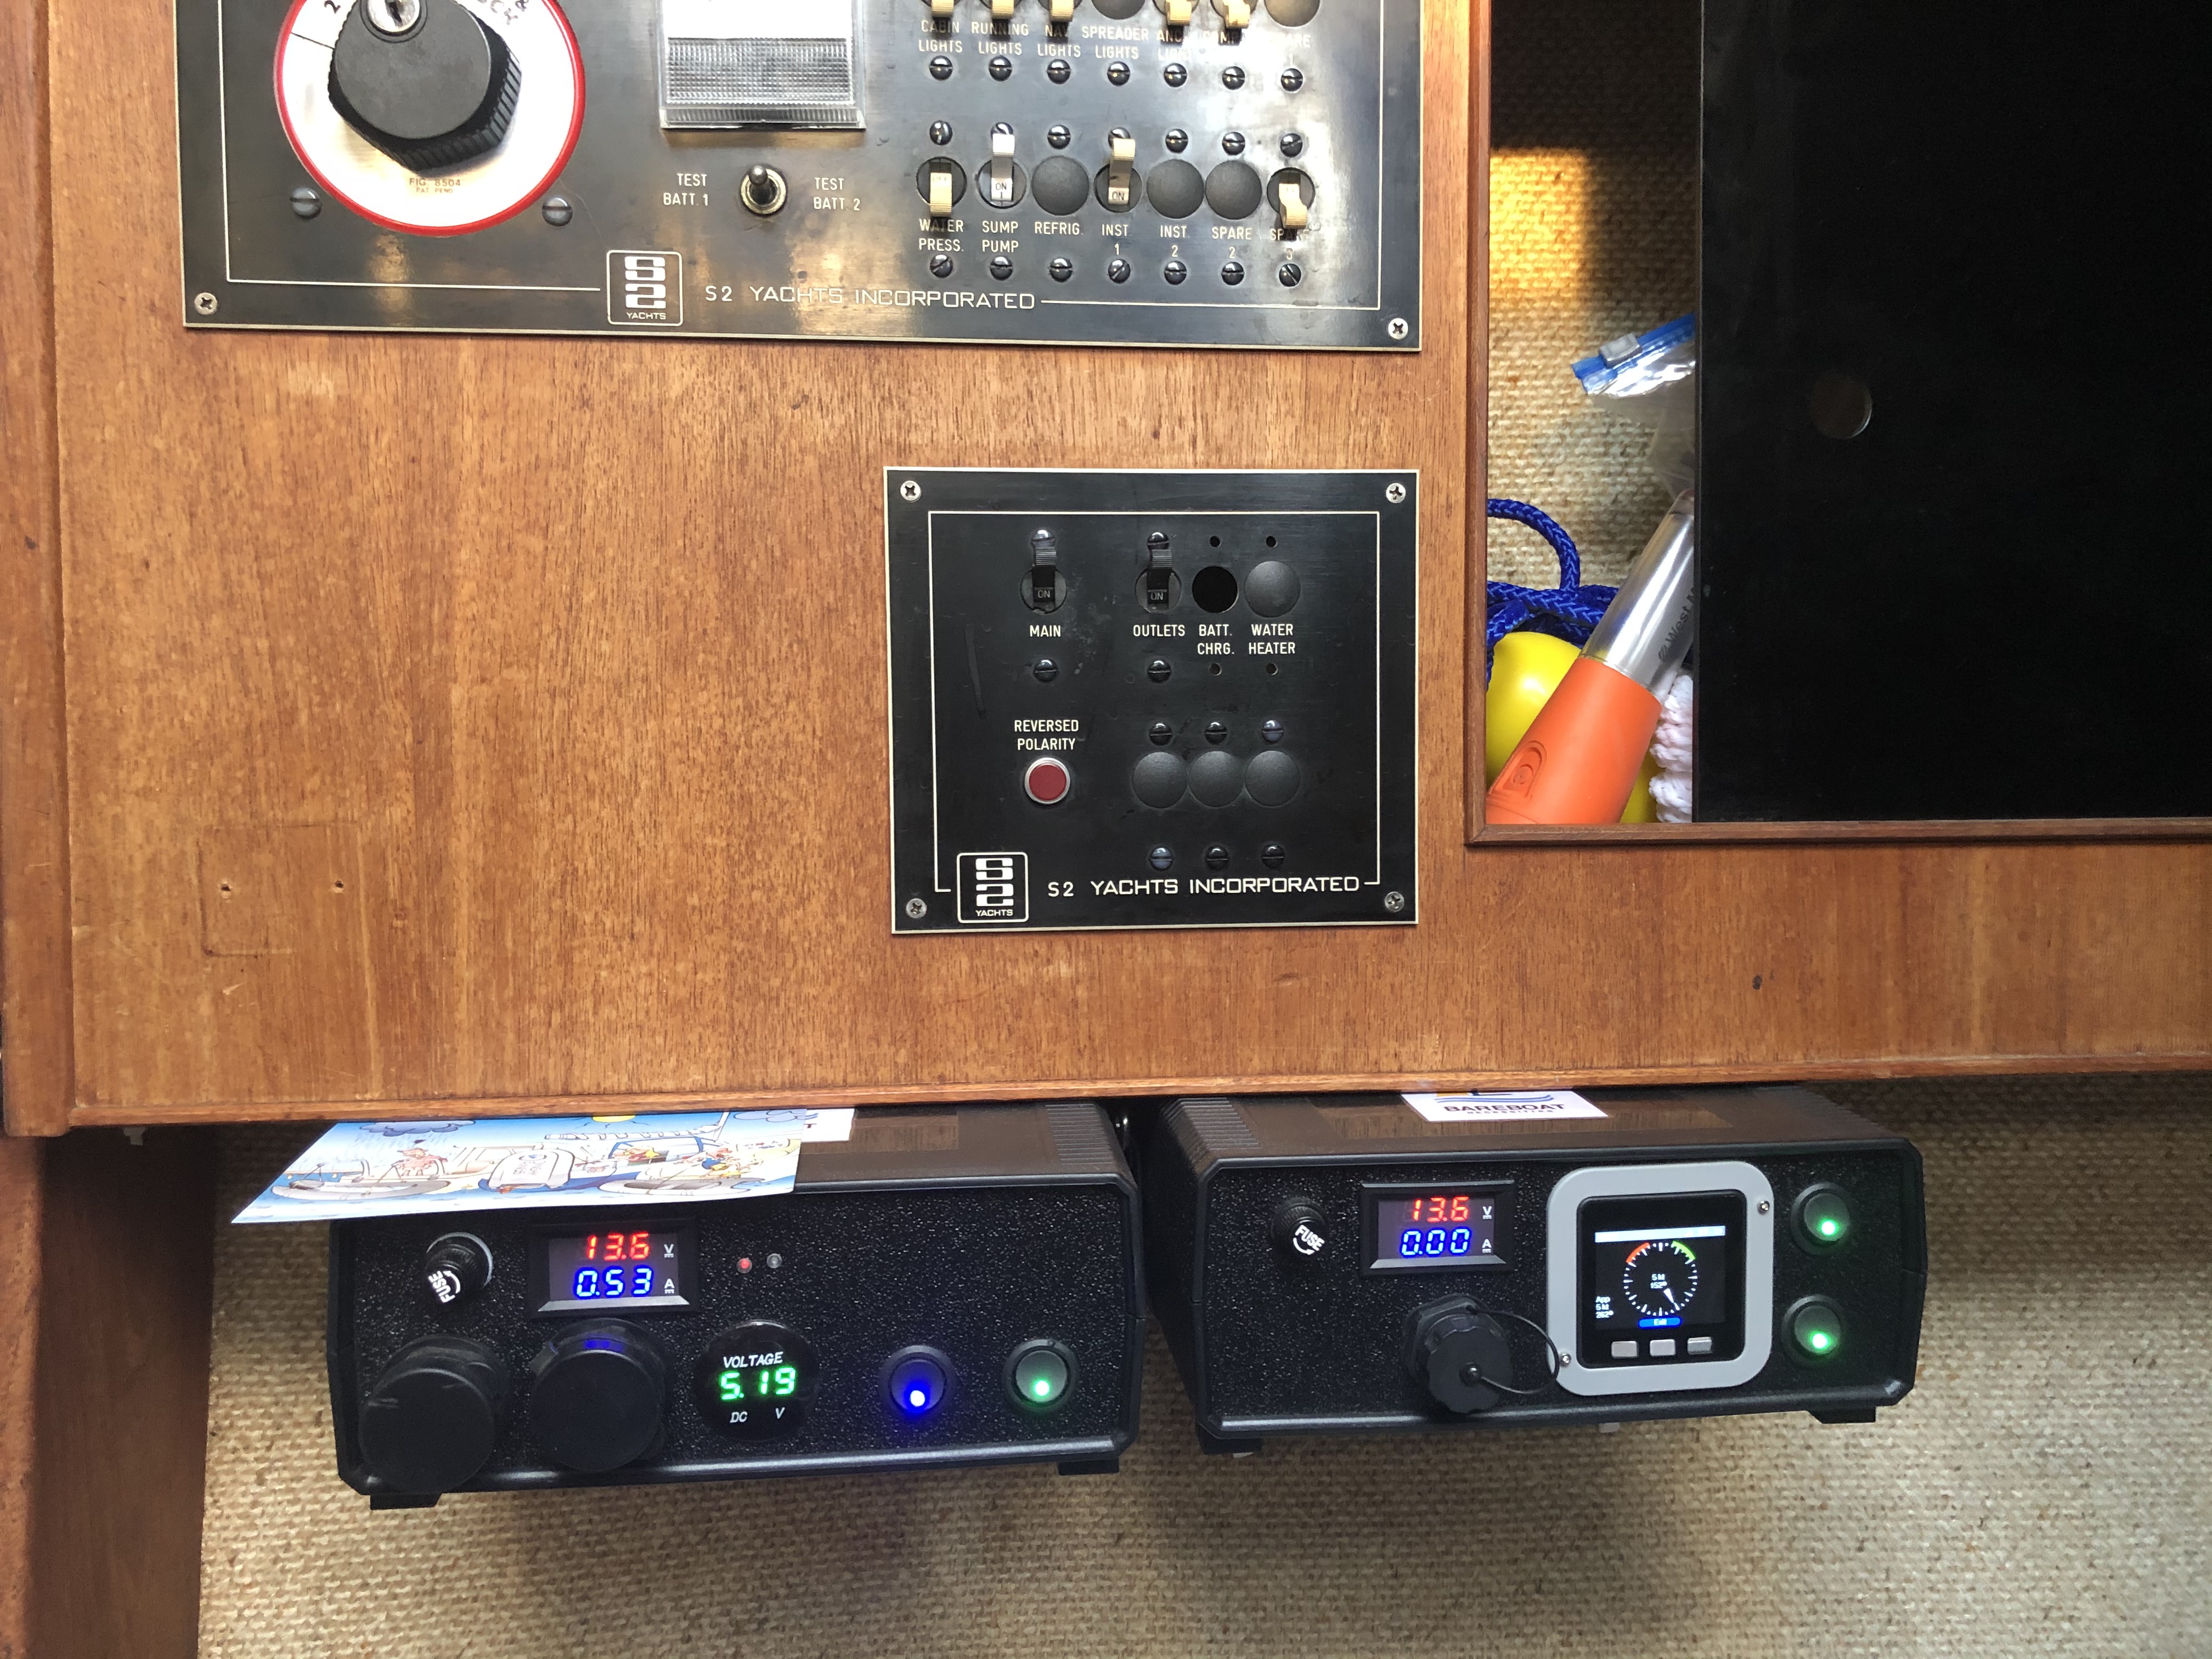
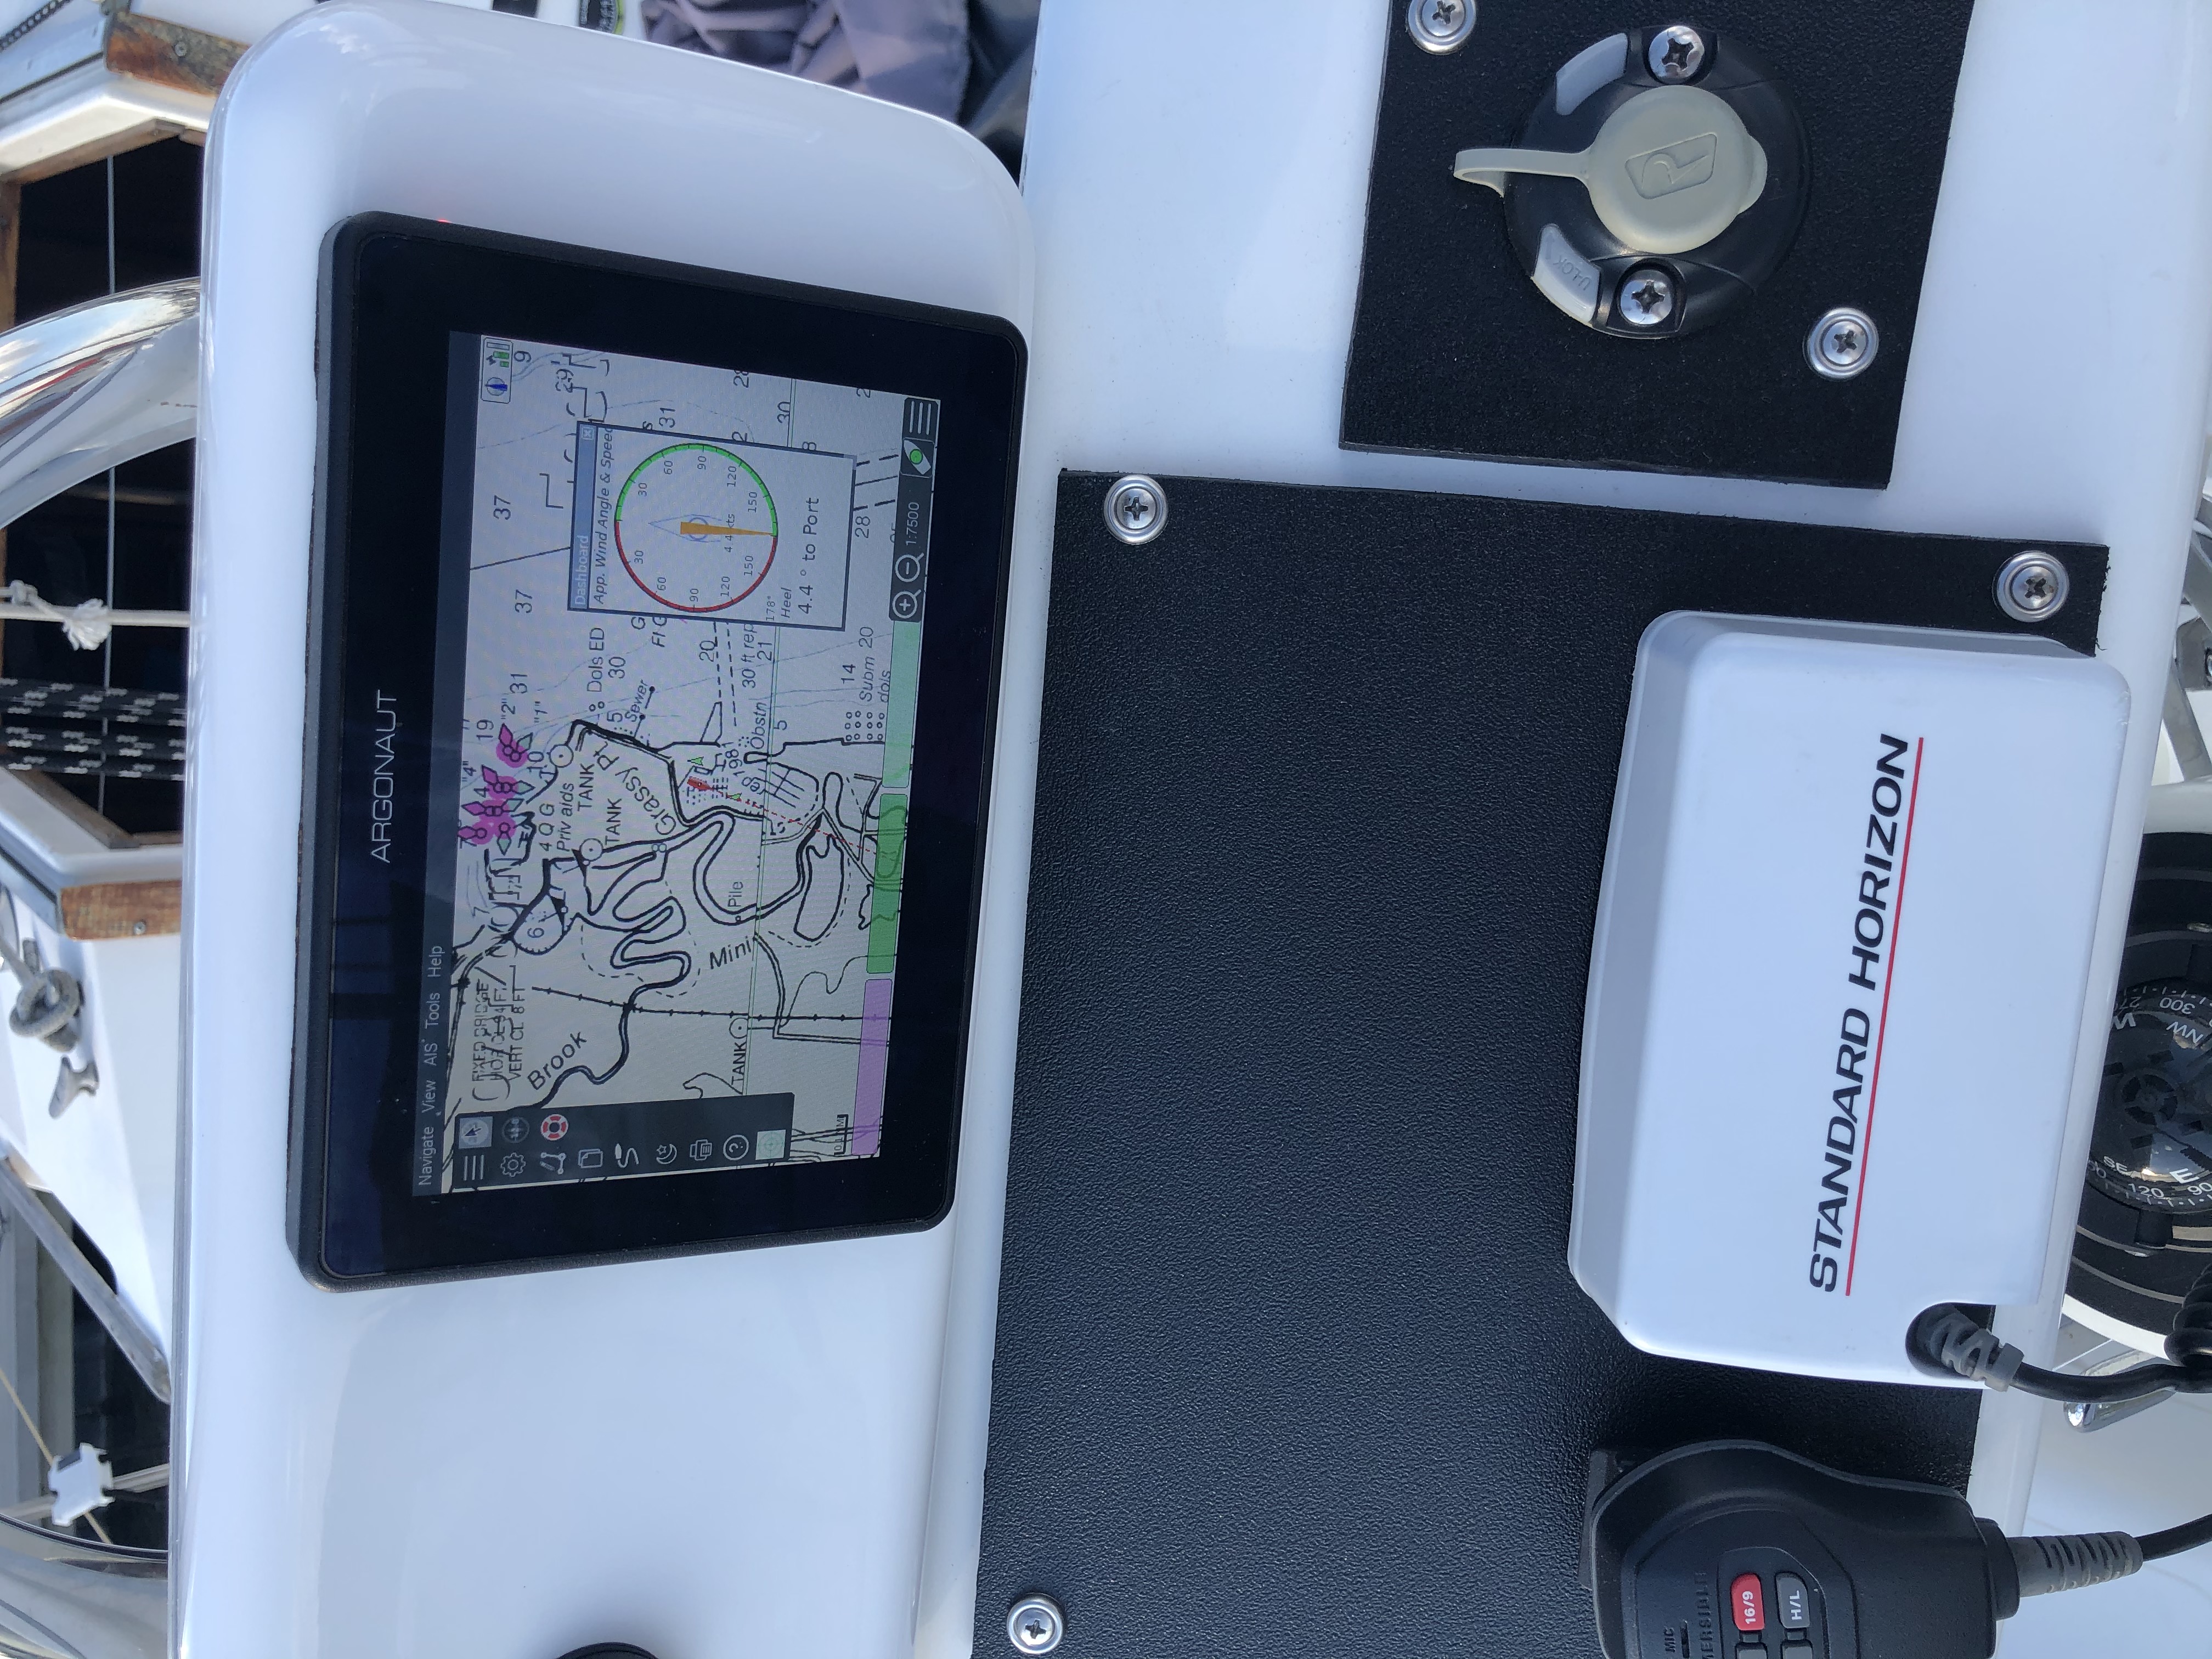
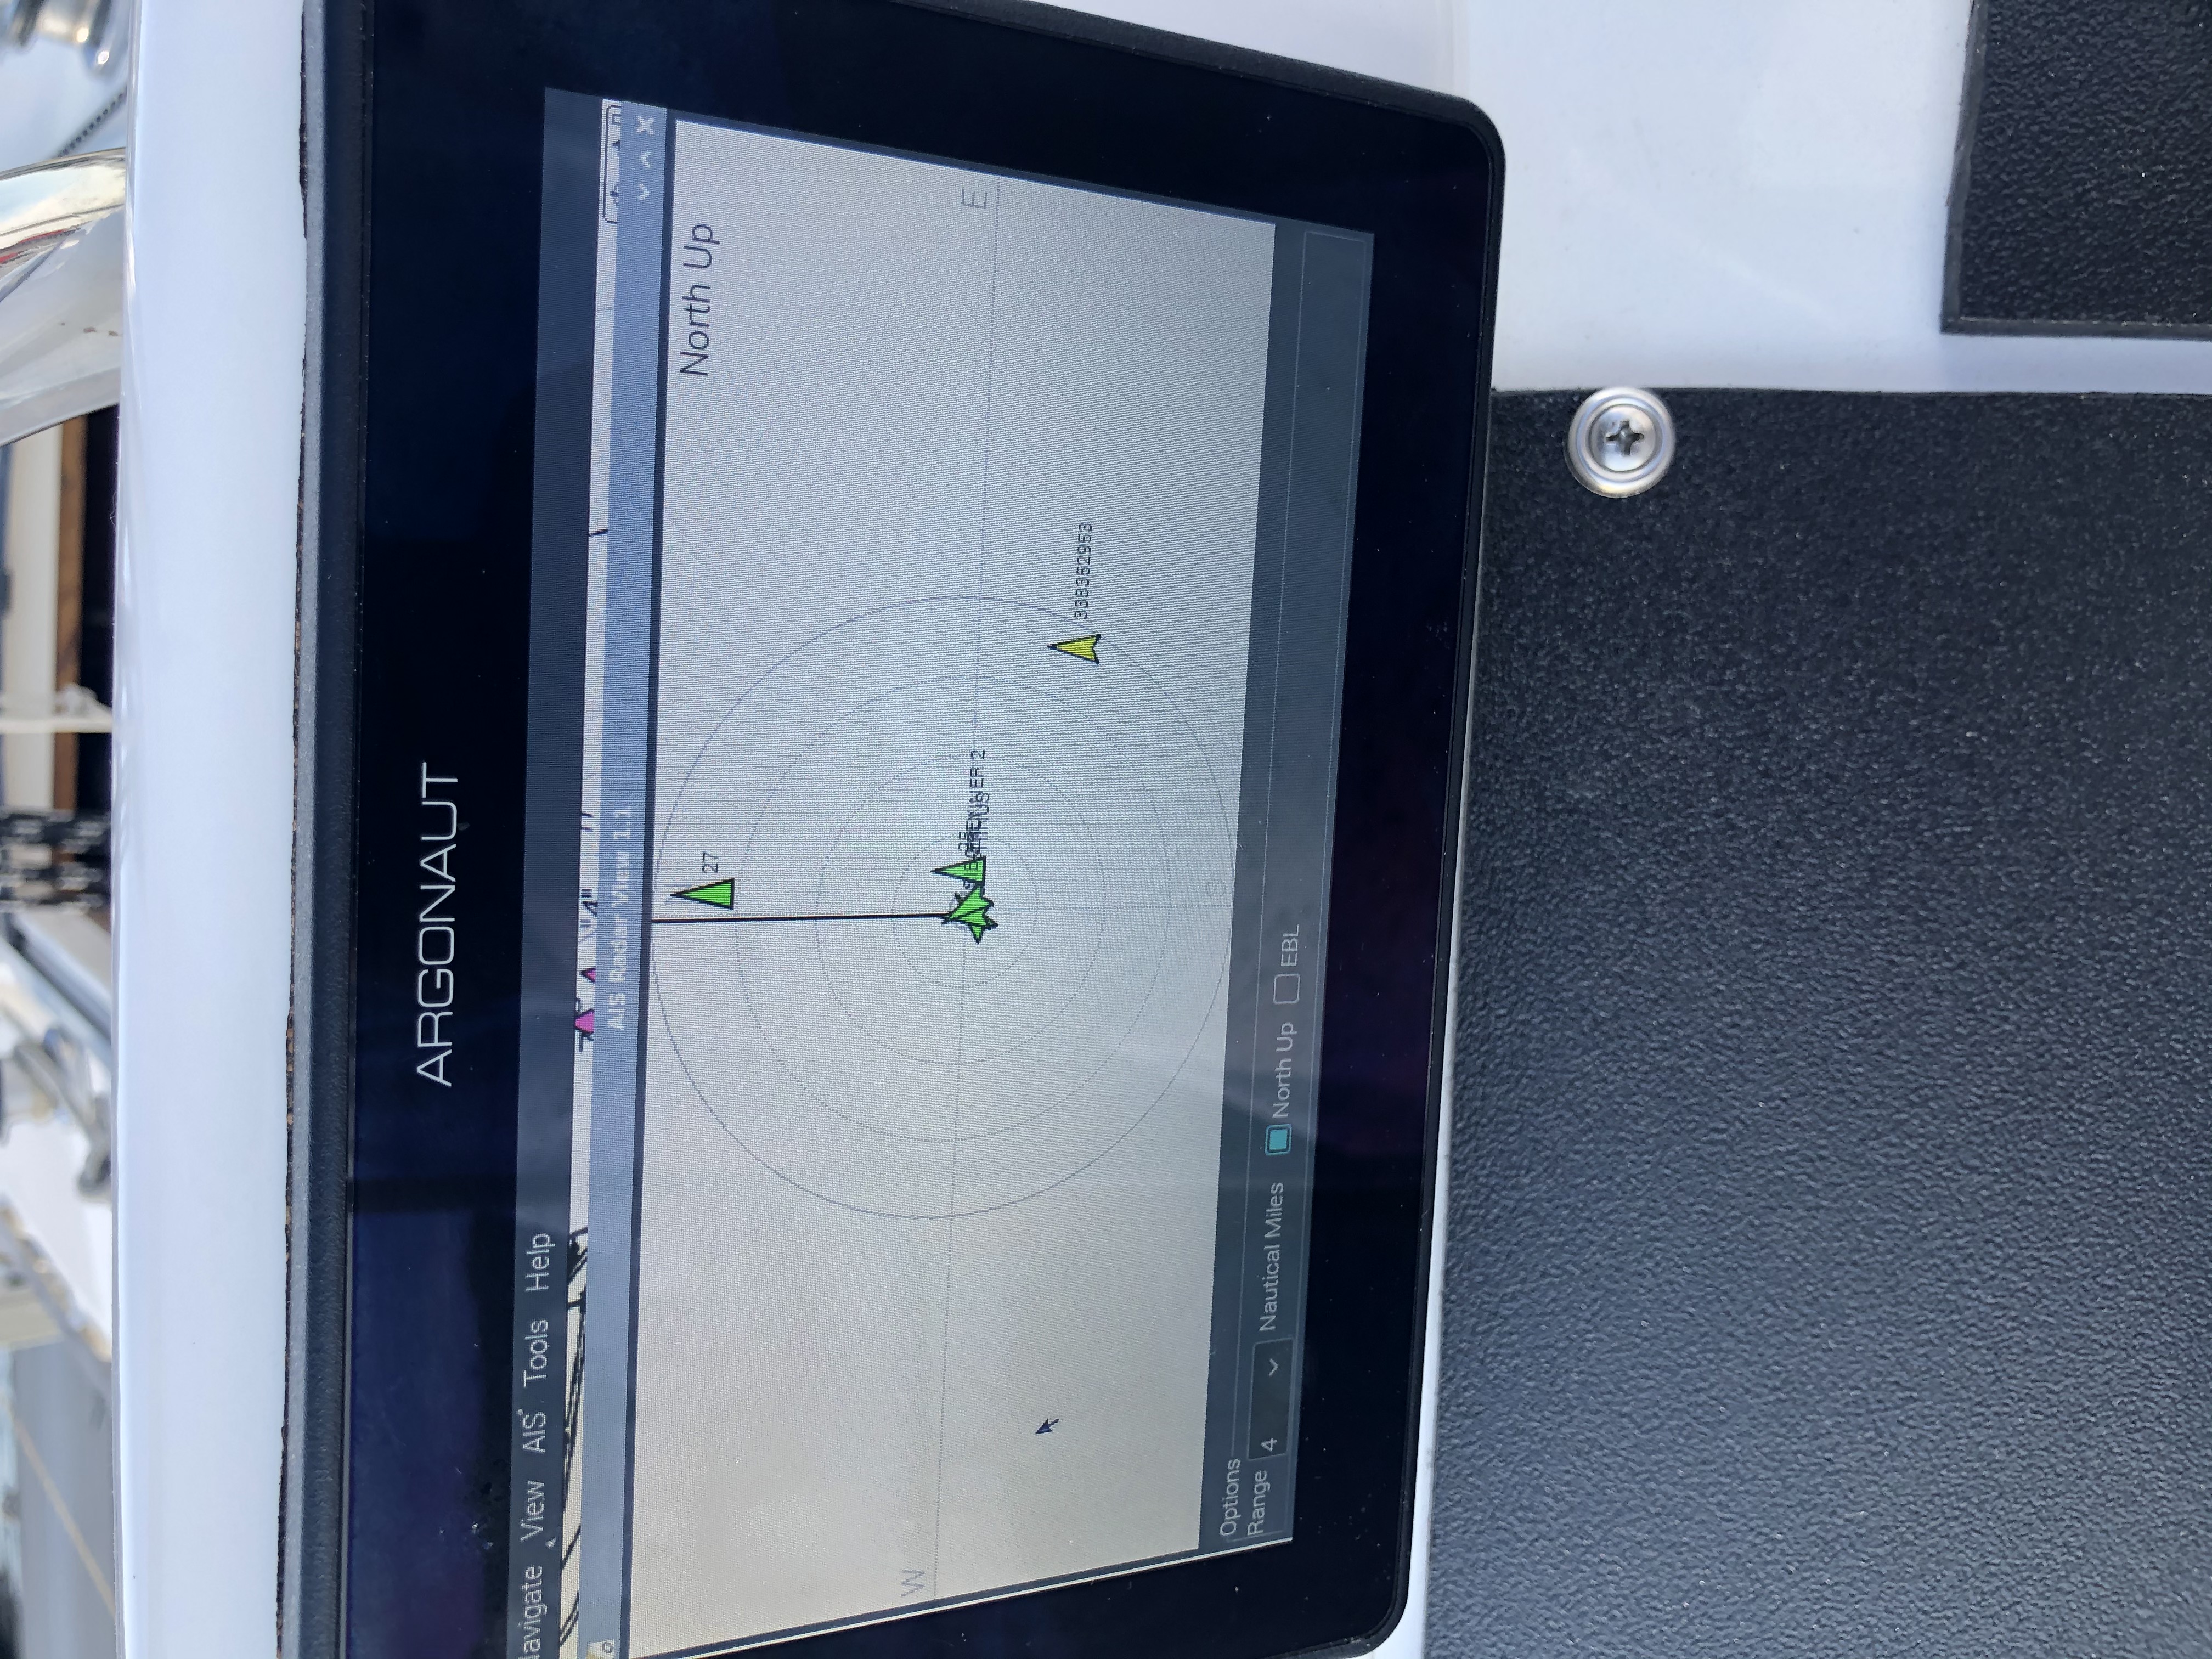
3. Other Hardware Platforms
3.1. Pine64
ARM 64 based solutions: SBC, Laptop, Phone, Watch with Linux. Waterproof casing is available too. Worth alternative to raspberry pi product line.
3.2. LilyGO esp32 watch 2020
esp32 programmable water-resistant low cost watch
3.3. Car Android Systems
BOSS Audio Systems Marine Rated Weatherproof MRCP9685A Apple CarPlay Android Auto
4. Pole for Sailboat Solar Panel / Wind Generator
This is no welding, no bends solution. The pole is built from universal stainless steel marine components. To reproduce this design you would need only a pipe cutter tool and a drill. The top is quick release adjustable angle (two axis). Removable for winter storage. The solar panel is quickly detachable and removable.
Most of the components are common marine rail fittings for 1" tubing. The top one component to make tee join is a stainless steel end rail T pipe clamp pipe fence reinforcement rit for 25mm round tube available from many vendors. It works perfectly. I use an eye nut for quick release instead of a regular nut.
There is also a closed body turnbuckle in the design. It needs a securing wire to be fixed in place to prevent unscrewing.
| I had to add one more turnbuckle to form a stiff triangle to better hold the mast vertically. Two turnbuckles mounts to the same bolt on the pole and attach to two different points on the vertical stanchion. |
The pipe cutter which worked perfectly easy for me on stainless steel is this one:
The markings say "GT-Q50A" which points to R’DEER tool (Hong Kong brand).
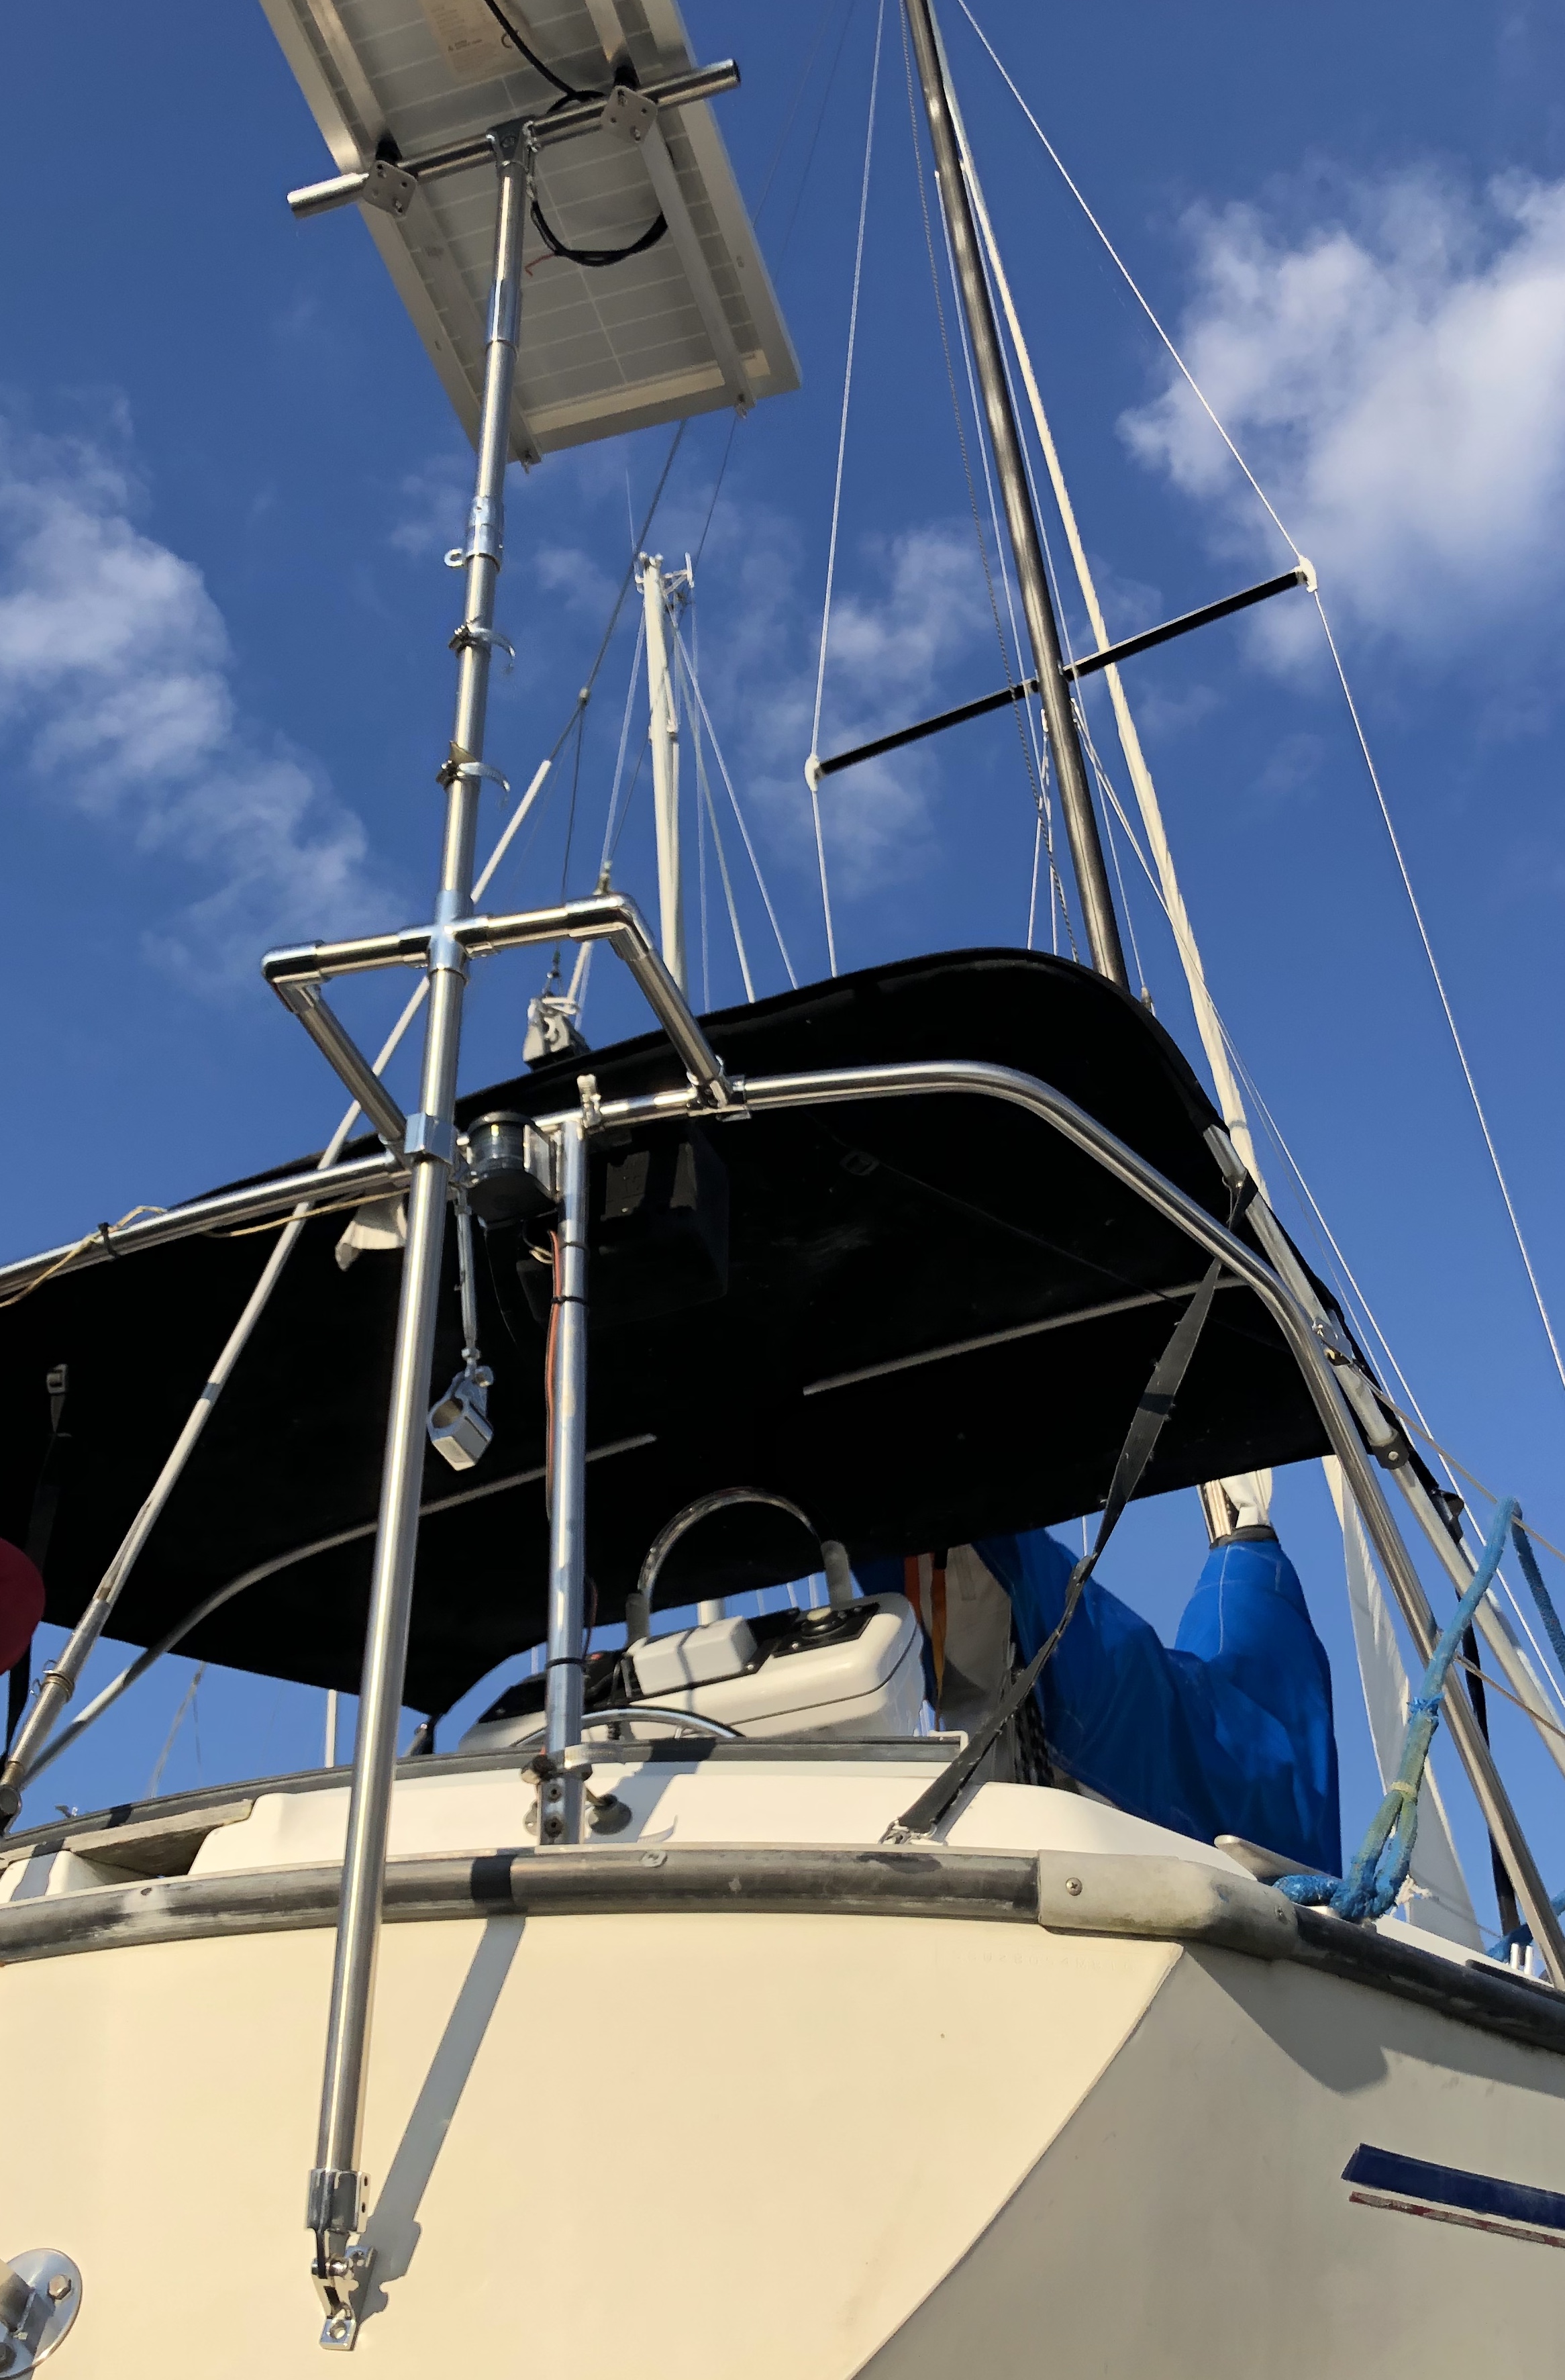
5. Other (not electronics) Projects
5.1. Water Tank Restoration
How to Refurbish Water Tanks (By Eian Mathieson)
The idea is to cut inspection ports in old aluminum tank. Sand inside. Clear corrosion with white vinegar. Fix the holes with J-B WaterWeld epoxy putty. Then coat whole inside with Jotun Jotacote 605 (certified for drinking water tanks). Do it in 3 coats with 24-hour difference. Seal inspection ports with polycarbonate cover plate, silicone gasket and screw-type deck plate.
5.3. Air Conditioner for a Small Boat
Zero Breeze Air Conditioner
The idea is to hang it at night inside the cabin and have a cover for the companionway with a hole for a/c vent. The drain from a/c will go to the bilge.
My boat didn’t have any overhead tie points in its cabin. So I installed L-track rail (smooth profile) bolted to existings overhead bolts.
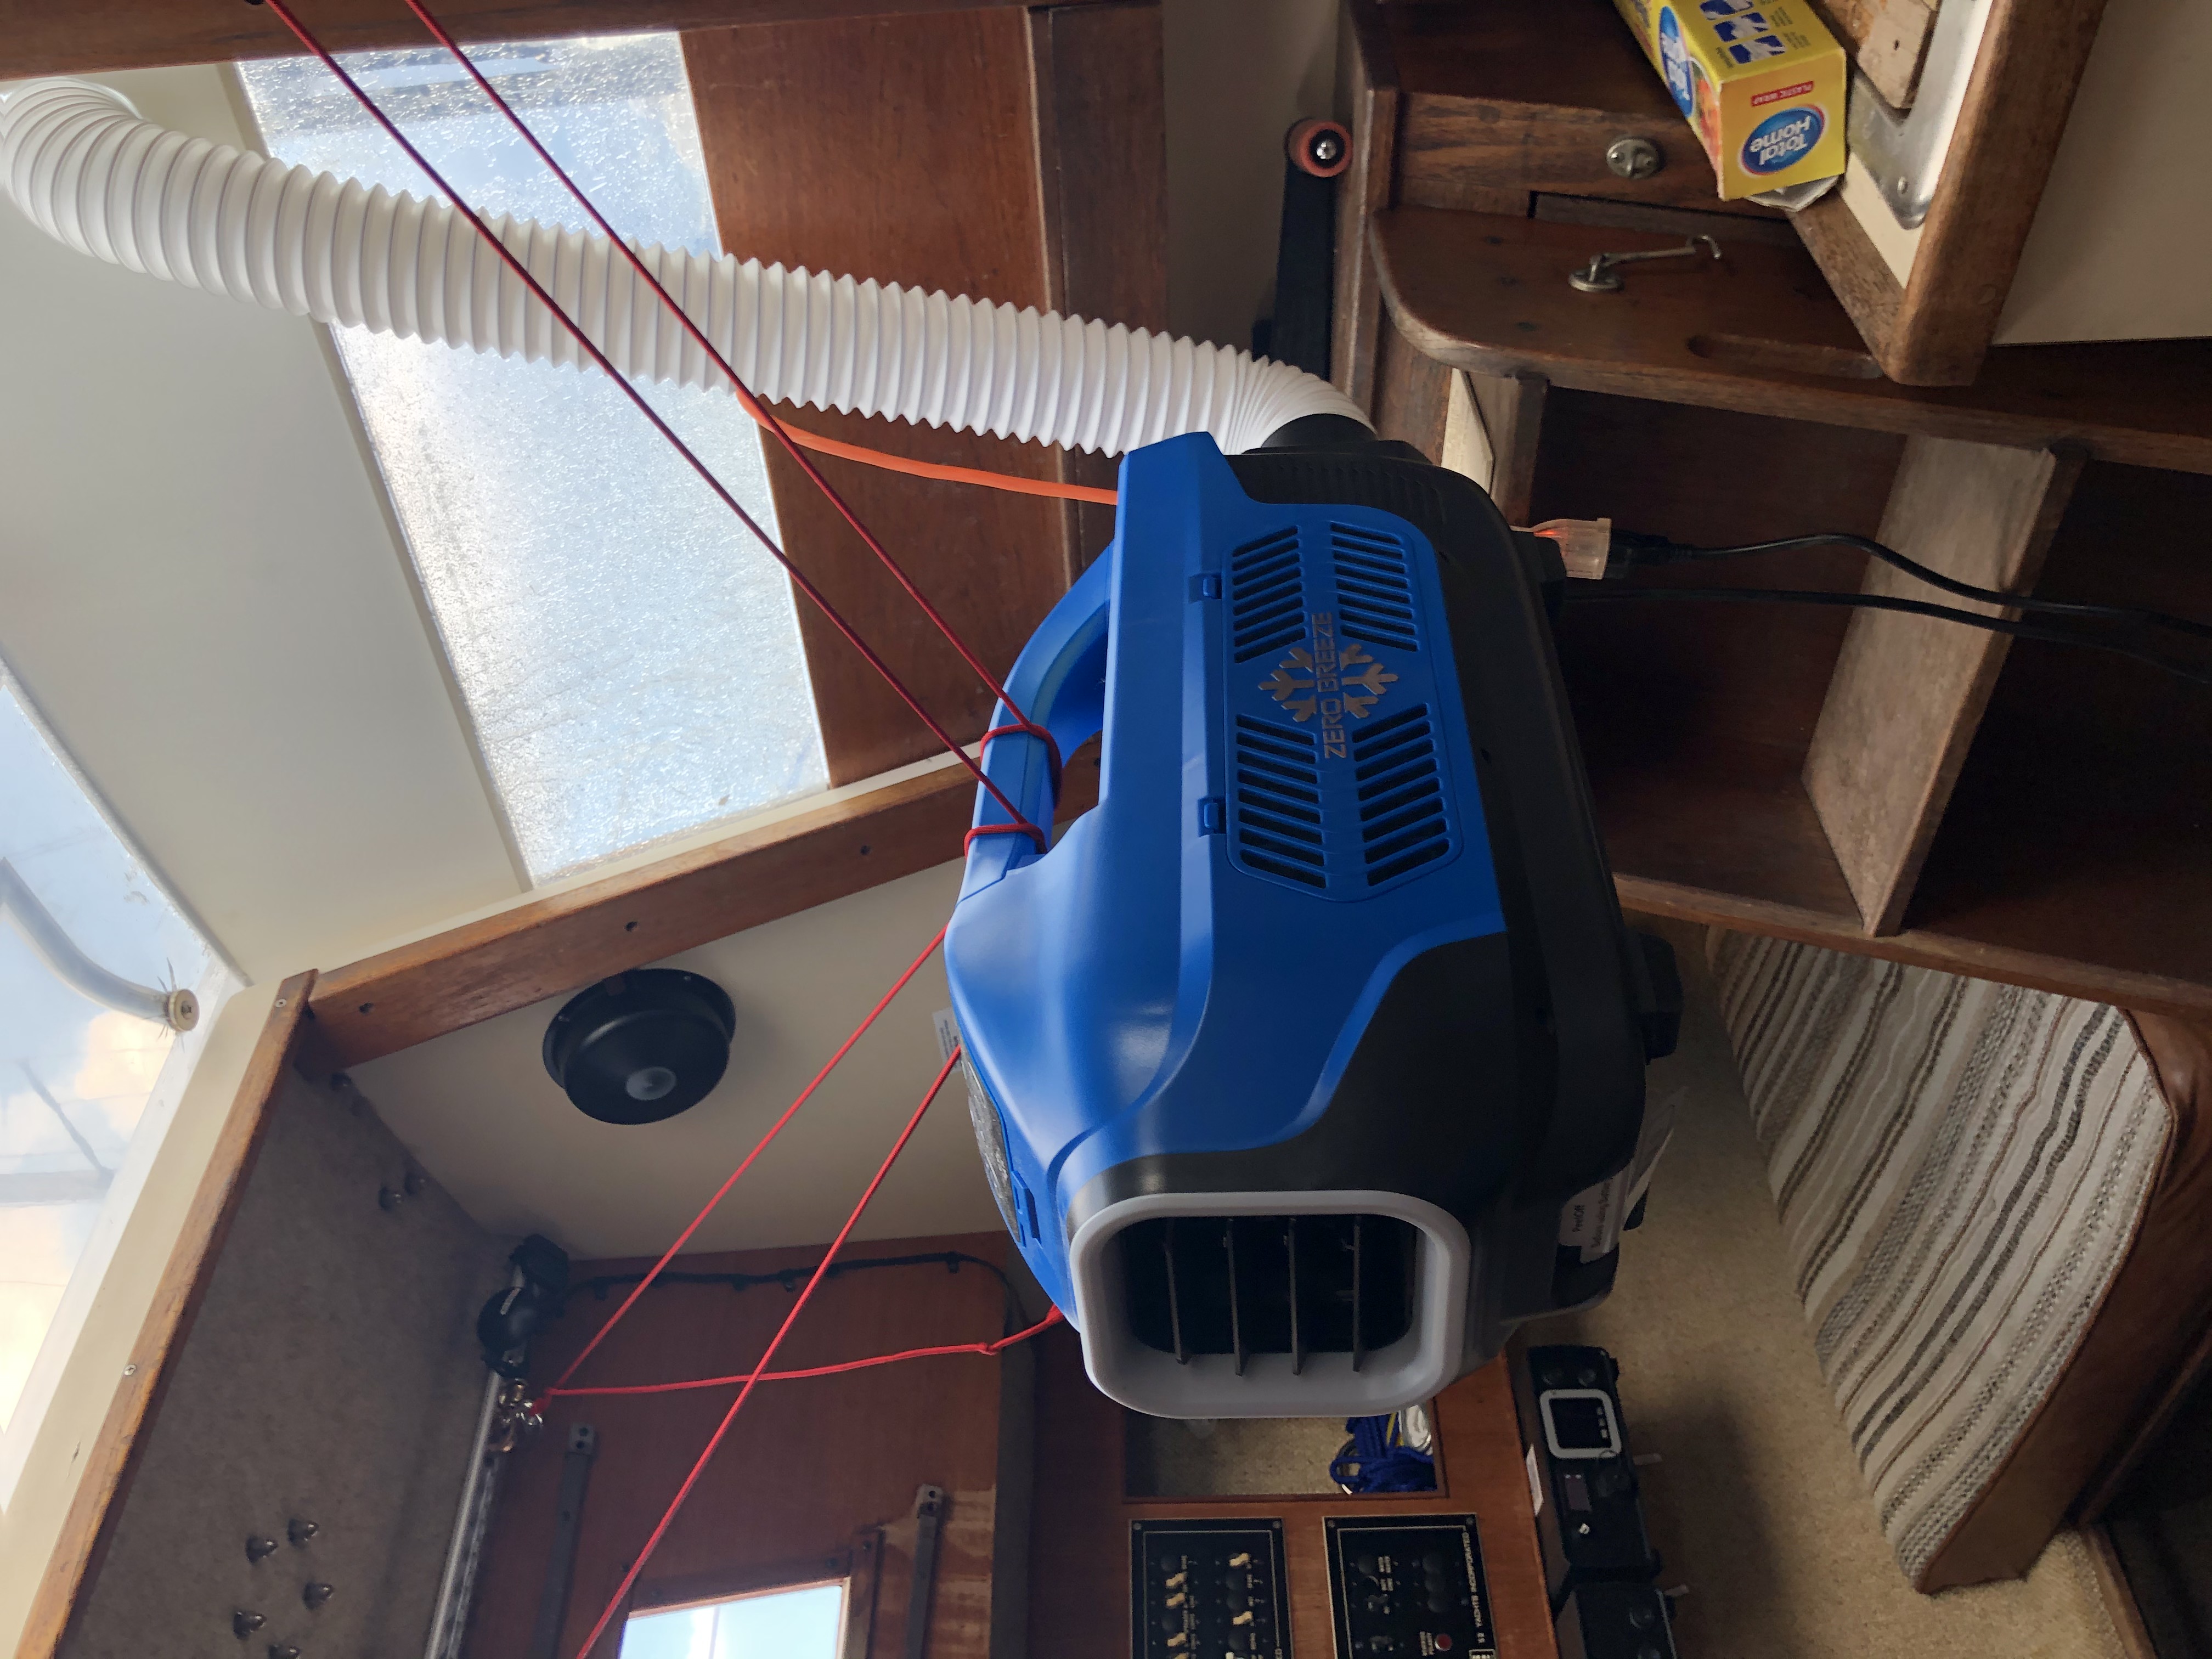
| Unfortunately the power supply which comes with ZeroBreeze is not waterproof (I do not know why they would build a tent A/C with no waterproof power supply). It broke right away. I had to replace it with: https://www.amazon.com/dp/B07SB2WY7Z (LED Power Supply 200W High-powerTransformer Waterproof IP67 12V DC Driver Adapter for Outdoor Use) and mount it in a place not likely to get wet. |
5.4. Double Gimbaled Stove for a Small Boat
DIY by "SV Nimbus" https://www.youtube.com/watch?v=vDjRy90NAvI
Look also at past commercial solutions:
-
Stable Stove by Safire http://safirewaterjet.co.uk/the-stable-stove-a-gimbal-bracket-mount-for-jetboil-stove.html/
-
FORCE10 Seacook 82000 Swing Stove http://www.2040-parts.com/seacook-force-10-marine-stove-i2262594/
-
Bremer Sea Swing https://classiccampstoves.com/threads/optimus-45a-in-bremer-sea-swing.15673/
-
Forespar Mini Galley 2000 https://www.jmsonline.net/mini-galley-2000-w-pot-pan-bag.htm
6. Mobile Applications (Smartphones and Tablets)
-
iNavX
-
Navionics
-
OpenCPN
-
SEAiq
-
Marine Traffic
-
Ship Finder
-
PredictWind
-
NOAA Weather
-
Tide Alert
-
US Coast Guard
-
SeaTow
-
Snag a Slip
-
ActiveCaptain
-
CruisersSailingForums
-
Boatsetter
-
GoSailing
-
NauticEd
-
Knot Guide
-
StarChart
Samsung Galaxy Tab Active Pro is a good example of a rugged tablet.
7. Articles Featuring Bareboat Necessities Project
8. Third-Party Projects
8.1. Onboard Computer System
8.2. S/Y Curiosity SignalK setup
8.3. Sailing with Linux (NMEA, GPSd, Iridium)
Instructions on connecting Satellite Iridium phone to Pi for satellite data services.
8.4. RaspEx (Ubuntu with OpenCPN)
Another Raspberry Pi Boating Project
8.5. LysMarine
LysMarine
Bareboat Necessities Marine OS:
8.6. Android on raspberry pi
LineageOS runs Android on raspberry pi
8.7. Boat Chartplotter using stick PC
Marine Chartplotter PC - Open CPN on ASUS QM1